Make Your Own: She-Ra
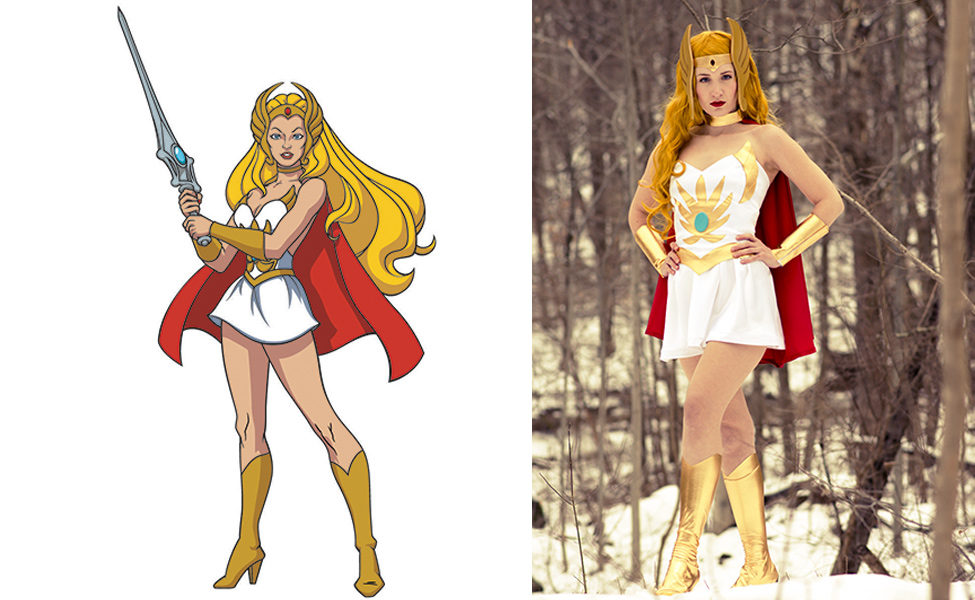
She-Ra, Princess of Power first made her television debut in 1985. After the success of He-Man, creators Larry DiTillio and J. Michael Straczynski wanted to create a character specifically designed to empower young girls. Thus, She-Ra was born. Sister to He-Man and every bit his equal, She-Ra was received as a strong, well-rounded character who inspired a generation – so much so that she has since seen a rebirth in the new 2018 rendition. Since the success of the reboot, I thought it was time to bring the classic She-Ra to life, and help others do the same.
Supplies List
1. About 2.5 yards of white fabric
2. About 1.5 yards of metallic 4-way stretch fabric
3. 1 yard of red fabric
4. About 2 yards of fusible midweight stabilizer
5. Wonder Under stabilizer
6. Gold thread
7. White thread
8. Red thread
9. Small red gem cabochon
10. Turquoise craft paint
11. Mod Podge (glossy)
12. Tacky glue
13. 2 or 3 large pieces of thick foam (5mm preferable)
14. 2 large pieces of thin foam (1mm – 2mm)
15. Gold fabric paint (optional)
16. Velcro
17. Thin elastic
18. Thick waistband elastic
19. Gold spray paint
20. Polyurethane (glossy finish)
21. Sharpie marker
22. Bunny suit pattern by Jessie Pridemore
23. Iron
24. Wax paper
25. Straight pins
26. 10” lightweight separating zipper
27. Any pair of high heels (your preference, must be slip-on with no straps)
STEP 1
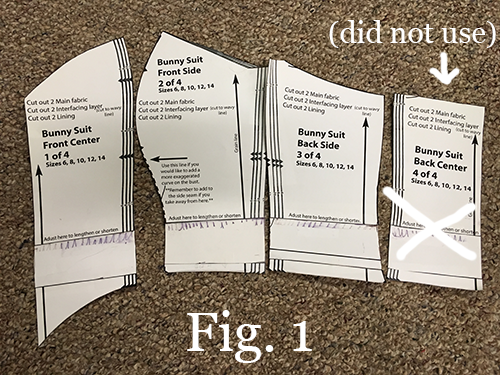
For this costume, I decided to begin with the bodice piece. In order to make the bodice, I used Jessie Pridemore’s bunny suit pattern and adjusted it to suit my needs and measurements. (This included elongating the pattern and, in this instance, leaving out “Piece 4 of 4” as pictured.) In order to cut it into the shape of a bodice, I drew a widow’s peak shape on the front center piece, and then cut the pattern off at the lower arrows where the pieces match up.
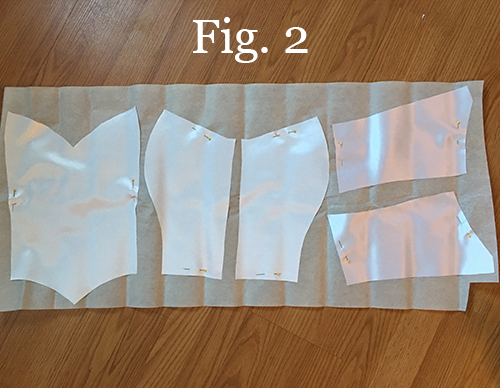
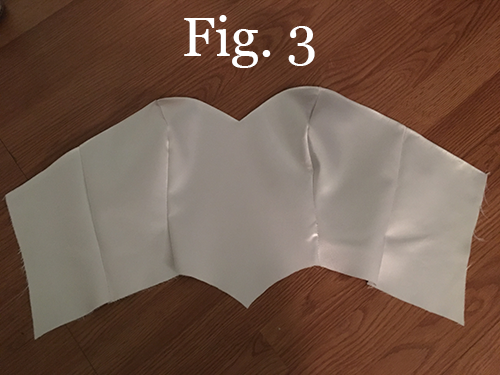
Once you have your pattern pieces figured out, you’re going to want to think ahead and consider your Wonder Under stabilizer. You can either fuse the Wonder Under beforehand to your fabric, then cut out the pieces, and then fuse it to another piece of fabric (and cut those pieces out again) to save time, but I find that that wastes a lot of fabric (and stabilizer!) that you might be able to salvage otherwise. I chose to trace my pieces out 3 times – twice on my white fabric and once on my stabilizer. I cut them all out, fused my stabilizer to my first set of fabric pieces, then fused those pieces to my second set so that each piece was double-sided with fabric.
STEP 2
Trace the bottom half of your bodice piece onto a piece of wax paper. Make a strip of this shape that is roughly 2 inches thick. This will be your belt. Take your wax paper pattern and trace the pattern onto your gold fabric. Fuse your midweight stabilizer to this strip. You can either leave the back raw or line it on the inside with another gold strip by sewing it in. Sew your belt piece to the bottom of your bodice, then sew in your zipper.
STEP 3
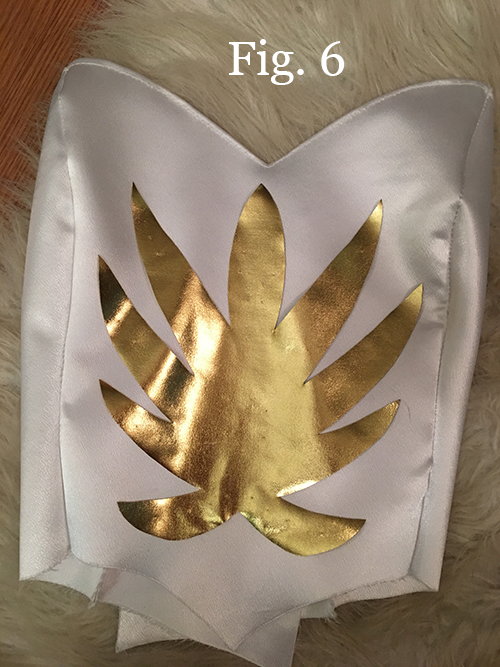
The lotus! Draw out your lotus shape on a piece of wax paper. To get a shape that is symmetrical, fold your design in half and cut it out.
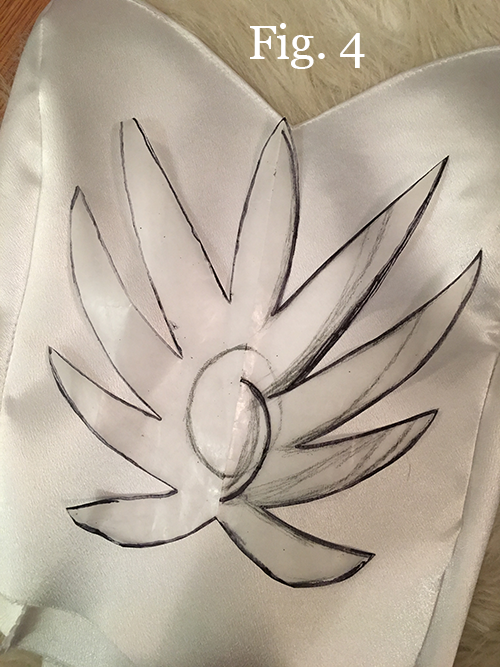
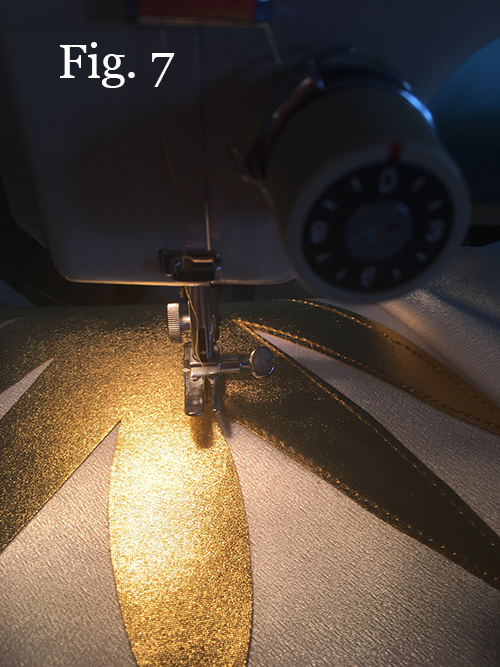
Next, trace it onto your gold fabric. Once again, you will be using your double-sided Wonder Under in order to fuse the lotus onto the front of the bodice. Once that is done, you may find it prudent to reinforce it with a stitch around the outside with matching gold thread.
STEP 4
For the bodice wings, draw your shape out on wax paper first and cut 2 identical pieces. Trace those pieces on to your gold fabric and, this time, fuse it to your midweight stabilizer. You may once again choose to leave the backside raw or carefully line it with gold fabric. Stitch around the edges for reinforcement.
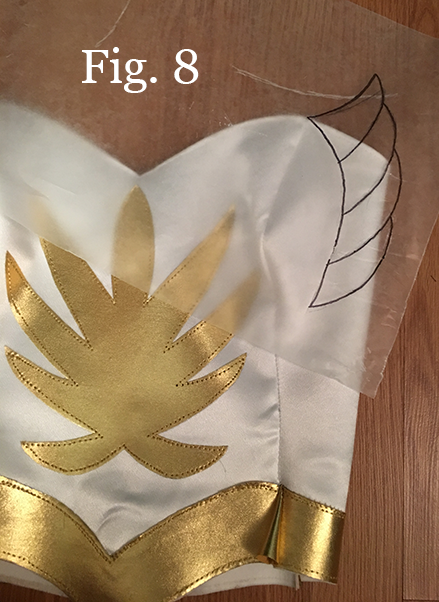
Next, place your wings where you want them to be. It’s best to use a dress form or make adjustments while you’re wearing the bodice to make sure the wings are symmetrical. This part is tricky! But patience is key. Once you have your wings lined up, pin them in and stitch.
OPTIONAL STEP: For added dimension, you can trace the lines of the “feathers” of the wings in with gold fabric paint.
STEP 5
Time to make your blue gem. Cut out an oval from one of your pieces of thick foam. Paint, let dry, then seal with a few layers of Mod Podge. Once that’s done, line it up where you’d like it to sit in your lotus shape, and glue it in with your tacky glue. For a little something extra, you can trace around it with your gold fabric paint so that it looks like it’s really sitting inside your bodice.
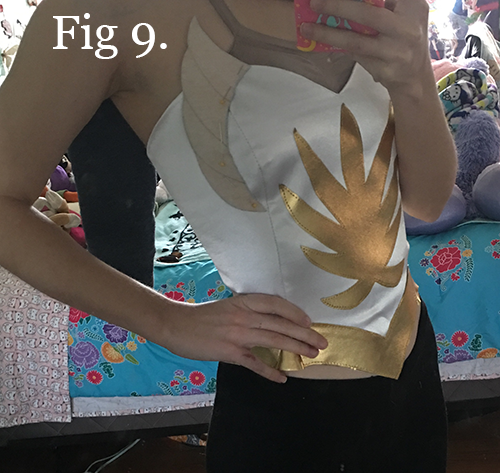
STEP 6
Now that your bodice is done, it’s time to move onto the skirt. One of the benefits of having this costume in two separate pieces is that you can adjust it to fit more comfortably while you wear it.
For the skirt, I made a simple circle skirt. It may sound intimidating, but don’t worry! Making a circle skirt is quite easy, and it gets easier every time you do it.
I always use the Circle Skirt App by Hand London. This app allows you to pattern out a circle skirt based on your measurements, and can be made with an elastic top or a zip-up back.
PRO TIP: If you are using elastic as I have suggested, make sure you make your WAIST the width of your HIPS so that it will fit. You may have to hem it to be a little shorter, or take a few inches or centimeters off when cutting it out.
STEP 7
The cape. Measure out a strip of gold fabric that is about 2 inches wide to go around your neck (and a little extra for the velcro). Fuse it with your midweight stabilizer and install your velcro.
To make the cape, I actually patterned it out the same way I did the circle skirt. I did it a bit backwards – I figured out how long I wanted it to be, and then put in the “waist” inches that gave me that number. (Some guesswork was involved because, uh, you know… math? Gross.) Cut out your cape, hem it along all the edges, and stitch it to your gold choker. Voila!
STEP 8
Now for the bracers. Easy peasy. Simply measure your forearm and wrist, and the length you wish for your bracers to be. As always, map it out on wax paper and leave some room for the velcro. Cut, fuse with the midweight stabilizer, install your velcro, and reinforce with a stitch around the edges.
STEP 9
Now it’s time for the helmet/circlet. First, measure the length around your head. Cut out a gold fabric strip, roughly one inch or so, that goes just a bit past your temples. Make sure to include the widow’s peak shape in the middle bottom. Stabilize with your midweight interfacing. Stitch to reinforce and add your red gem with your tacky glue. Next, sew in your thin elastic band for the other half of the circlet.
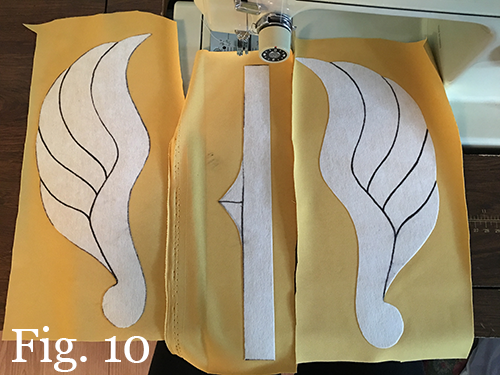
(You will notice that in this photo, I chose to make the headband and the wings all at once. You may choose this method as well – either way works fine.)
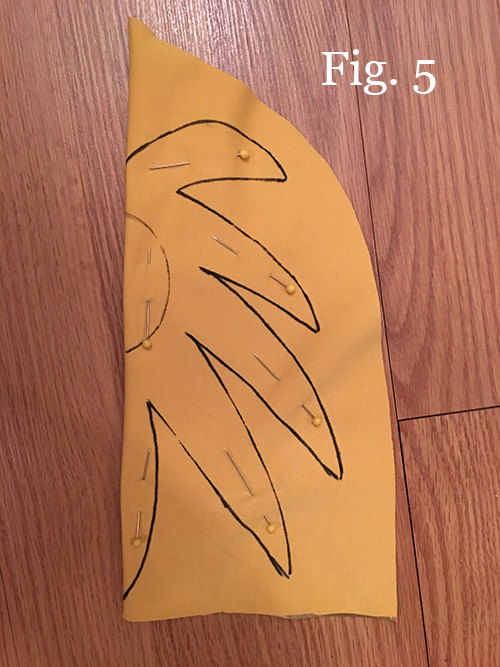
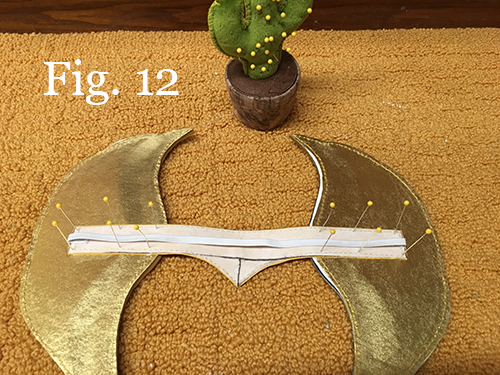
Next it’s time for the wings. Draw your design out wax paper and transfer to your gold fabric – 2 identical, opposite pieces of course – and fuse with midweight stabilizer. Next, draw out each “feather” of the wing on the stabilizer with your Sharpie. Cut out those individual “feather” shapes from your thin foam and, using your tacky glue, attach them to the raw side of wings (the one with the bare stabilizer). Do the same with the larger anchoring shape on the inside of the wings, except use your thick foam for that. Spray each wing with gold spray paint and seal with polyurethane. Attach to the circlet using your tacky glue.
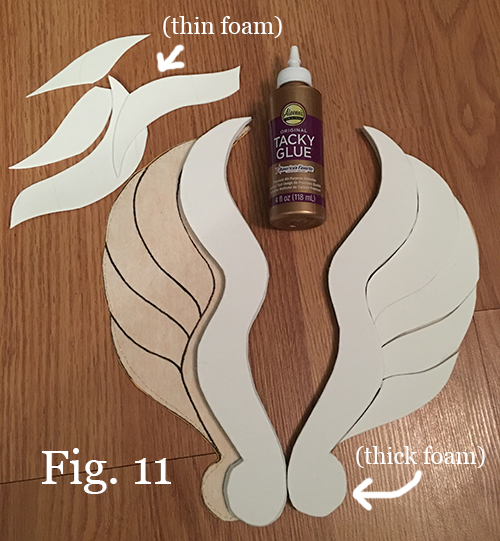
Gently place your straight pins along the edges to keep your strip in place while it dries against the wings.
STEP 10
Time for the shoes! To make the boots, start by draping one leg with fabric (wrong side up) and pinning it tightly closed around the underside of where you think it should sit on your calf, all the way down to the bottom of your heel and toes. Draw along the pinned line, and down the center of your shin. With your high heel on, trace the bottom of the fabric where your foot is, along where the shoe ends. Stitch closed what you’ve pinned and cut away the excess fabric.
Next, slide your leg into the piece you’ve made (right side up) and take note of how it lays over the shoe. You will want to allow room for the heel, but you will want to sew a section of it closed right next to the heel (where it doesn’t touch the ground). You will then want to sew in elastic that goes under the toes of the shoe, holding the fabric that sits on top of the toes down securely.
Once you’ve done all that, you have a pattern ready to make the second boot. Yay! Since She-Ra’s shoes have that good ol’ widow’s peak shape again, I layed one finished slip-on boot over the other and carefully cut the shape out of the top.
If you’d like a more in-depth tutorial on how to make boot covers, check out my video on YouTube.
Once you’ve finished, your costume will be complete, and you’ll be ready to face The Evil Horde!
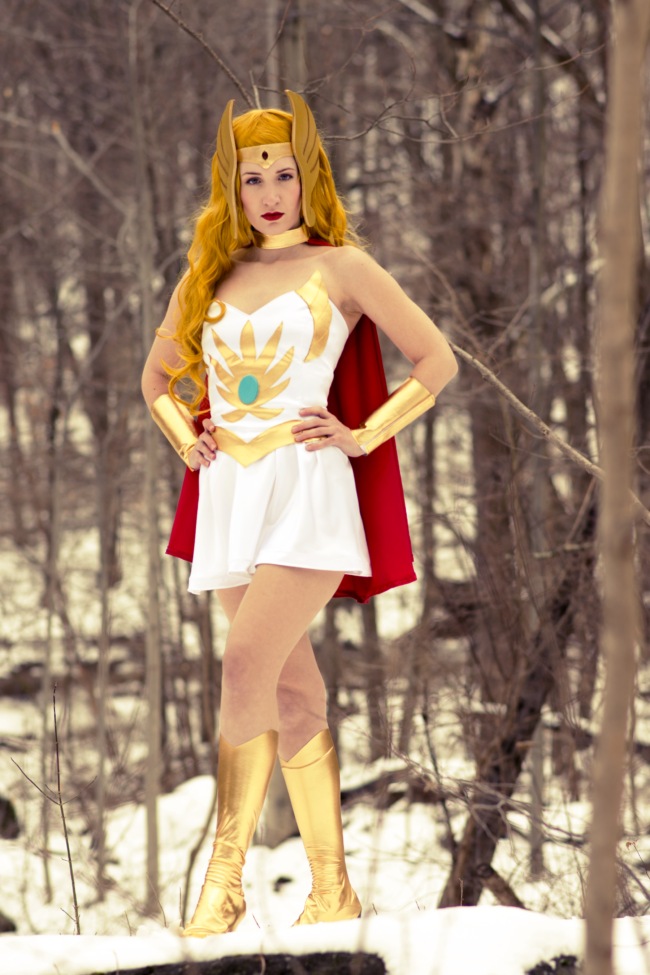
(Photos by @mauricejphotos)
About the Author
Diomira Keane
Cosplayer, artist, cat-lover, party princess extraordinaire.

There are no comments yet, add one below.
Stay connected. Don't miss out!
Get new costume guides in your inbox once a month.


Leave a Comment