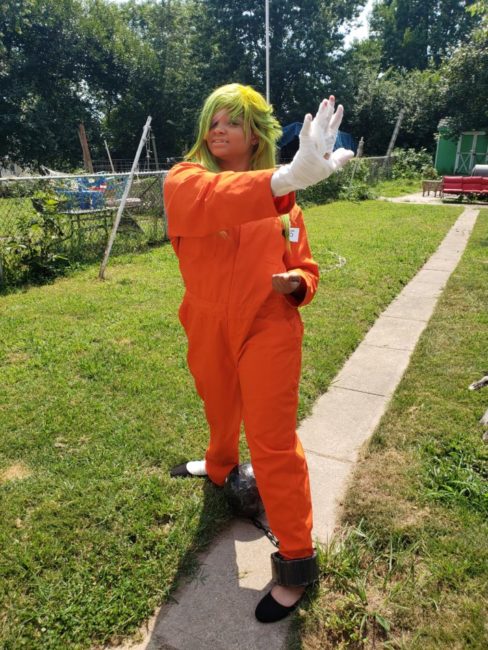
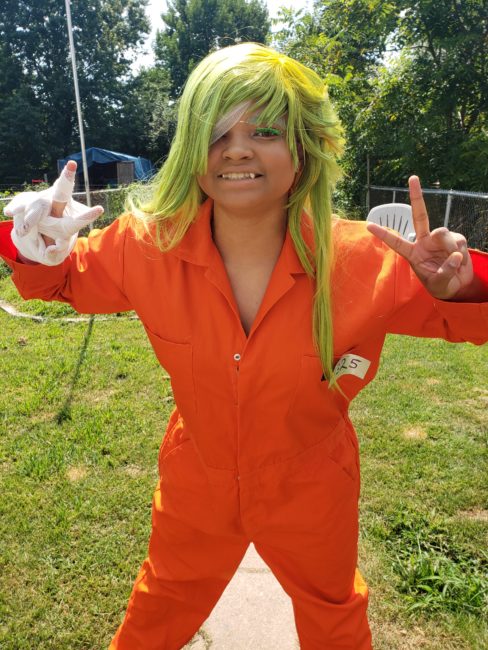
Make Your Own: Nico from Nanbaka
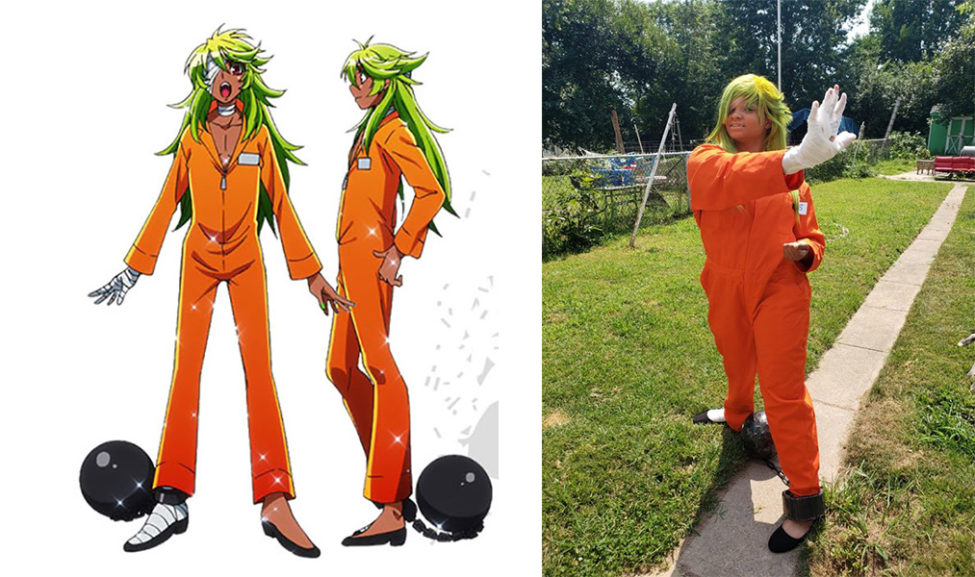
Nico is one of Nanbaka’s vividly-colored main characters. Although he’s sick, he’s a cheerful, energetic, and anime loving kind of kid. Nanbaka is a webcomic by Futamata Shou which premiered as an anime in 2016. Here’s how to make your own Nico costume to become the lovable inmate from cell 13!
Things you’ll need:
- Orange Jumpsuit
- Fake Fangs
- Black Flats
- A lot of Gauze
- Neon Green Eyelashes
- Fixodent or Other Dental Adhesive
- Premade Nico Wig or Green Wig
- Temporary Yellow Hair Spray
- Aqua Net Hair Spray
- Craft knife
- Blow dryer
- FiberFix 10x Duct Tape
- Styrofoam Ball
- Foam Board
- Black Plastic Chain
- Silver Paper for nametag
- Black marker
- Red Contact Lenses
Gather all of these materials. Luckily, Nico’s outfit isn’t too complicated to put together. The jumpsuit, gauze, shoes, and teeth are fine on their own so I’ll just skip to the things I DID have to alter.
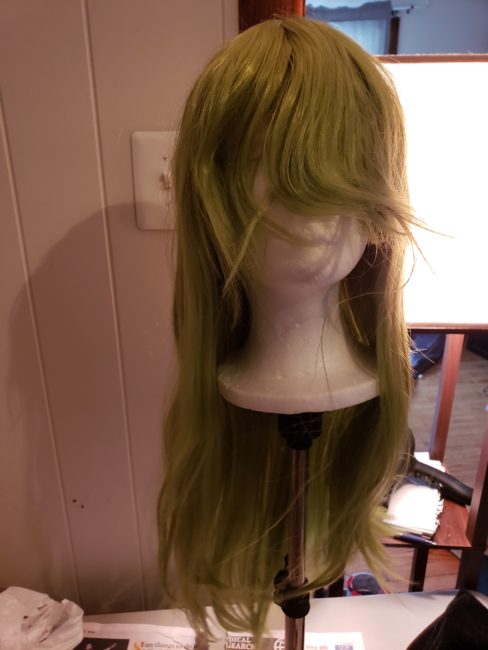
Wig
If you bought the pre-made Nico wig, good for you for skipping the mess I put myself in. You can skip this part. The rest of you will have to put this wig together yourselves. Now the upside to using an EpicCosplay wig instead of the cheaper option is that you’ve bought a very high quality and sturdy wig. These wigs will last a lot longer and withstand more abuse. You could even use it in other cosplays if you’d like.
Step One:
First thing you do when you unpack a wig is brush it out. Wigs sometimes have stray fibers hanging to them and you’ll want to get rid of those before styling. Next, pull up a picture of Nico’s bangs. His bangs are pretty…exotic, so a picture will be handy.
Step Two:
Spray the yellow hair spray on the top center of the wig until you get the desired gradient effect. This hair spray is temporary, so if you mess up you can just wash it out and try again. Brush around the edge where the hair spray ends so it blends more naturally.
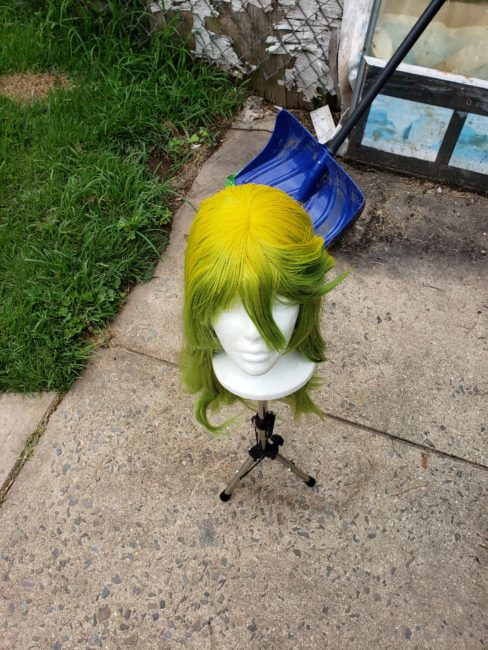
Step Three:
Style the bangs. I found it easier to mark on my wig head which sides were left or right. Nico’s bandages are on the right side of his body and his bang’s cover the bandages on his left eye. To style the bangs, grab a few strands of hair and cut them down to the appropriate size. Curve the strands in your hand and spray the Aqua Net until it’s saturated. Next, blow dry the area until it’s no longer sticky and it stays in the place you want. As for the cutting, go by your eye and the reference picture. For sharp looking strands, cut on a diagonal. For his choppy bangs, cut upwards at the hair to create a somewhat uneven look. I sharpened some of the strands with the Aqua Net and blow dryer.
Step Four:
Find a reference picture for the back of his head. There’s random spiked hairs in places, so use the Aqua Net and hair dryer to create as many as you want.

Boom, wig done. But you’re not out of the park yet. The next part of Nico’s costume is his large ball and chain he keeps around his ankle.
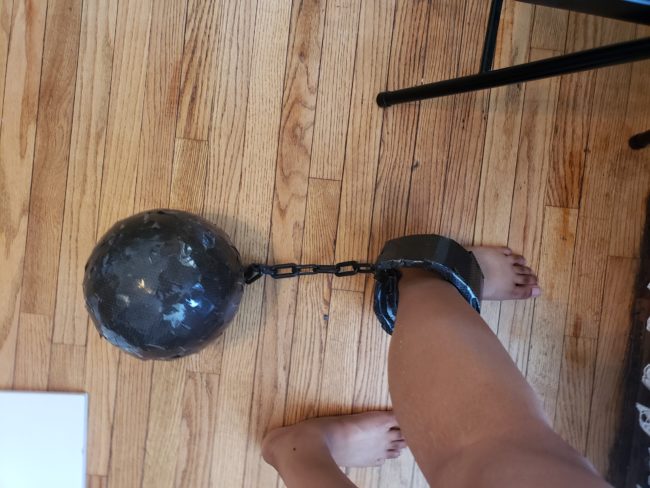
Ball and Chain
Step One:
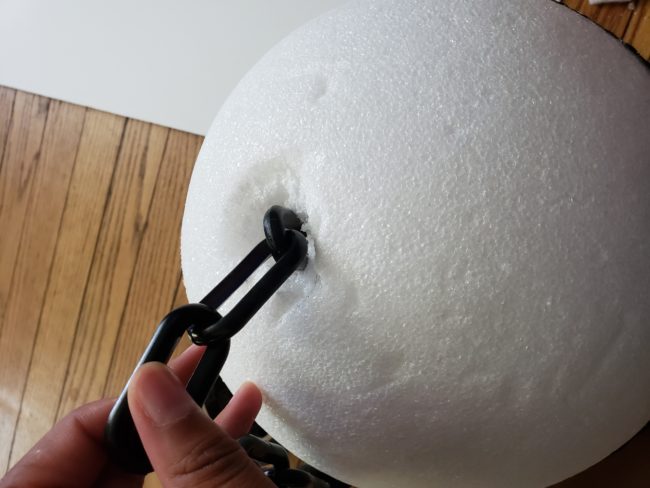
Take your foam ball and FiberFix duct tape and start wrapping the tape around the ball. I wrapped it one line of tape at a time so I could combat the edges that wouldn’t stay down. To get rid of those pesky edges, cut alternating diagonal lines into the tape, then lay the inward shaped pieces down and the outward shaped pieces on top.
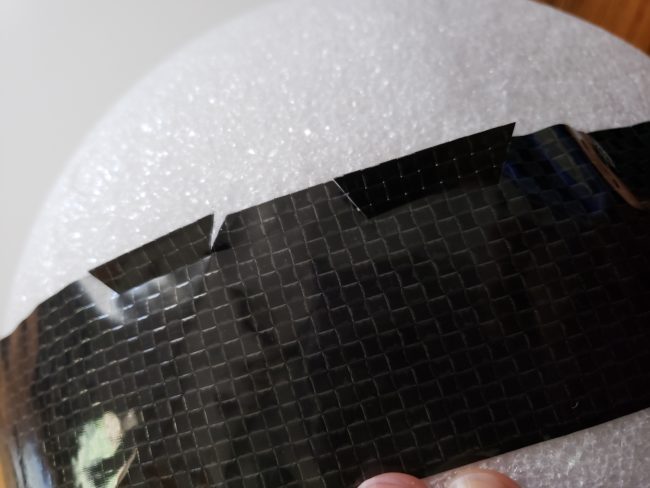
Before you finish taping the entire ball, remember to carve a small space out of the foam to wedge the plastic chain into. FiberFix tape is really strong, but if you feel the tape won’t hold the chain in the ball well enough, feel free to put some glue in the hole. Cut the chain to the length that you feel it won’t get into the way of your or others’ walking.
Step Two:
Measure around your ankle. Create the cuff for your ankle by slicing an ankle width of foam board in the form of a rectangle. I say ankle width because I didn’t have an exact measurement besides the space where my ankle is. Make it thick enough to look comically large like Nico’s. Slice shallow lines column wise down the rectangle. Slice just enough so you can break the foam on the inside, but not the paper on the opposite side. Doing this will make your rectangle bend into a circle.

Step Three:
Grab your FiberFix tape and start wrappin’! I don’t think there’s a true wrong way to wrapping your anklet besides the way that stops it from functioning as an anklet. I took strips of tape as long as the columns in the anklet and placed them on each individual column. As long as the anklet still bends and is covered with tape, you’re good.
Once again, make sure you leave a small space for the other side of the chain. I cut a rectangle as wide as one chain link into the end of the anklet and taped my chain into it.
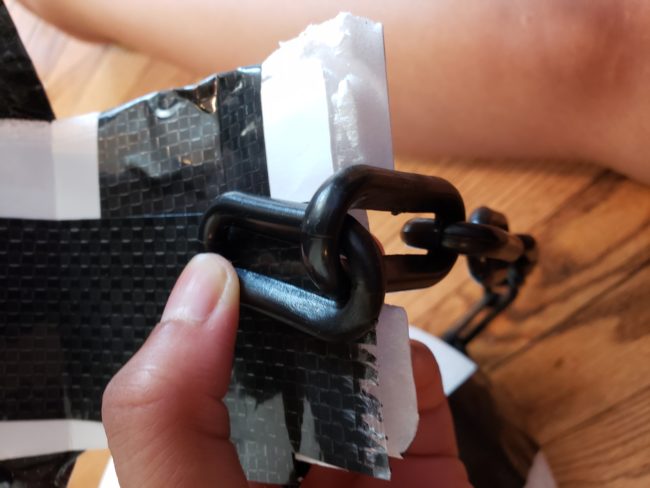
Once you’ve taped your entire anklet, cut a rectangle of silver paper and write Nico’s inmate number on it. His number, 1325, is pinned to the left side of his jumpsuit.
And just like that, you’re done!
Tips:
- Nico’s bandages are on the RIGHT SIDE of his body. This includes his face, hand, and foot. He also has bandages around his neck.
- Nico’s bandages wrap around his hair as well. I forgot this part and only wrapped my face.
- SEE YOUR OPTOMETRIST BEFORE DOING ANYTHING WITH CONTACTS
- If your anklet doesn’t stay closed on it’s own, tape some black elastic to the opening.
- Fixodent is gross. Also your fangs may not stay very well on your teeth depending on how they’re shaped. My teeth had a few problems staying put. NEVER EAT WITH YOUR FANGS IN!
- I spiked my eyelashes with some eyelash glue. This is optional though.
- I’ve heard people use food markers for his tongue tattoo.
About the Author
Otto
Hello! I'm Otto and I've been making costumes and cosplaying for about 3 years now.

There are no comments yet, add one below.
Stay connected. Don't miss out!
Get new costume guides in your inbox once a month.


Leave a Comment