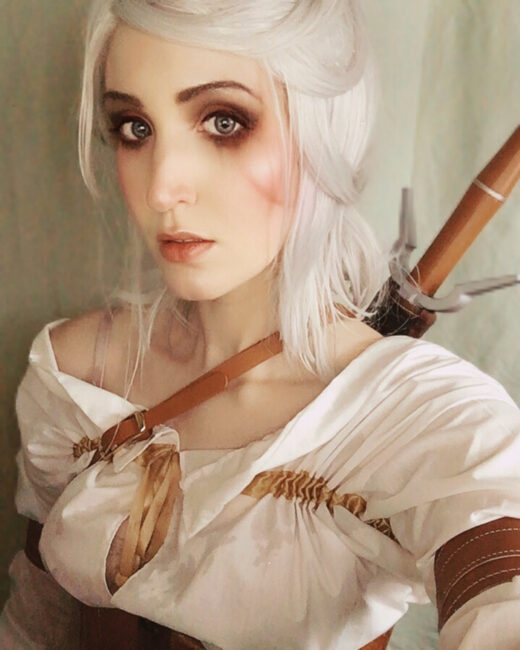
Make Your Own: Ciri from The Witcher III: Wild Hunt
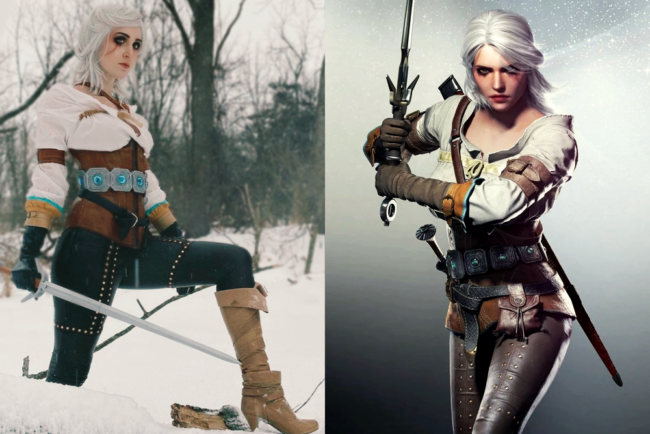
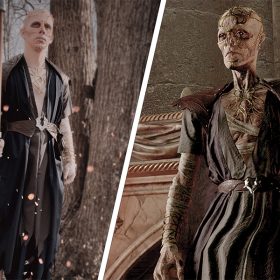
“For Cirilla is also a highly-skilled witcher, heiress to several thrones, the last bearer of the Elder Blood, a powerful Source endowed with exceptional magic talent and the Lady of Time and Space.”
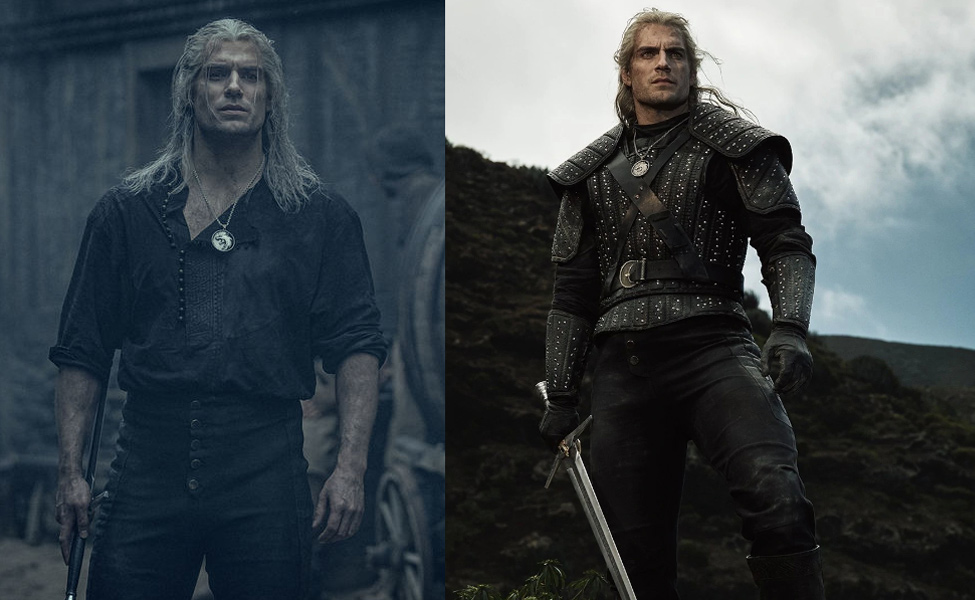
The Witcher, the popular game-turned-Netflix series is based on a series of books by fantasy author Andrzej Sapkowski, which follow the adventures of Geralt of Rivia, a powerful witcher who hunts beasts and monsters of all sorts using his superhuman fighting abilities. Cirilla, Geralt’s adopted daughter, is one of the main characters of the series, and a playable character in the game adaptation entitled The Witcher III: Wild Hunt.
In this tutorial we will be learning how to make one of her most iconic outfits from Wild Hunt. This tutorial is best suited for intermediate to advanced cosplayers who are either somewhat familiar with corsetry or well-seasoned corset makers. For beginners, we also have this Ciri closet cosplay guide. Let’s begin!
You Will Need:
Corset
- FREE downloadable corset pattern from araneablack.com. (I used the SONYA style, but the ALLY style works well too.)
- 3+ yards or so of inexpensive upholstery vinyl (which you will be using for other pieces of the cosplay as well; shin guards, sword sheath, arm bands, glove bands, and optional belt pouch.)
- Polyester boning
- 14” black steel busk
- Corset lacing
- Double Fold Bias Tape in Mocha (at least 3 packs)
- Eyelets and eyelet tools
- Pellon 541 Wash N Gone stabilizer (optional, as explained in the instructions)
- Heavy upholstery thread in tan color
Undershirt
- Simplicity pattern 8579
- About 2 yards bleached muslin (check the size chart on the Simplicity pattern jacket for your exact measurements, which will determine the amount of muslin you will need.)
- Skinny ribbon in medium brown color
- 1 inch thick satin ribbon in color “camel”
- Pair of 6-8mm wooden beads (you may choose to paint silver or leave them raw)
- White all-purpose thread
- ¼” elastic
Pants
- Pleather leggings (1 size larger than your normal size)
- 5 spools of Simplicity stud tape in colors brown and antique gold
- Eloflex thread in black
- Fabric glue
Accessories
- 4 oz jar of Angelus Leather Paint in colors Beige, English Tan, Dark Brown, and Dark Taupe (for corset and leather accessories)
- 1 yard Simplicity ruffled trim
- Tan acrylic paint
- Double Fold Bias Tape in Aquamarine and matching thread
- 5mm thick craft foam
- Plasti-Dip
- Metallic Silver Spray Paint and Light Brown Spray Paint
- Silver braided jewelry cord and tapestry needle
- 2 packs of Dritz buckles and 1 set of mini buckles
- 27mm turquoise rhinestones, 1-2 packs
- Pleather gloves
- Black belt and tan skinny belt
- Beige high-heeled ankle boots
- Ciri sword replica prop and ⅜ inch 3 foot dowel rod
- E6000 glue
- Awl
- Embossing stylus
- Sponge
- Craft weight stabilizer (Pellon 71F or comparable)
STEP ONE:
For the sake of getting the toughest bit of this cosplay out of the way first, we’re going to begin with the corset. I used the SONYA style from AraneaBlack.com, and printed the pattern out according to the accompanying instructions. Because Ciri’s corset is slightly longer than this pattern, I made allowances for that, which I will explain.
In the pattern, you will see through-lines located throughout each piece which say “shorten” on the top and “lengthen” on the bottom. Cut these through-lines and place pieces of paper that are of equal size between the cut pieces to make each piece longer throughout.
To decide how long you want your pieces to be, decide how long you want your corset to be in general. For instance, I lengthened my corset pieces based on where I wanted the corset to fall on my hips, so I took the front piece (“Piece 1”, Front Center, as it is labeled in the pattern) and measured it from where the top would sit normally, down to where I want the bottom edge to stop.
Please note, you must lengthen each pattern piece in BOTH places where it allows you to do so, otherwise your corset will not fit properly.
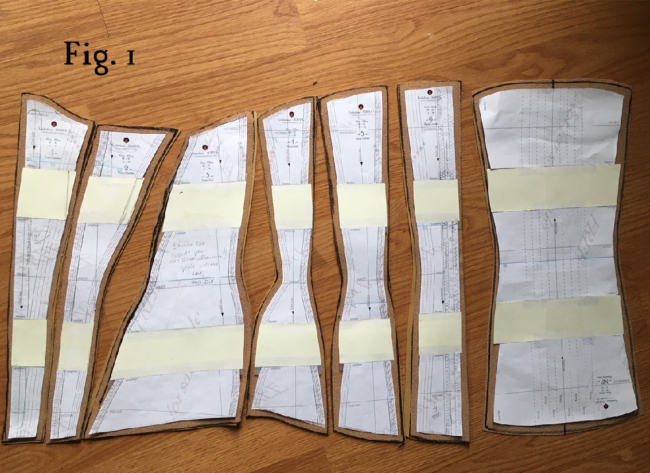
As you can see in Fig. 1, it is a bit difficult to match up the length of the new paper sections with the existing pattern pieces based on how much I lengthened each piece according to the length of my torso, but giving yourself a general estimation on the shape of each piece will be enough to give you a good idea of how to cut out each piece.
STEP TWO:
Now that you have all of your pieces cut out, sew pieces 1-6 together in succession, so that you will have 2 opposite-facing corset pieces. Use your heavy duty upholstery thread.
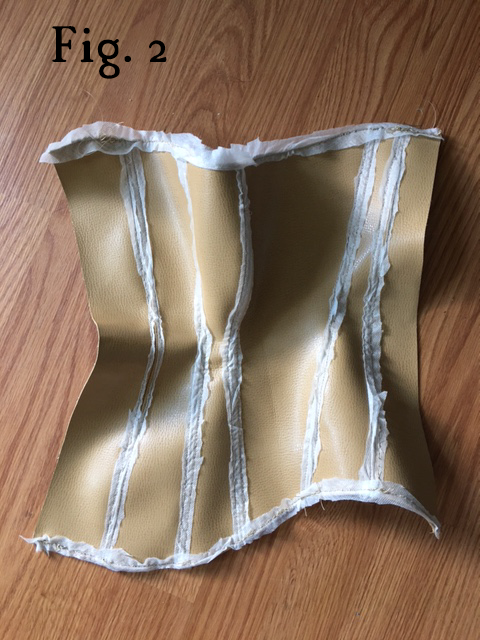
Seen in Fig. 2 is one corset side. When you are finished sewing all your pieces together, go back and sew down the inside edges of each piece all around each seam so that the “flaps” on the inside of every seam stay flat. Sew along the top and bottom edges as well. (Disregard the modesty panel (piece “MP”) for now.)
Note: You will need a heavy duty sewing machine needle to sew all of your vinyl pieces, including the corset. The tan vinyl I used as seen in each Figure was from the flat fold bargain section of Joann’s – a fabric that is not often found online, so I lucked out in that regard. This particular vinyl was glossy and stuck to my sewing machine, making it almost impossible to feed through. To remedy this, I used the Wash N Gone stabilizer so that I could easily feed the fabric through the machine, then cut off all the excess around the seams, and then simply wash with a damp sponge to get rid of the remaining stabilizer. If you are having a similar problem sewing your corset, this is an easy and inexpensive solution.
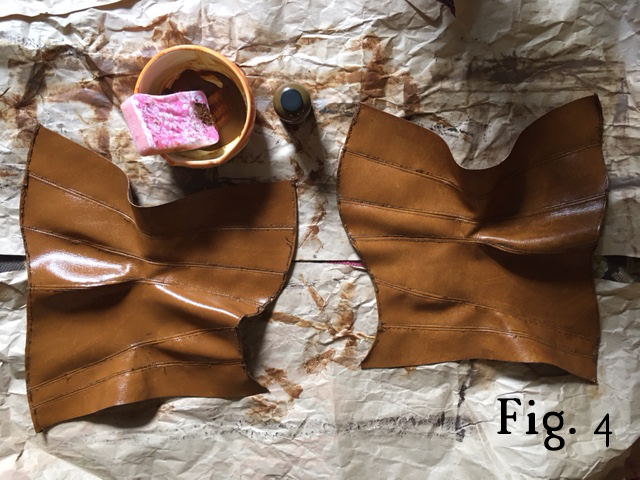
OPTIONAL STEP:
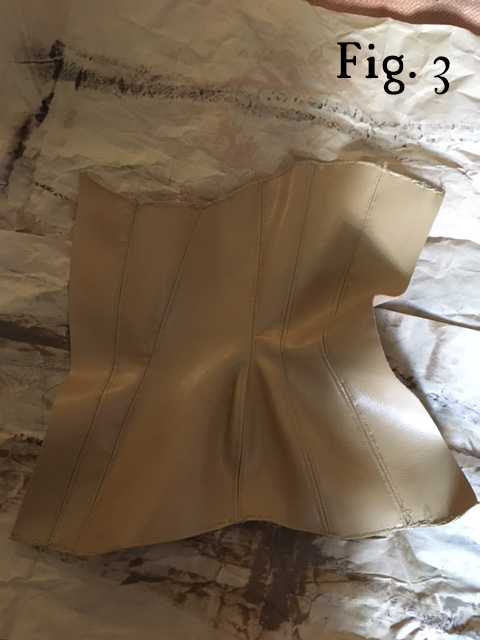
If you want to get the color of your corset just right, use a sponge to paint your corset pieces with your Angelus leather paint in the color English Tan. Use many thin and even layers to paint your leather, so that your leather doesn’t become sticky. (Paint your modesty panel as well.)
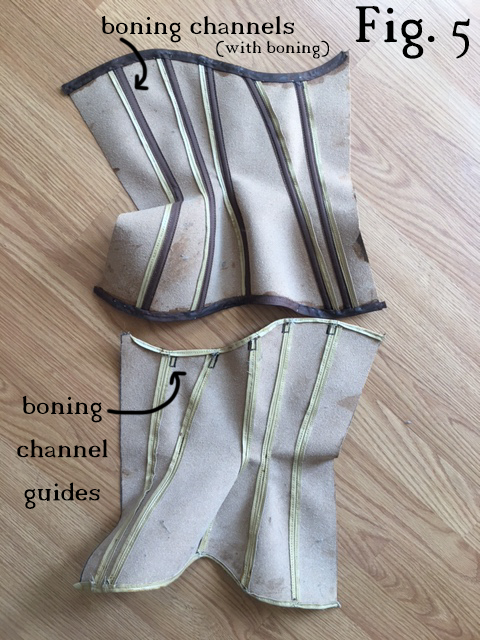
STEP THREE:
Now that your 2 corset pieces are sewn together, it’s time to sew in boning channels. Using your bias tape in the color “mocha”, sew in each channel on the “inner” side of each piece, NOT including “Piece 1 – Center Front”. Once you have your channels sewn in, insert your polyester boning by placing the tip of your spool into each channel, then cutting off the excess. Sew more bias tape alone the top and bottom of both pieces to cover the raw, open edges of your channels.
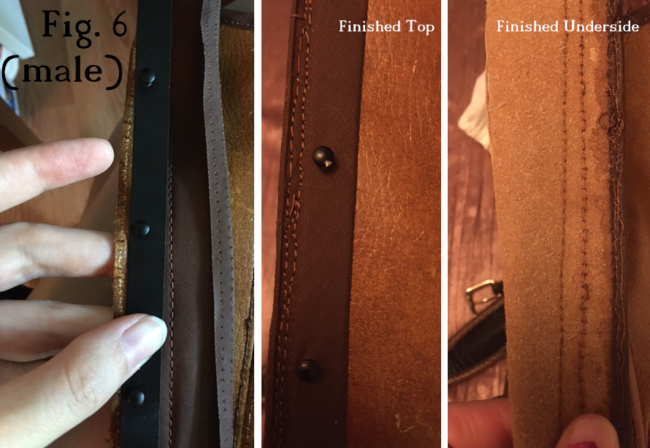
STEP FOUR:
There are a few ways to install a busk into your corset. I will demonstrate for you the method I used. To begin, I unfolded my bias tape and sewed one of the side edges down to the right-side edge of both Front Center pieces. I then placed my busk down where it was to sit, and marked off each “nub” of the male side of the busk, then punched holes along those markings accordingly. I then laid in the male side (you can choose to reinforce this process with a bit of fabric glue), then folded the bias tape over, then sewed the remaining edge of the bias tape over and around the inside edge of the Front Piece.
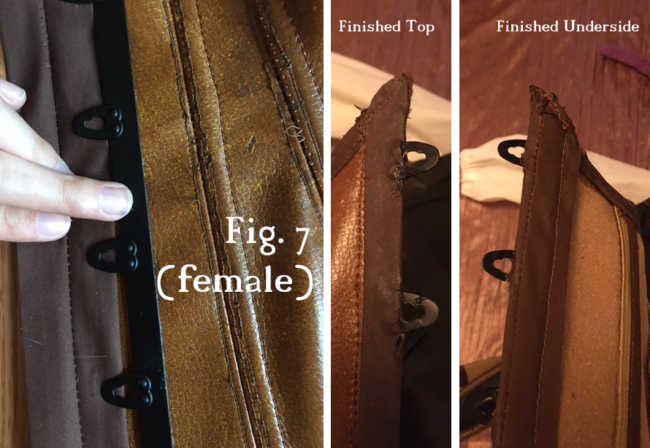
STEP FIVE:
I followed a similar process for the female side of the busk, cutting slits into the middle of the bias tape where the clasps would come through, then sewed down the edges.
STEP SIX:
With the front of the corset finished, the next step is to install eyelets down the back side of each piece. Before you begin, sew a strip of mocha bias tape down the back edges of each corset piece. These strips are where your eyelets will be installed. If you refer back to your pattern piece, you will notice that Piece 6 “Back Center” has markings down the side which you can use as a guide to place your eyelets. Mark these placements off with a permanent marker, then use an awl to punch holes through these markings. You can also use your awl to thread your eyelets through, as seen in Fig. 8 below.

Once your eyelets are threaded, you can use your eyelet tool to hammer down the edges and secure each eyelet in place.
STEP SEVEN:
Attach your modesty panel to one side of the back of your corset, then lace your corset up with your corset lacing. You’re now all finished with your corset!
STEP EIGHT:
For the white undershirt, I used Simplicity pattern 8579 View B as a base, with the following adjustments:
- Lengthen each sleeve (Piece 8) by about double, plus a few inches, such that they are a bit longer than wrist to shoulder length. Install ¼” elastic to the wrist openings of each sleeve.
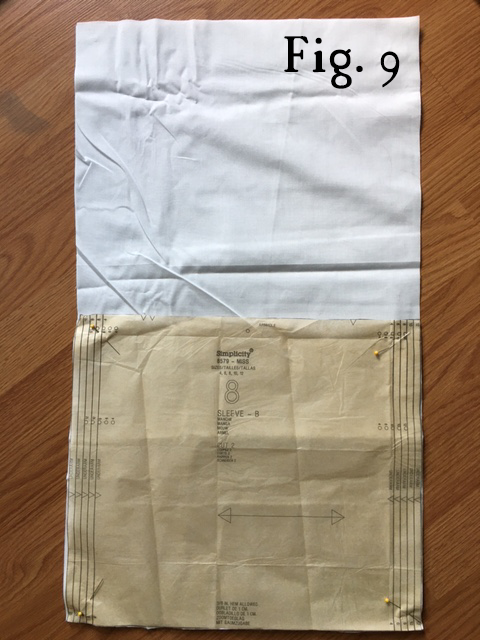
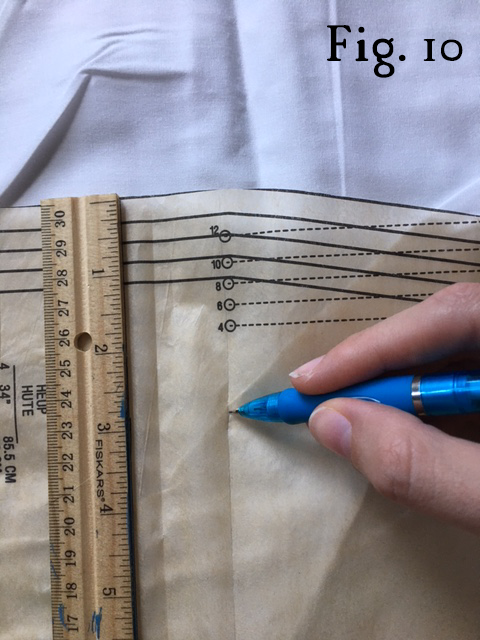
- Shorten the length of the garment until it reaches about hip-length. For me, I chose to make it a bit shorter still, marking where I planned on cropping it on the pattern piece shown in Fig. 10 below:
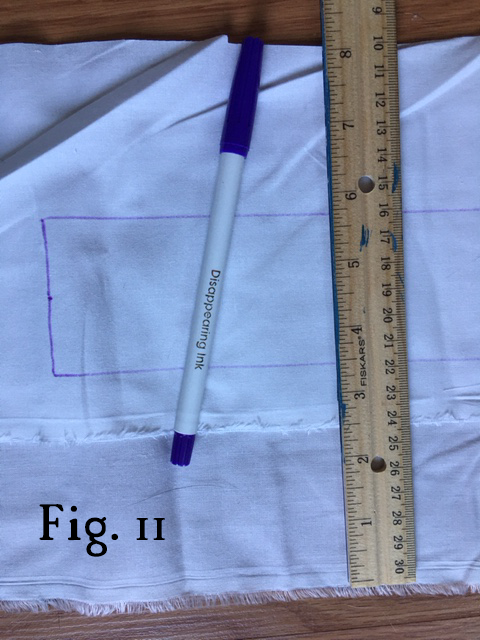
- Add a strip of fabric about 2 inches thick (4 inches total, doubled over on top and sewn in along the seam) to the neck of the garment, as you can see drawn in with disappearing ink in Fig. 11 below.
- Lastly, I cut a deep-plunging slit directly down the front center of the garment, about down to my sternum. I then hemmed all the edges, and installed a strip of 1 inch thick silk ribbon around the back and front of the shirt, just under the armpit. This strip opens at the edges of the deep-plunging slit. Through those openings, I threaded my skinny ribbon through the 1 inch ribbon, all the way through the shirt. Then I finished off each edge of the skinny ribbon by threading a wooden bead through the ends of each and tied them into place. For reinforcement, you can add a bit of fabric or E6000 glue to make sure the wooden beads do not slip off. You will use this skinny ribbon to pull the shirt closed and taught when you wear your cosplay, tying it in a bow in the front, as the shirt is meant to be very loose.
STEP NINE:
Next up is the pants. Paint your base leggings with your Angelus leather paint in the color Dark Brown, again, using many thin and even layers. After your leggings have completely dried, take them up about half an inch by sewing a seam around each leg, just above the knee, using your elastic thread and a zigzag stitch.
Then, take your pants in about ¼” in the front and back of each leg, from the top of the pants down to that seam you’ve made above your knee. After your seams are put in, put your leggings on and make sure they are comfortable and well-fitting. While wearing your pants, measure out your Simplicity studded tape from the top of your pants to the seam you’ve made above your knee. Cut out 4 strips of your studded tape for the FRONT of your pants, and 4 strips of studded tape for the BACK of your pants. (Make sure to MEASURE the back seam as well, so that your tape is long enough in the back. You will be putting a strip of studded tape on each side of your front and back seams.
Measure out a strip of studded tape once more for the circumference of your leg above the knee where you’ve placed your seam. Cut 2 strips, one for each leg, which will be placed above your knee seam. Next, it’s time to install your stud tape. You can do this by securing each strip of tape down with a basting stitch, then trying your pants on to make sure everything lines up before committing. When you have your studded tape positioned effectively, sew in each strip along the edges, once again using elastic thread and a zigzag stitch.
STEP TEN:
For the boots, I lucked out and found a decent pair of white pleather ankle boots at a thrift store that I painted, so this tutorial will focus on using a mix between pre-made boots and matching shin guards.
To make your shin guards, cut out 2 rectangles that are about 22 inches by 15 inches. (This will vary a bit based on the height and width of your own legs.) Hem up the edges, then cut a strip of leather, about 1 inch thick. Again, the length of this strip will vary depending on your size, but the idea is that you will use this strip to wrap up the length of your leg from ankle to just below your knee about 3 times before being secured with a buckle at the top.
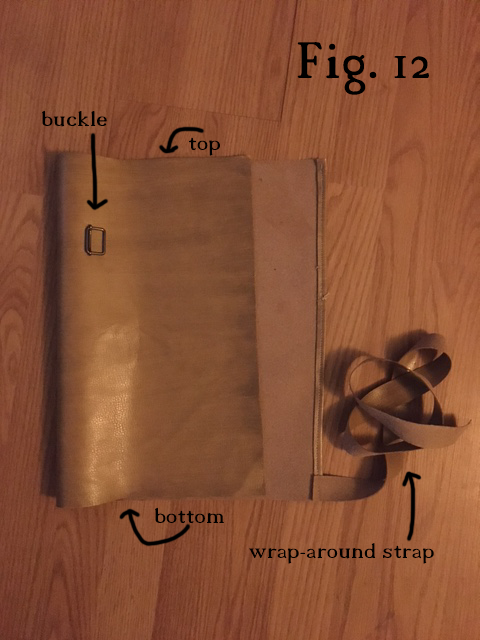
Lastly, attach your strip and your buckle as shown in Fig. 12 above, and paint your shin guard squares to match your boots. As for me, I used a mix of the Angelus leather paint in Beige and Dark Taupe.
Note: You can attach your buckle by hand using your heavy duty thread and one of your smaller tapestry needles.
STEP ELEVEN:
For your upper arm bands, cut 2 rectangles, long enough to wrap around your arm once with just a bit of overhang. These arm bands should be about 3 inches or so thick, and can be painted with a mix of English Tan and Beige leather paint to emulate the color of Ciri’s bands. Cut another longer, thinner strip of leather, and sew it right along the top of your larger rectangle, with a few inches extra tailing off, stopping midway down your rectangle as shown in Fig 13 below:
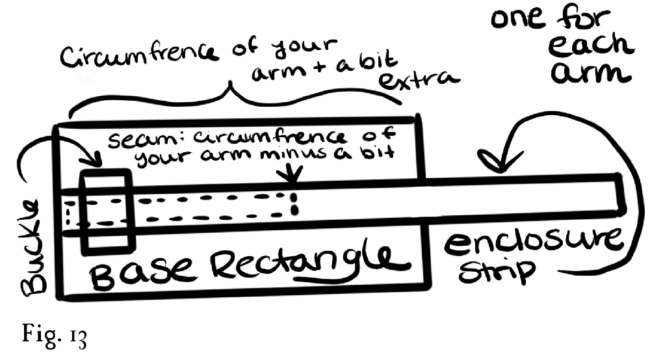
Install your buckle to the opposite end of the rectangle, and you now have two arm bands ready to go.
STEP TWELVE:
For the gloves, we will be using a similar method to how we made the arm bands, except each rectangle will be a bit smaller, and we will be installing the smaller buckles onto each one, instead of the larger ones listed above. Additionally, we will be installing the ruffled trim to the top of the buckled bit.
To do this, simply dye your ruffled trim using a mix of 1 part hot water and 1 part tan acrylic paint, mixed thoroughly. Leave your trim in the mix for a few minutes, then allow it to dry completely. Before attaching the ruffle to the top of your glove buckle, attach your aquamarine bias tape to the top of the ruffle (not the bottom edge, where there is already bias tape attached. We will be using that edge to attach to the strap.) Paint the leather buckle with your Angelus leather paint in Beige, then attach the ruffle to the top of the buckle.
Next, cut your glove down to size, so that it reaches about halfway up your forearm. Attach your ruffled buckle to the top of your gloves with a zigzag seam and elastic thread. (Since these glove buckles are more for decoration and less for practical use, make sure they sit comfortably around your arm just below the elbow while closed, so that you don’t have to adjust the straps each time you wear them.)
STEP THIRTEEN:
Next we’re going to make Ciri’s iconic jeweled belt. To do this, simply measure your waist just above the hips to determine how many 3 x 3 inch silver squares you will need to make your belt. For me, I used nine, but everyone may be different. Cut out your squares, then cut each of the 4 tips off of each square.
When you’ve got all of your squares prepared, use a #2 lead pencil to sketch out your design for each square. Here in Fig. 14 is a close-up of the design I drew:
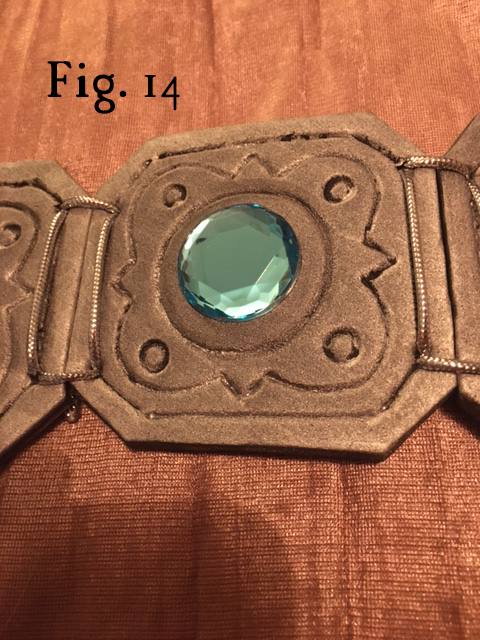
When you’ve got your design sketched out, use an embossing stylus to carve the design into each square. Next, cover each square with a coating of Plasti-Dip. Allow your squares to dry completely, then lay on a coat of metallic silver spray paint. Glue your turquoise rhinestones down into the center of each square using E6000 glue.
Once you’ve got all your squares prepared, you can attach them by sewing them together using your tapestry needle and silver braided jewelry cord. (If you are finding it hard to break the surface of your squares because of the PlastiDip, try using an awl to make some headway, and then continue on with the tapestry needle.
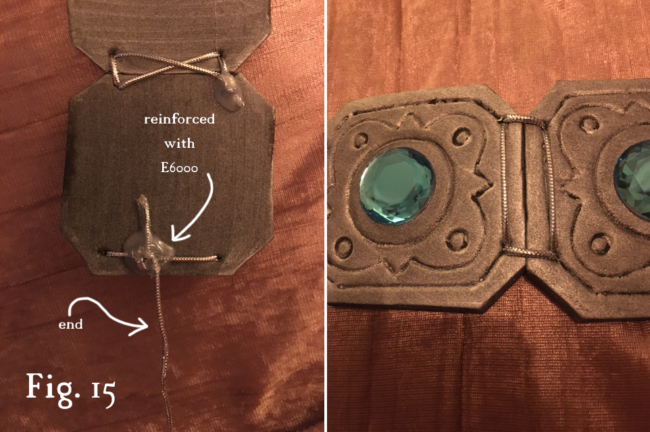
When you’ve reached the last square, attach a long piece of braided cord to each end to use as a way to tie your belt together when you take it on and off.
Now you’ve completed the costume itself! Time to move on to the props.
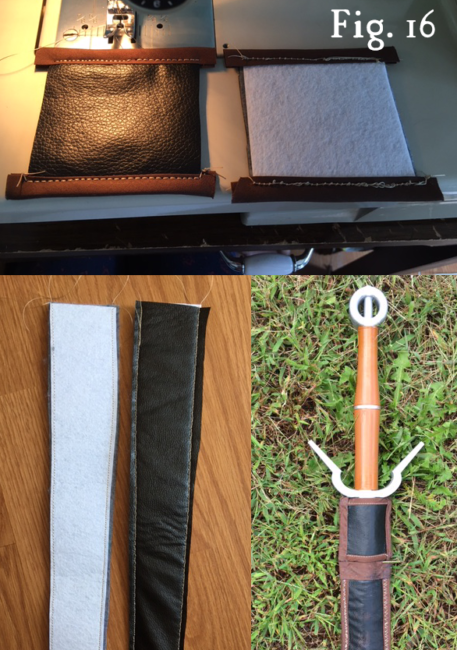
STEP FOURTEEN:
Now that you’re all done making your Ciri costume (!) you can move on to your sword and sheath. To make your sword, simply assemble the props from the sword replica kit listed above using your ⅜” dowel rod and some E6000 glue. After the glue has dried completely, paint your sword with your metallic silver spray paint and light brown spray paint.
As for your sheath, lay your sword down on a sheet of your craft weight stabilizer and trace all around it from the tip to the hilt. Cut out 2 of these tracings from the stabilizer, and 2 from your leather. Sew the stabilizer pieces to the leather pieces, and then sew 2 strips of leather to the leather side of ONE piece. (These will be the loops that you will thread your skinny tan belt through, so that you can carry your sheath and sword around with you.) Next, sew those pieces together (wrong sides together). Sew your mocha-colored bias tape all around the edges using your heavy duty thread and a zigzag stitch.
If you would like a thicker bit at the top like my sheath has, cut 2 squares from your stabilizer and 2 from your leather and attach them together like you did with the rest of the sheath, finishing all the edges with bias tape. Insert the sheath into the square part and glue the square part down with E600 to the top of the sheath. As an added detail, Ciri’s sheath is a deep red, which you can paint if you so desire.
And with that, you’re now well-fitted to fight whatever Noonwraiths, Drowners, or Water Hags come your way.
Additionally, if you’re taking your cosplay to a con or Faire and would like to make a simple pouch you can put on your belt like Ciri sometimes has, you can find out how to make one from my Jamie Fraser tutorial as well.
For an inside look at how I did my Ciri makeup, check out this Speed-Thru demo I put up on YouTube.
And with that, I’ll leave you to your witching!
About the Author
Diomira Keane
Cosplayer, artist, cat-lover, party princess extraordinaire.


There are no comments yet, add one below.
Stay connected. Don't miss out!
Get new costume guides in your inbox once a month.


Leave a Comment