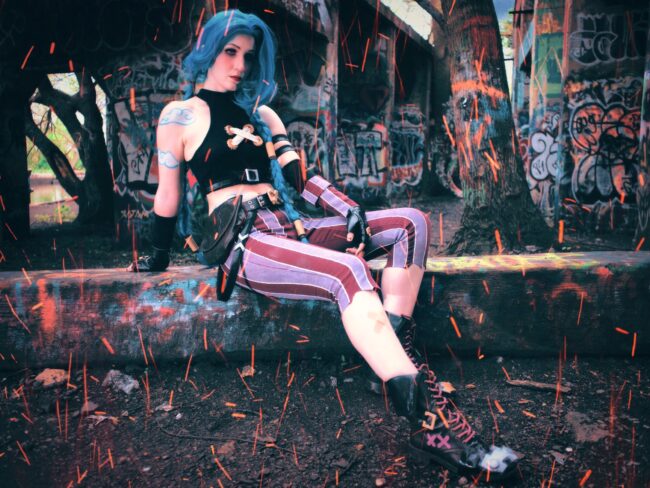
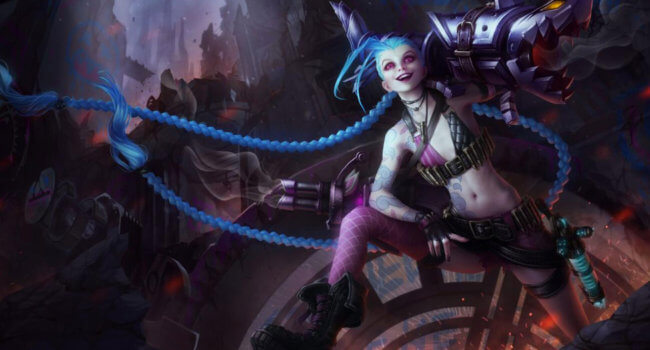
Make Your Own: Jinx
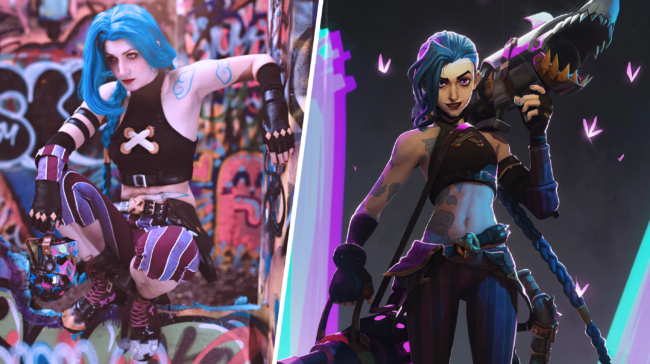
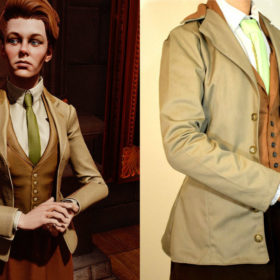
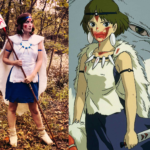
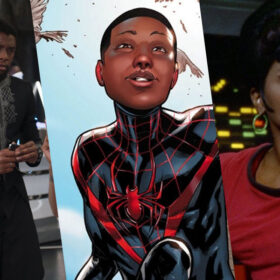
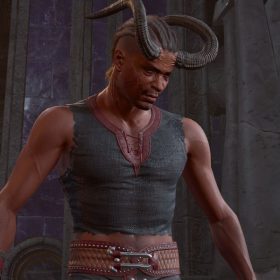
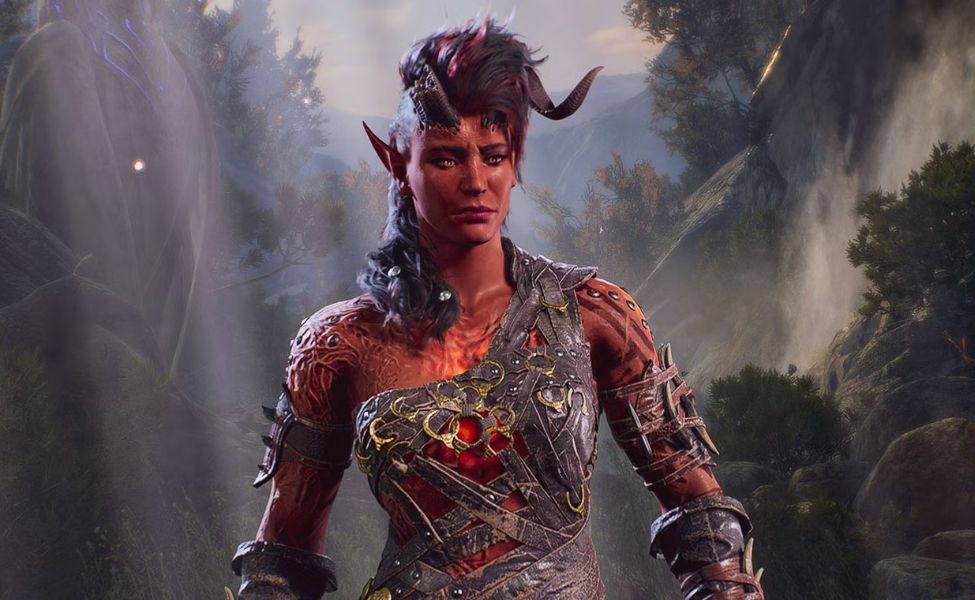
Christian Linke and Alex Yee’s Arcane debuted on Netflix in 2021. Based on the League of Legends franchise, the series follows two sisters, Jinx and Vi, as they fight on opposing sides of a war between the affluent and technologically advanced city of Piltover, and Zaun, a city left in the dust of Piltover’s success.
This tutorial provides a step-by-step guide for how to create Jinx’s costume and includes many of the fine details seen in her clothing throughout the show. This is a great project for beginner cosplayers who already have some knowledge of sewing and experience with knit/stretchy fabrics. And if you don’t – don’t worry! This is a great place to start. Just remember to have patience with yourself!
You will need:
- Leggings pattern (or an existing pair of pants/leggings you already own and are okay with dyeing!)
- ~2 yards purple or burgundy stretchy fabric (consult your leggings pattern for exact amount based on your size)
- 1 black turtleneck shirt (or existing turtleneck crop top)
- 1 yard black faux leather
- ⅛ yard unbleached muslin
- 2 packs black bias tape
- Fabric medium
- Pink, white, and light purple acrylic paint
- Masking tape
- 3-5 sheets of thick foam
- 1-2 sheets of thin foam
- Silver spray paint
- Gold spray paint
- Plasti-Dip
- Wax paper
- Spandex arm socks
- McCalls Pattern M7397
- Black belt
- Eloflex thread and upholstery thread
- Velcro dots
- 2 pack of belt buckles/sliders
- Large eyelets
- White and black embroidery floss and embroidery needle
- Hot glue and glue gun
- Disappearing ink marker
- Fabric glue
- Thick paint brush
- Body paint (white and light blue)
- Band-aids
- Combat boots (new or used)
Step One:
Begin by printing out your leggings pattern, cutting out your pattern pieces, and constructing your leggings using your purple/burgundy stretchy knit fabric. The pattern I have provided yields a pair of leggings that sit a bit high on the hips, so you can either adjust the height of your leggings during the sewing process or simply fold the top down while you wear them. Similarly, if you prefer the high-waisted look, feel free to wear the leggings as-is. If you prefer a pattern with a slightly lower waist to match Jinx’s low-rise pants more accurately without having to adjust your pattern, consider using this pattern instead. Either way, make sure you use the pattern for the ankle-length pants, NOT the capri or knee length pants.
Tip: Use your Eloflex thread whenever you are working with stretchy fabric.
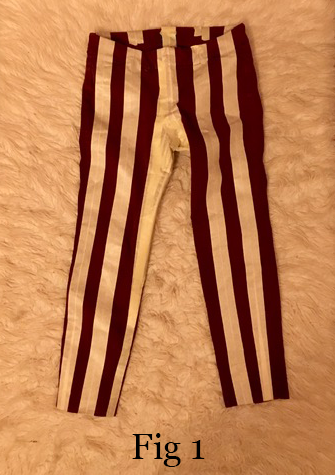
Step Two:
Use masking tape to create equally-sized vertical stripes down your pants.
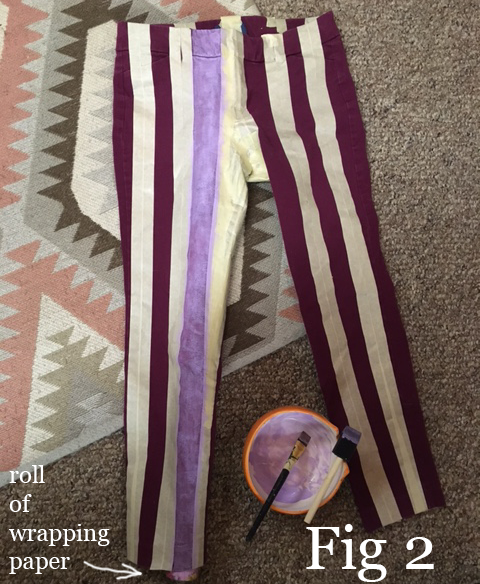
Once your pants are completely covered in masking tape front to back, mix your light purple fabric paint and fabric medium together as per the instructions on the fabric medium bottle. Use a thick paint brush to paint in the stripes on your pants that are not covered in masking tape.
Tip: Make sure to keep something between the pant legs so that the paint does not bleed through. I used a roll of wrapping paper to keep the front and back from touching as I painted.
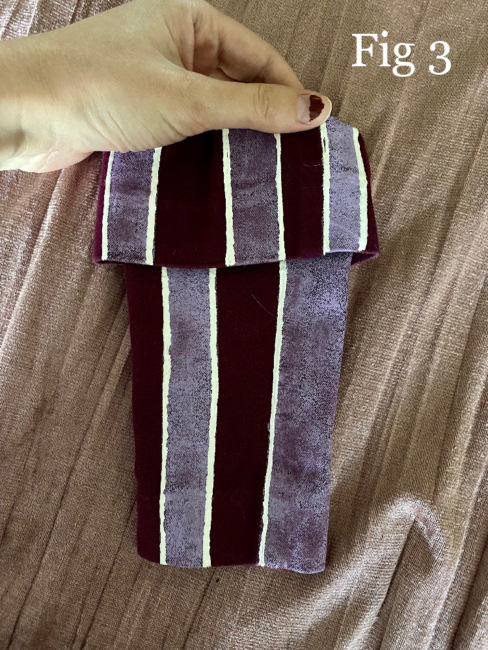
Step Three:
Once your pants are completely dry, remove the masking tape and outline all of your light purple stripes with your white paint (again, mixed with fabric medium). Let them dry once more, then cut the excess length of the pants off to capri length. I cut mine in such a way that they were rough and jagged, to create the illusion of a torn look. Remember to cut one shorter than the other as well. To finish off the seams of your pants that have now been cut through, consider using a little bit of fabric glue to keep the seams of the cut edges from coming undone.
Step Four:
Use the longer piece of your pants that you cut from your leggings for your arm band. You can do this by simply putting your arm through the cut-off pant leg (inside out) and drawing a line using your disappearing ink pen on either side of where your arm sits. Add a few centimeters on either side of that line so that it’s not too skin-tight, and sew those lines together. Cut away any excess fabric so that the band is the appropriate length. Use the “cuff” of your other pant leg to create the “cuff” of the top of your new arm band by cutting it off and sewing it to the top of your band. If it’s too wide, you can adjust the width of it the same way that you adjusted the arm band itself.
Step Five:
Lay your black turtleneck flat on a piece of wax paper and trace it with a permanent marker. Fold the wax paper in half through the middle of your tracing. Measure how long you want your Jinx top to be and draw a line where the bottom of your top should fall. Starting at the armpit of your shirt tracing, draw a swooping line up to meet the turtleneck cuff about halfway to the folded middle. Cut your new top pattern out while it is folded over. Unfold it to reveal a perfectly symmetrical pattern. Lay this pattern on top of your black turtleneck and cut according to the pattern. Hem over the new arm holes the bottom edge of your new crop top.
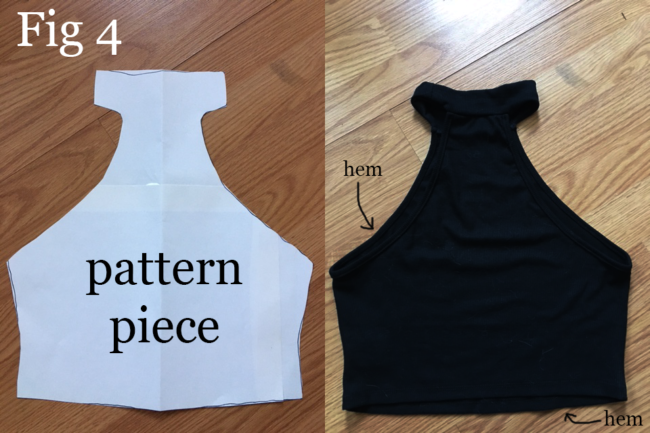
Tip: Hold your pattern piece up to your body and examine it in the mirror before cutting your shirt to make sure that everything is where you want it to be. Remember, you can always cut more off, but you can’t easily add more fabric.
Step Six:
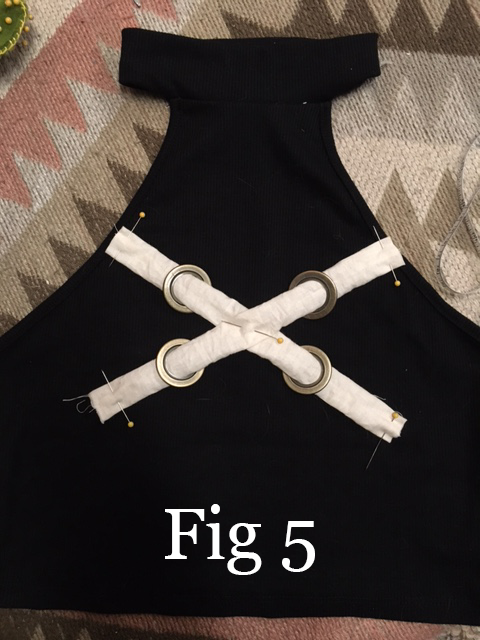
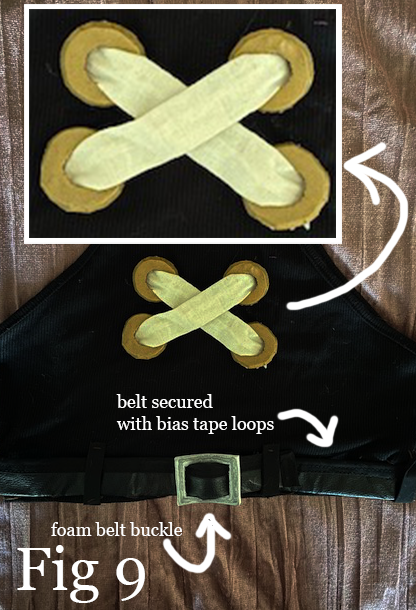
Cut 2 long strips, about 2 ½ inches wide from your muslin. Sew the edges together, and flip them inside out to create 2 long “tubes”. Iron them flat. Lay them in an “X” on your black crop top. Slide 4 large eyelets through the ends of each one so that you can get a sense of where you want everything to be.
With your embroidery floss, sew your muslin strips to your eyelets.
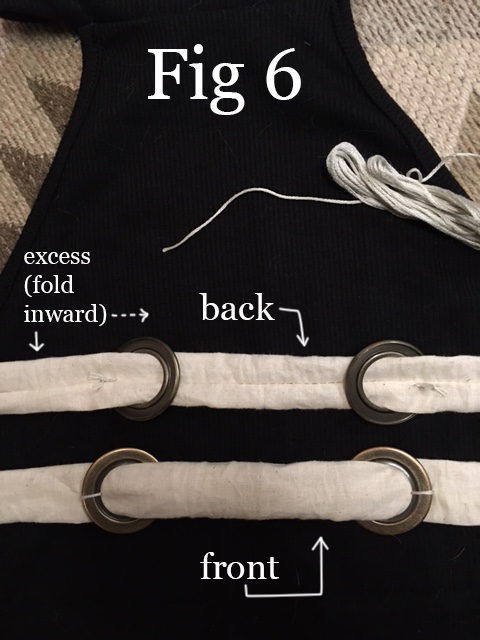
Fold the excess muslin in so that it is no longer visible from the “right side up” view and glue it down with fabric glue. Sew your “X” down to the front of your shirt using your embroidery floss, all around each eyelet.
Step Seven:
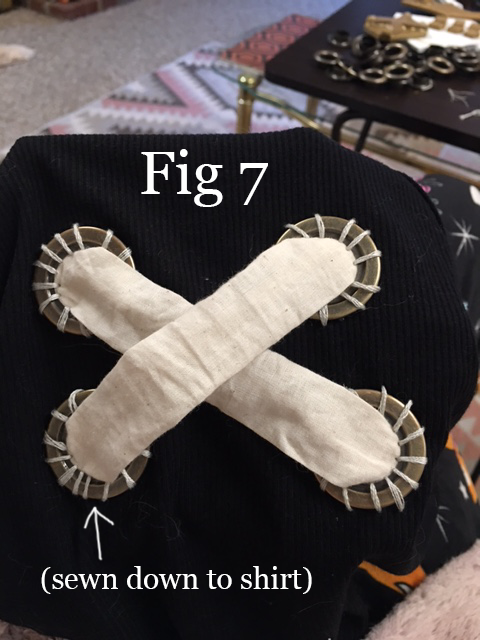
Trace one of your eyelets onto a piece of thick foam, 4 times. Cut each circle out, then cut a gash through each circle, and cut out the middle. You should now be left with 4 C-shaped “caps” for your eyelets. Spray them with Plasti-Dip, and then gold spray paint.
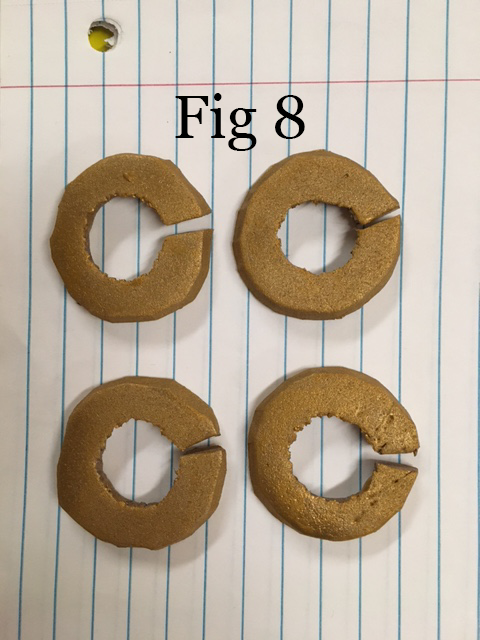
Slip your caps onto the tops of your eyelets and position them so that the slit of the “C” is under each muslin strip, unable to be seen from the top view. Glue the caps down to the eyelets using your hot glue.
Step Eight:
Using McCalls Pattern M7397, create a pair of short fingerless gloves from your faux black leather. Lightweight faux leather is preferred, but make sure to use your upholstery thread if you are working with thicker faux leather.
Create “knuckle studs” for your leather gloves by cutting out 8 small diamonds, 4 for each glove. Prime them with Plasti-Dip, spray paint them gold, and sew them to the knuckles of your gloves by hand using your embroidery floss (black or white, whichever color you prefer. You can also choose to paint the floss gold by hand after you’re finished sewing.)
Step Nine:
To make the leather loops that hang on either side of Jinx’s belt, take a measurement from the front of your hips to the back of your hips, allowing a lot of slack for your loops to hang about halfway to your thighs. Use that measurement to cut 2 strips of faux leather, about 2 inches thick. Fold the edges over, wrong sides together, and sew them down. Place your raw edges between the center of your double-folded bias tape, and sew the bias tape down.
Follow this same method for creating Jinx’s 2 arm straps, using the width of your upper arm as a measurement for the lengths of both of your strips, PLUS a few inches. Wrap one end of your completed strip to the center rod of your buckle/slider and sew it shut. Weave the other end through the buckle and adjust as necessary when putting on and taking off your arm straps.
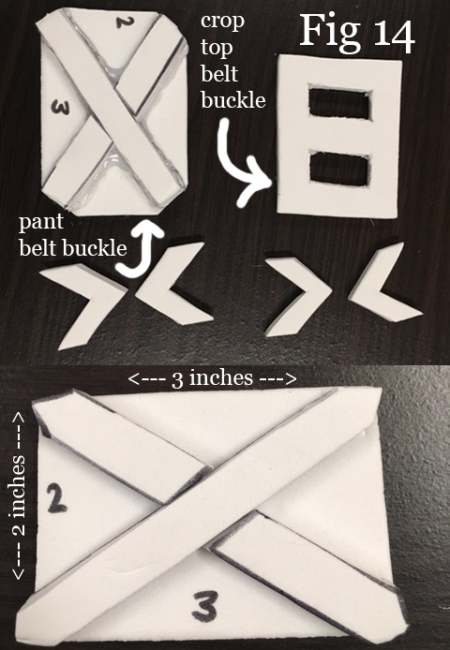
Lastly, create a belt for the bottom of your crop top using this method as well. (Measure the width of your lower chest PLUS a few inches for your belt.) Create a buckle from thick foam similar in shape to the metal buckle/sliders used for your arm straps (see FIG 14.) Create belt loops along the bottom of your crop top for your belt to run through using your black bias tape.
Step Ten:
Create a chunky wristband for yourself in a similar manner to how you made your loops. Measure the circumference of your wrist and cut 2 identical rectangles that are as thick as you want them to be, and as long as the circumference of your wrist plus 1+ inches on either side. Sew them together (wrong sides together) and sew bias tape around the raw edges. Install 1 or 2 Velcro dots on the ends of your wristband.
Step Eleven:
To create a more worn and oversized look to your combat boots, create a boot flap by measuring the length of the very top of your boot opening. This will be the width of your flap. Measure how long you want your boot flap to be, and double that length. Cut out 2 pieces of faux leather with those measurements. Fold your pieces wrong sides together lengthwise and sew. Once again, cover your raw edges with bias tape. On the folded edge, measure about half an inch in, and mark that measurement with your white paint.

Place your boot flap inside of the top of your boot, and glue it down to the inside with hot glue.
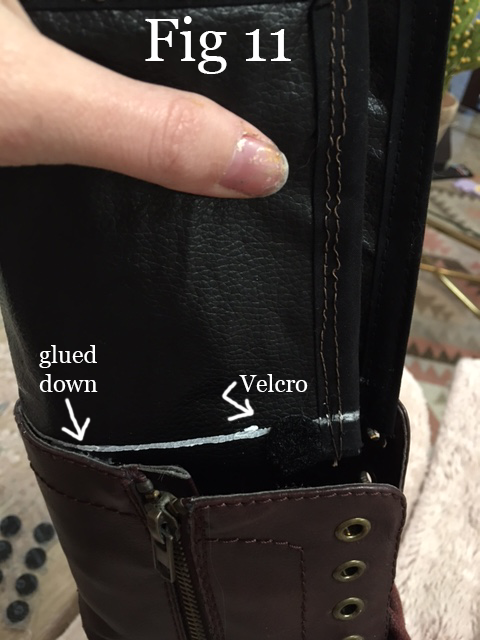
Tip: If your boots have a zipper on the side or the back like mine do, glue your flap up to wherever that zipper is. Leave the rest of the flap unglued, and install Velcro dots to the opposite edge. That way, one side will be fully glued in, and the other can be attached via the Velcro as you put your boots on and take them off.
Step Twelve:
Next it’s time to make the rest of all your various foam pieces. For the 2 arrow shapes that appear on each of Jinx’s hip loops, trace one of your strips of leather onto a piece of paper and draw your 4 arrows together within that strip.
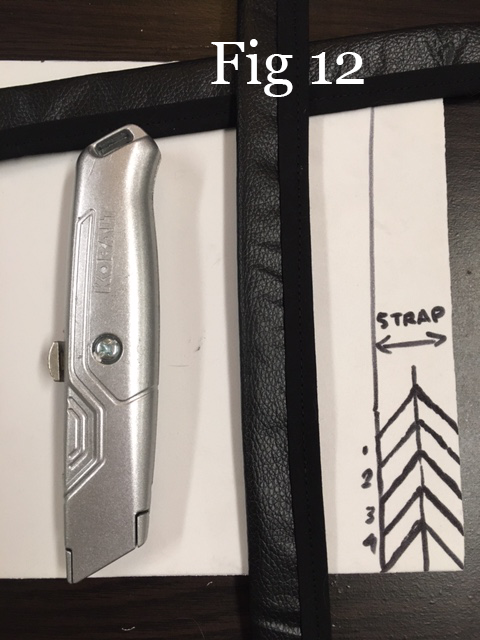
With scissors, a box cutter, or an X-acto knife, cut your arrows out.
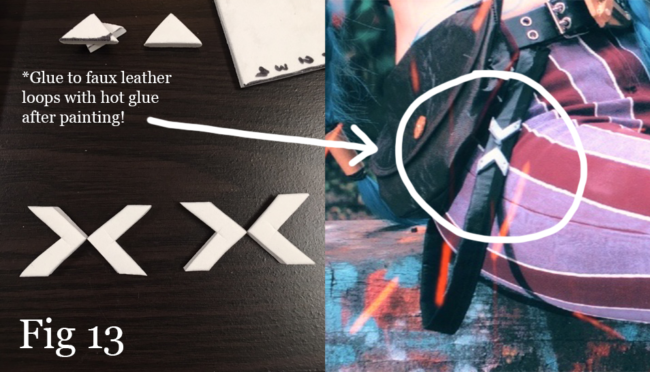
Create your crop top belt buckle and pant belt buckle from your thick foam pieces as well.
Use your thin foam to create Jinx’s hair cuffs using simple, rectangular shapes fastened together with Velcro dots.
Tip: To keep your hair cuffs from falling off your braids, secure them by tying a hair tie around the braids right beneath the braid cuff itself. This will keep your cuff from sliding down, especially if it’s difficult to get the cuff wrapped around the braid tightly.
Step Thirteen:
Use your Plasti-Dip to prime all of your foam pieces, then spray paint all except the belt buckle and hair cuffs silver. For the belt buckle and hair cuffs, spray paint them gold.
Step Fourteen:
Using your thick foam, create jagged shapes large enough to fit on the toes of each of your boots. Decorate them with foam “screws” and “bolts”, prime and paint them (one gold, one silver). Using lots of hot glue, glue them to the toes of your boots. Paint the shoelaces pink, and add 2 pink “X” shapes to the inside and outside of your boots.
Step Fifteen:
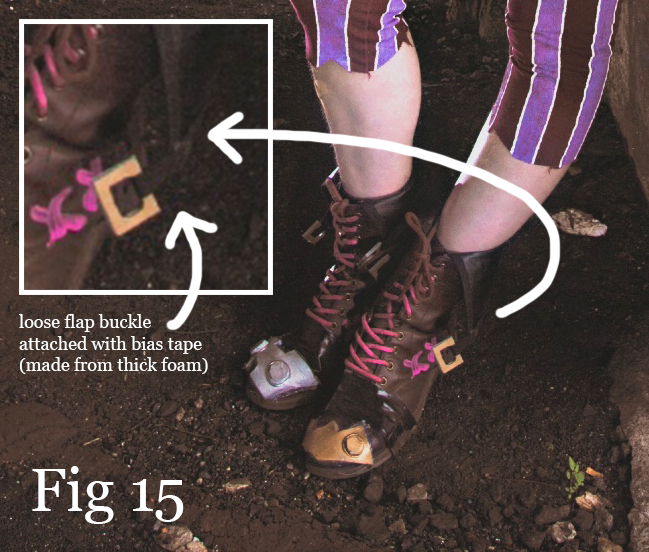
If you would like to, you can make some buckles for your flaps the same way you made the other thick foam buckles. Simply attach them to the 2 corners of each of your flaps (4 all together) using your black bias tape.
If you would like a hip pack to attach to your belt as Jinx is sometimes seen having, consider referring to my Jamie Fraser tutorial in which I cover the basics on how to make a simple leather pouch.
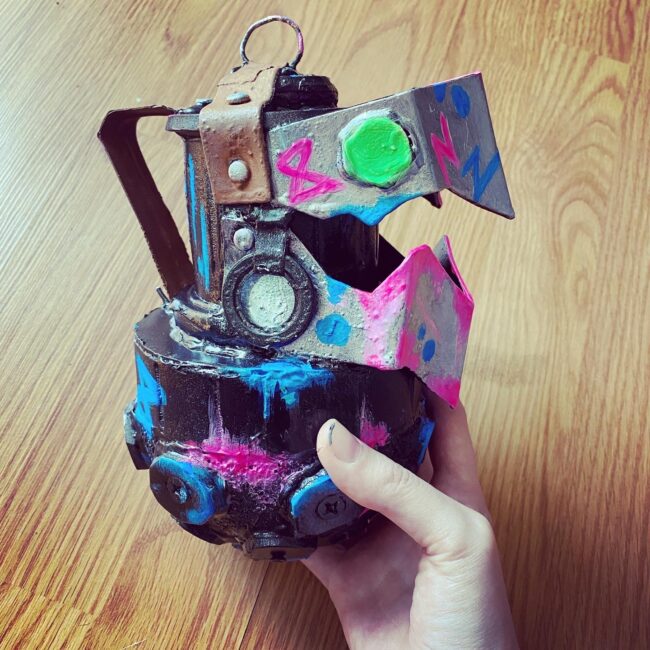
If you are interested in how I made Jinx’s Chomper Bomb, check out my YouTube tutorial which covers the process from start to finish and includes a list of materials!
About the Author
Diomira Keane
Cosplayer, artist, cat-lover, party princess extraordinaire.


There are no comments yet, add one below.
Stay connected. Don't miss out!
Get new costume guides in your inbox once a month.


Leave a Comment