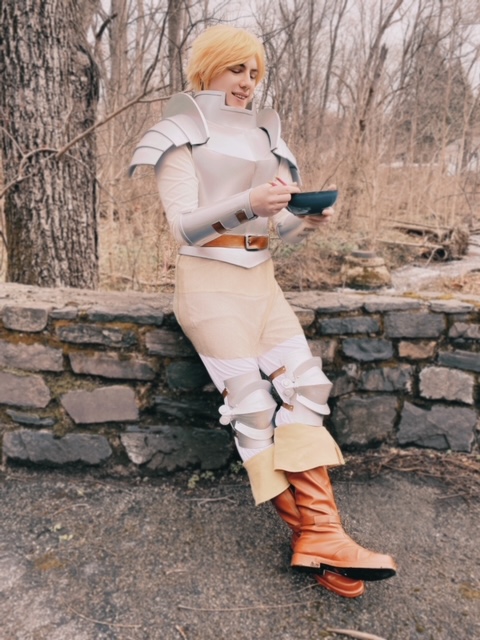
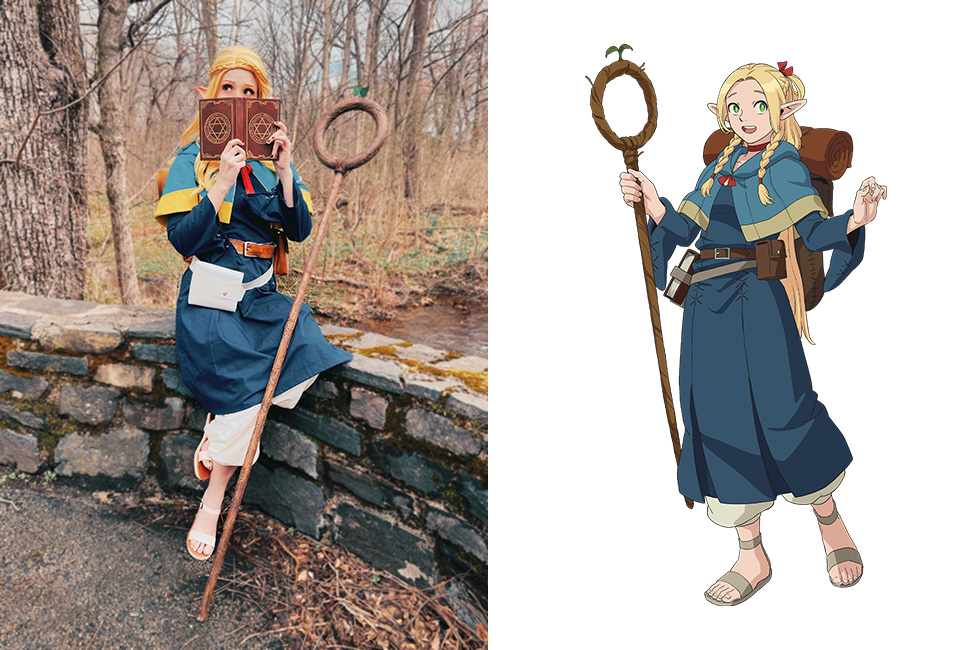
Make Your Own: Laios Touden
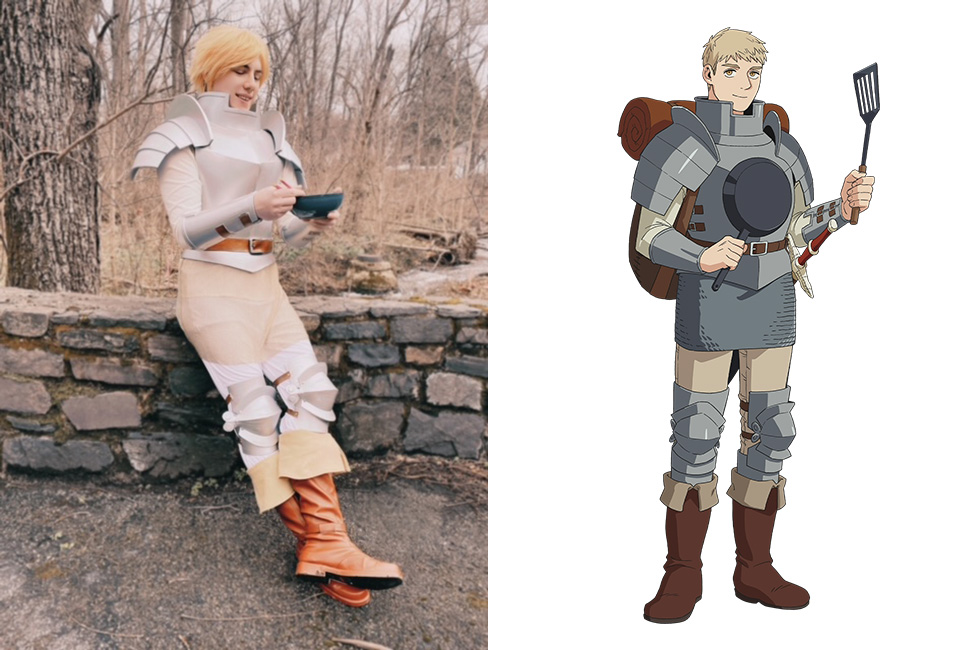
Laios Touden is one of the main protagonists in Dungeon Meshi, alongside Marcille. The leader of his party, he’s a human fighter with a fascination (and appetite) for all different types of monsters. This tutorial features some light sewing and armor building, and is best suited for cosplayers with some foam crafting under their belt. Overall, it offers relatively straight-forward armor assembly and beginner-friendly sewing.
You Will Need:
- 3 yards of navy blue cotton broadcloth
- 3 yards of cream cotton broadcloth
- 2 yards of turquoise cotton broadcloth
- 2 yards of sunflower cotton broadcloth
- 1 yard of white marine vinyl
- 1-2 yards of brown fleece
- 3 yards of water soluble interfacing
- Double-sided fusible webbing
- Sewing pattern by Aliceincosplayland
- Backpack pattern by Aliceincosplayland
- Belt pattern by Aliceincosplayland
- Angelus leather paint in brown
- 1.5 inch belt buckle
- ¼ inch grommet tool kit
- Leather cord
- Upholstery thread
- ½ inch red ribbon
- ½ inch non roll elastic
- Snaps
- 24 inch navy invisible zipper
- Tailoring pencil
- Hot glue kit
- E6000 glue
- Floral foam ring
- 1 inch dowel rods
- Matte finish Mod Podge
- Dark brown spray paint
- Nutmeg brown acrylic paint
- Gold leaf ink
- Elf ears
Step One:
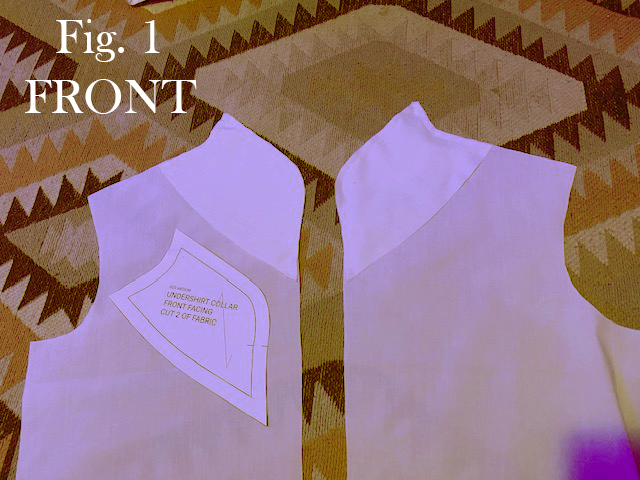
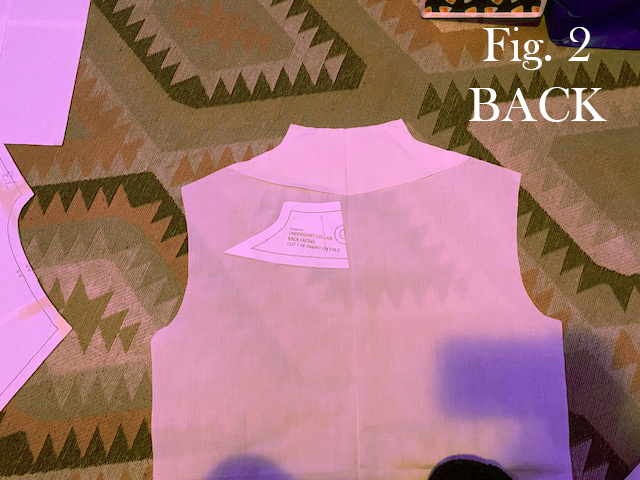
Begin by printing out the pattern pieces for the Elven Tunic according to the printing instructions. Tape your pages together and cut out all pattern pieces. Begin with the long sleeve undershirt. Cut each pattern piece from the white cotton broadcloth fabric. Attach the collar lining first to the FRONT and BACK of the shirt pieces with wrong sides together.
Flip the collar lining right side out. Continue assembling the undershirt by sewing the front pieces together, leaving a generous amount of open room at the collar so that the shirt will be able to slip on and off. Sew your front piece to your back piece, then sew down the shoulders. Next, sew the sleeves closed and hem the edges. Pin your sleeve holes to the arm holes of the undershirt and sew them in. Finally, hem the bottom of the shirt.
Step Two:
Next, cut your pant pieces from the white cotton jersey fabric. Sew the BACK pieces to the FRONT pieces, then tuck one leg into the other with RIGHT SIDES facing each other and sew the legs together in the middle. Sew a strip of elastic to one end of the waistband, then fold the waistband over so that the elastic runs straight through the middle. Sew the waistband fabric together, then sew the waistband to the top of the pants, leaving one end of the waistband open. Pull the elastic through the waistband to your desired length, then trim the excess and sew the end of the waistband shut. Hem the bottom of each pant leg.
Step Three:
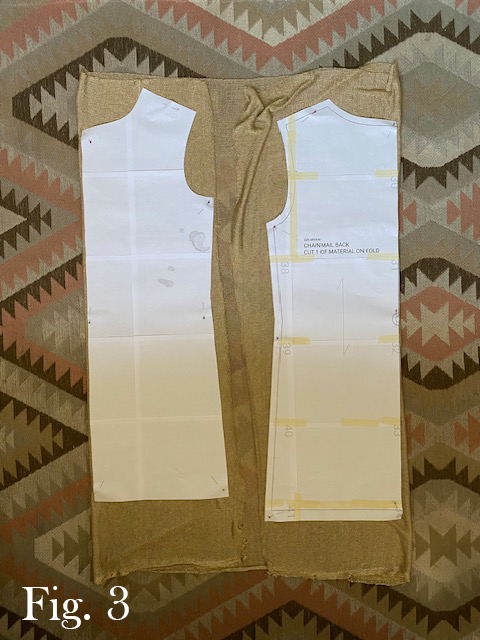
Lay the FRONT and BACK pieces of the tunic pattern on the chain mesh fabric, ensuring that the fabric is folded over on each edge. We will not be using the sleeve pattern piece, only the front and back pieces. Ensure that the inner edges of both pattern pieces are against the folds of the fabric.
Step Four:
Cut the pattern pieces out and sew them together along the outer edges. No hemming is necessary for the tunic as it is meant to look like chain mail. Be aware that this fabric is VERY stretchy, so you may end up having to cut quite a bit off the bottom edge as it may be too long. I would suggest trying it on first, then placing a pin where you would like the length to be, and cutting the excess from there.
Step Five:
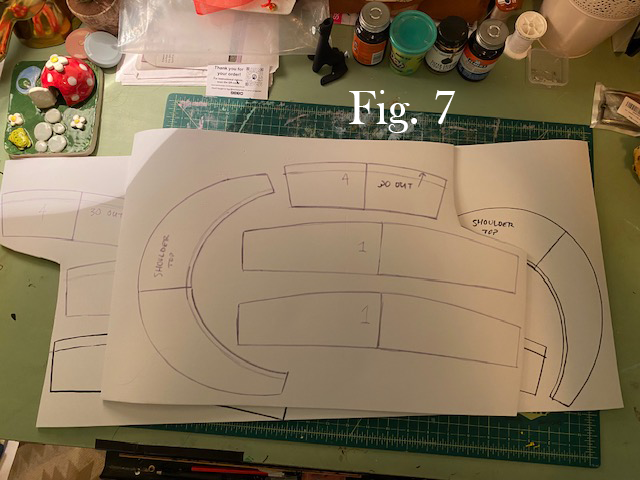
Print the pattern pieces for the Armor pattern and tape all the pages together.

Pay close attention to the guidelines in the pattern which give you the angles at which you should cut each edge. To keep track of these angles, I wrote them in the inside of each pattern piece so that I had them easily available once I started cutting my foam pieces. Additionally, make sure you are marking the edges of your pattern where you will want to cut ONE continuous piece. For example, in Fig. 5 I have done so by adding an indication in green ink along the edge where I will FLIP the pattern piece over and continue tracing a mirror image of that piece, to create ONE full piece.

Step Six:
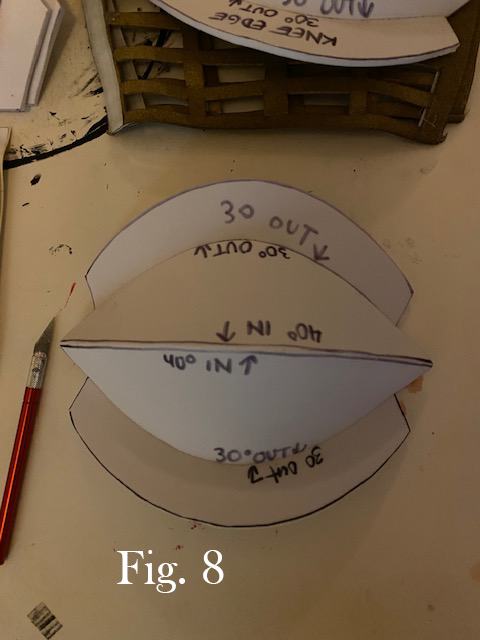
Trace each pattern piece onto your foam, mentioning the angles for each edge, and cut them out.
In order to achieve the angled cuts, use the BevAll Hobby tool listed in the materials.

Step Seven:
Begin attaching your armor pieces together by adding a generous amount of rubber cement to each edge and allowing it to dry completely. Attach your edges by lining them up and squeezing them together for about 10 seconds. The angles you cut should allow for the shape of each armor piece to take shape.
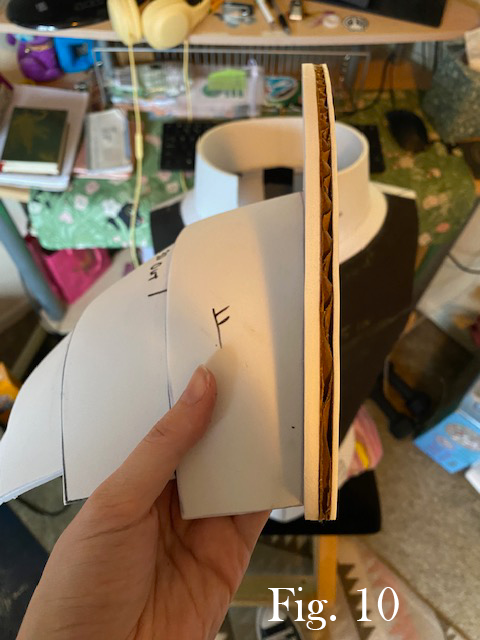
Step Eight:
As you assemble the shoulder armor, you may notice that the top edge foam piece that is meant to stick straight up is a little floppy. I accounted for this by cutting a piece of cardboard from the same pattern piece and attaching it with rubber cement. I added a thinner piece of foam to the other side, then later covered up the raw sandwiched edge with gorilla tape, so as to hide the edge of the cardboard.
Step Nine:
For the chest piece, glue the shoulder pieces together but only glue ONE side of the chest piece together and allowing the other side to remain open so that you can slip in and out of it.
Step Ten:
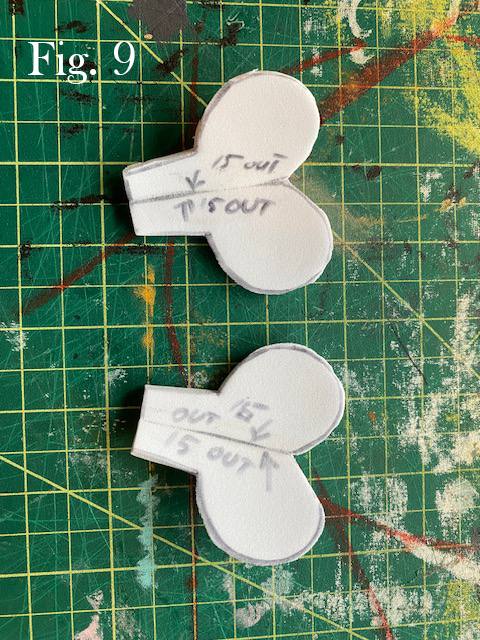
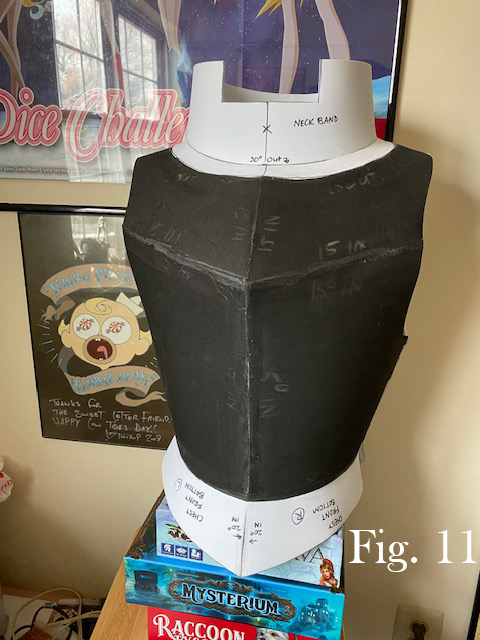
For the wrist armor, I chose to make my own pattern by measuring the length and width I wanted and cutting a cone-like shape, similar to the process I used to create Withers’ wristbands.
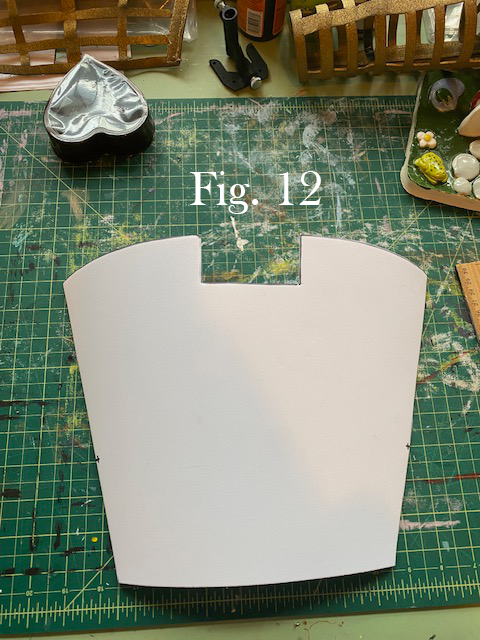
After that, I added some embellishment using thinner foam.
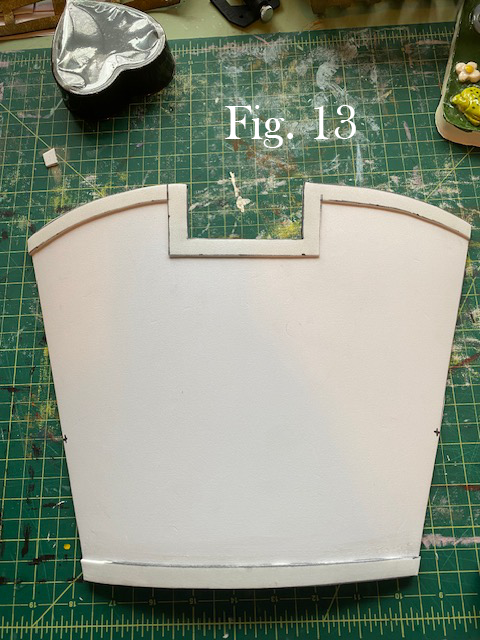
Using the rubber cement, I glued the wristband shut about ½ of the length of the edge (as indicated with marker on my piece in Fig.12 and Fig. 13), allowing a generous space at the bottom so that the wristbands can slip on and off. We will later add leather straps, one on the top of each for decoration and one closer to the wrist of each to allow the wristband to open and close.
Step Eleven:
After all of your pieces are assembled, prime all pieces with 2-3 thin layers of Flexbond, then spray paint each piece with silver spray paint. Allow each piece to dry for about 1-2 hours, then seal everything with a layer of clear topcoat.
Step Twelve:
To attach the shoulder armor to the chest armor, push a paper fastener through the middle of each shoulder piece and on through the center of the shoulder area of the chest piece. Attaching the shoulder pieces in this way will allow for a much more comfortable range of movement. You may use this method to attach that small “B” shaped accents to the knee armor as well.
Step Thirteen:
Cut strips from your marine vinyl to use as fasteners for your wristbands, chest armor, and knee armor. Attach each strip using a combination of E6000 glue and paper fasteners stuck through the center of each strap and the foam piece. Reinforce the anchor of each strip by adding gorilla tape to the inside where the arms of the paper fasteners open up.
For the wristbands, cut 2 strips of vinyl straps for each (4 total), as previously mentioned in Step Ten. For the bottom straps which will be used to open and close, attach 2 strips of Velcro; one to the outer edge of each lower strap and one directly on to the opposite side.
For the knee armor, Velcro to the outer edges of each leather strip (2 leather strips per knee armor; one on the top/thigh area and one on the bottom/calf area) so that they can meet up and attach in the center.
For the chest piece, allow the attaching strip (the shape of which is indicated in the chest piece pattern) to attach directly to the foam on the opposite side. You may add decorative strips to the side of the chest piece that has been glued shut for consistency.

Step Fourteen:
For the boot flap, measure the width of your calf and create a full-sized, mini length “skirt” by using the By Hand London Circle Skirt app, similar to the way I made Alfira’s boot flaps. Cut this shape from the tan felt, adding a slit in the center, and hem around the curved, outside edges where the slit is. Add Velcro to each end so that you can take them on and off. They will be tucked into the top of your brown boots, so make sure they are tall enough to have enough fabric to fit inside each boot.
Step Fifteen:
For the belt, sew two long strips of leather together to create a heavier weight using the upholstery thread. Attach the belt buckle by hand sewing it in. If you are interested in also adding a backpack to your Laios costume, check out the Marcille Donato tutorial which has patterns and instructions on how to do so.
After that, you’re all finished and ready to eat!
About the Author
Diomira Keane
Cosplayer, artist, cat-lover, party princess extraordinaire.


There are no comments yet, add one below.
Stay connected. Don't miss out!
Get new costume guides in your inbox once a month.


Leave a Comment