Make Your Own: Alfira From Baldur’s Gate 3
“Dance upon the stars tonight
Smile and pain will fade away
Words of mine will turn to ash
When you call the last light down”
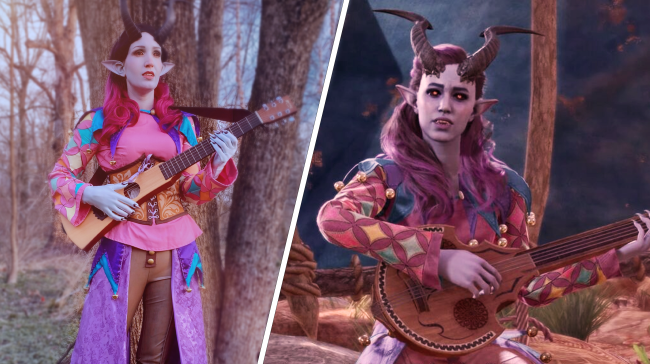
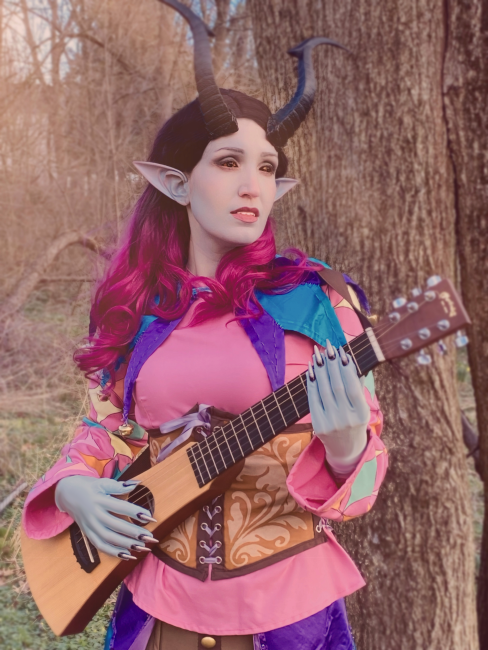
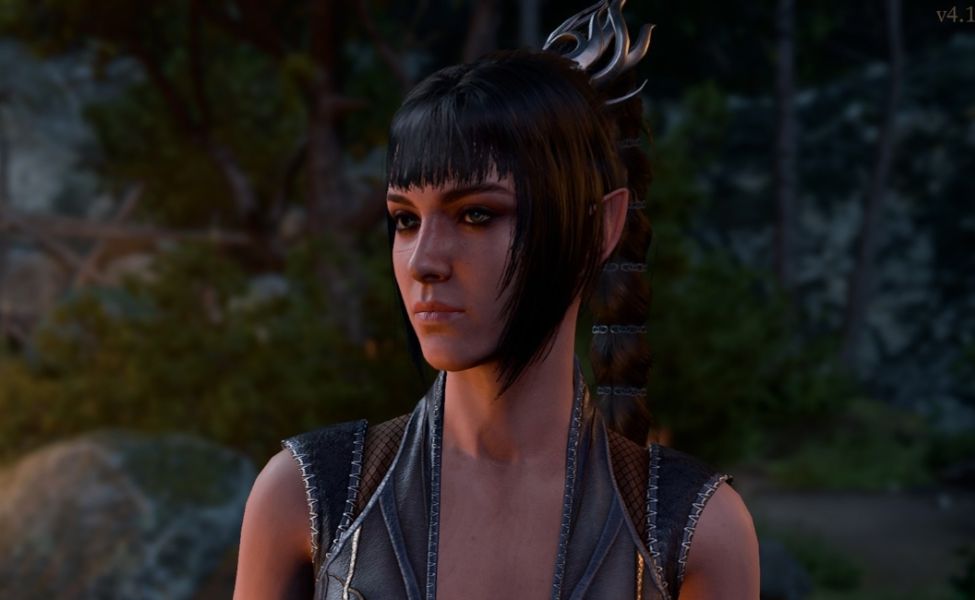
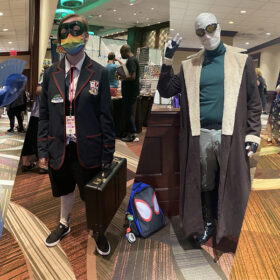
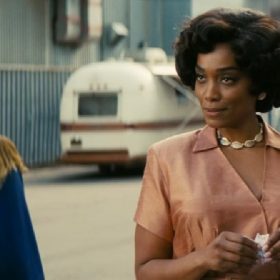
Alfira is a friendly Tiefling bard found singing to a pair of squirrels in the Emerald Grove during Act I of Baldur’s Gate 3. Depending on your choices (and Background), you may even encounter her again under happier (or less than happy) circumstances. Either way, her costume has many different components to it for cosplayers who enjoy a challenge and have a preference for the smaller details.
This tutorial is best suited for more intermediate to advanced cosplayers who have experience with pattern making and altering, corset making, and fabric painting. Please also note that this tutorial requires a 3D printer for the horns, however if you don’t have access to a 3D printer you can use this pattern from TrinesTreasury to make your horns out of foam.
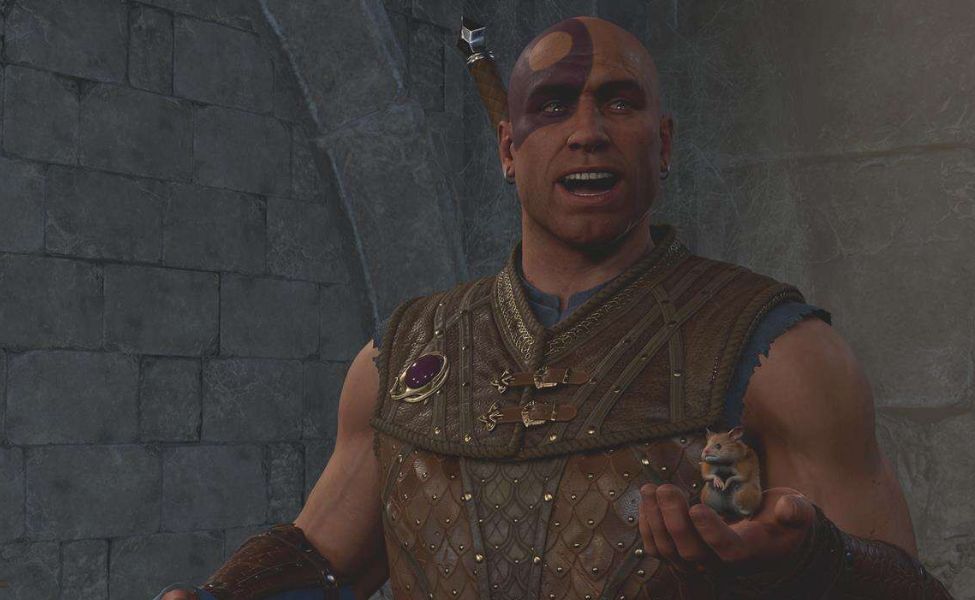
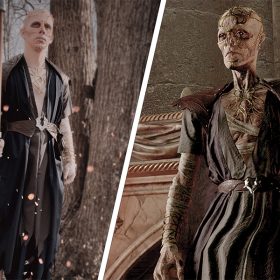
And don’t miss our Withers cosplay tutorial as well!
You will need:
- Simplicity 8695 Vintage sleeve pattern
- Doretta pants pattern (or similar high-waisted legging pattern)
- Ruin Curves Horn pattern for 3D printer and 3D printer filament
- Flat black primer and spray paint
- Matte sealer spray
- 2 part epoxy
- Tacky glue
- Sandpaper 320 – 800 grit
- Solid core pool noodle
- Thin EVA foam (1mm – 2mm)
- Grommet tool kit with ½” grommets
- Corset boning
- Sew-in Velcro
- 1” black elastic
- 20” pink invisible zipper
- 2 yards rayon challis fabric in Dusty Rose
- 2 yards charmeuse satin in Turquoise
- 2 yards charmeuse satin in Purple
- 2 yards rose jacquard fabric in Lavender
- 4 yards polyester china silk lining in Lavender
- 1 yard polyester china silk lining in Antique Gold
- 1 yard cotton polyester broadcloth in Brown
- 1 yard cotton polyester broadcloth in Dark Gold
- 1 yard shiny milliskin tricot in Light Blue
- 1 yard faux leather fabric
- 2 yards 4 way stretch faux leather fabric
- 2 yards purple lace trim
- 2 packs Pellon 805
- Angelus leather paint in Beige, Satchel Tan, and Dark Taupe (optional: leather preparer and deglazer and matte 4 topcoat)
- Apple Barrel acrylic paint in Blue Cotton, Pale Daffodil, Spiced Carrot, Key West, Aqua Sky, Cameo Pink, and Sunkissed Peach
- Textile medium
- Blue body paint
- Liquid latex
- Heavy weight thread in Brown
- All-purpose thread in Purple, Turquoise, and Pink
- White stretch thread
- Black stretch thread
- 2 skeins embroidery floss in Dark Sea Green
- 2 skeins embroidery floss in Dark Lavender
- Light purple ⅜” ribbon and Dark purple ⅜” ribbon
- 4mm purple beads
- 2 packs 7/8″ gold shank buttons
- 12 gauge jewelry wire
- Gold jingle bells
- Disappearing fabric ink pen
- Black fabric marker
- Elf ears
- Black acrylic nails and Silver nail polish
- Small custom fangs
- Ombre wig
Step 1: Pants
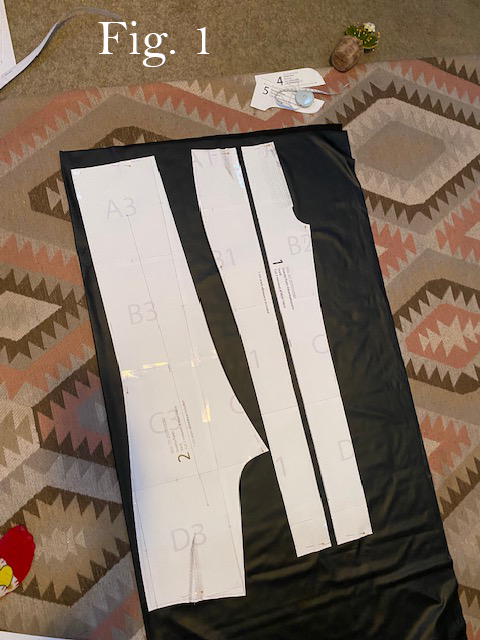
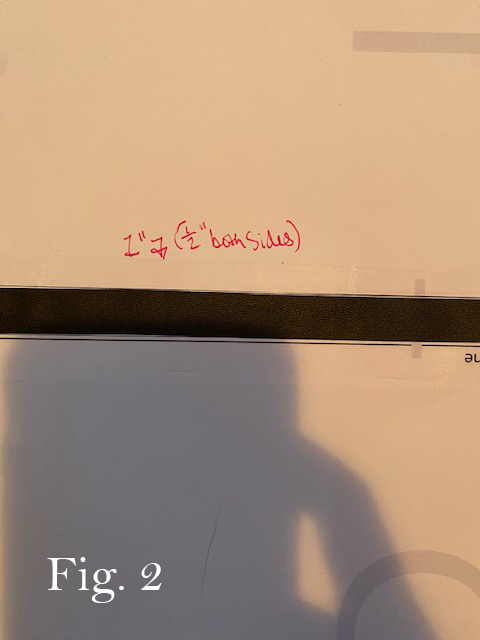
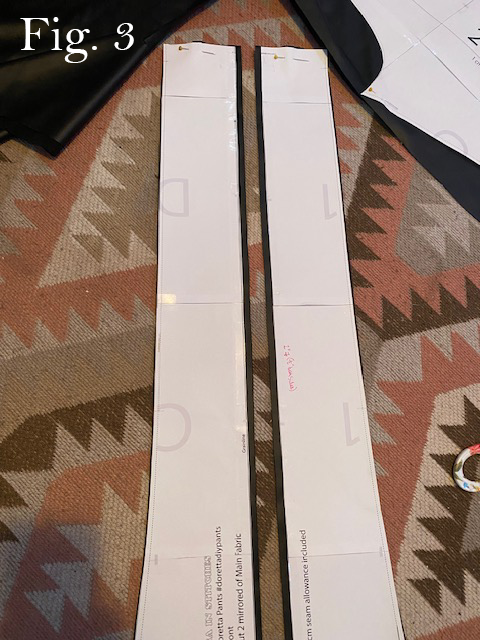
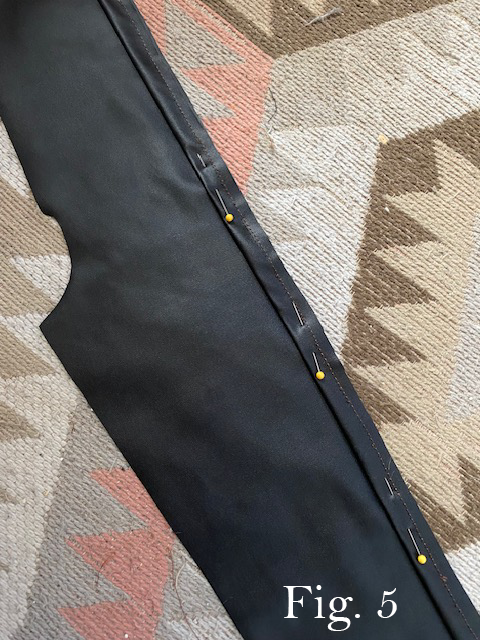
Begin with the pants by using the 4-way stretch faux leather fabric and the Doretta pants pattern according to your size. For the added detail of the seam that goes directly down the front of the pants, I cut that pattern piece in half (pattern piece 1 if using the Doretta pants pattern) and then sewed in a small, folded-over strip of the faux leather fabric (about ¼” when folded) using the black elastic thread. After sewing both front pieces back together with the folded-over strip added, I continued sewing the pattern as usual. Since the fabric was stretchy enough for me to be able to slip them on and off with ease, I ended up foregoing the fly zipper and instead simply used a small rectangle of the brown cotton broadcloth in place of the zipper, sewn directly onto the pants afterwards. I then added 2 of the gold shank buttons vertically across the brown cotton rectangle. I added a strip of elastic into the folded-over belt piece (pattern piece 3 of the Doretta pattern) for added stretch and tighter fit.
Next, I painted the completed pants with the Angelus leather paint in the color Dark Taupe. I wanted a scratchy, worn look for my pants so I was not very concerned with total coverage, but rather a textured finish. Make sure to paint your pants in many thin coats as opposed to one very thick coat. Lastly, hem the bottom of each pant leg with bias tape made from your brown cotton broadcloth.
Step 2: Pink Top
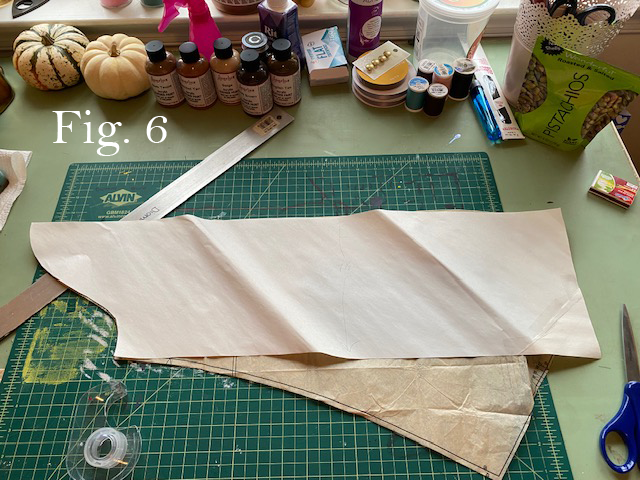
For the pink top, Use View D for your sleeves and cut out the bodice pieces according to your size from the rayon challis fabric. Using a piece of newsprint, butcher paper, or wax paper, trace the pattern piece for View D, but bring the bottom edge of the sleeve inwards a little bit for less of a bell-shaped look to your sleeves. I kept my sleeves rather straight with a very slight flare at the end.
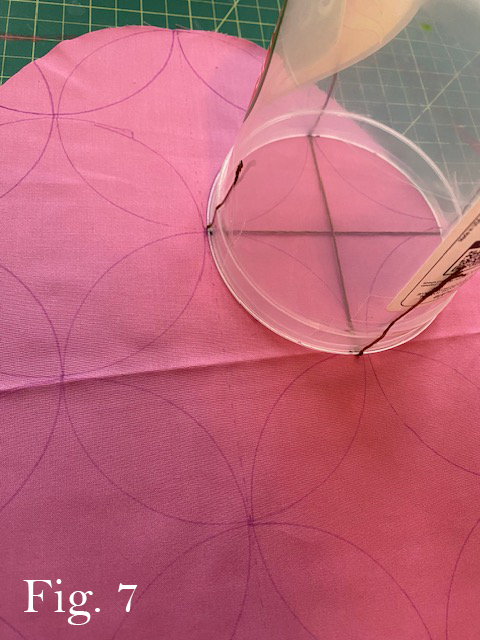
Next, use your disappearing ink pen to trace a series of interlocking circle patterns all over both sleeves. In order to make each circle exactly the same and evenly spaced, I used a medium container with an evenly measured “X” shape taped over the mouth with embroidery floss. Once your circles are complete, paint in the negative space (diamond shape) inside of each circle using your acrylic paint in the colors Pale Daffodil, Spiced Carrot, Key West, Aqua Sky, Cameo Pink, and Sunkissed Pink mixed with your textile medium.
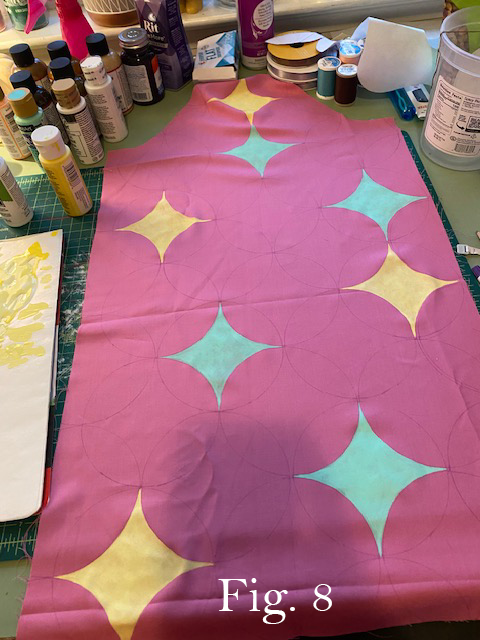
Lastly, go around all of your circles with your black fabric marker for a more defined finish.
FIG 9
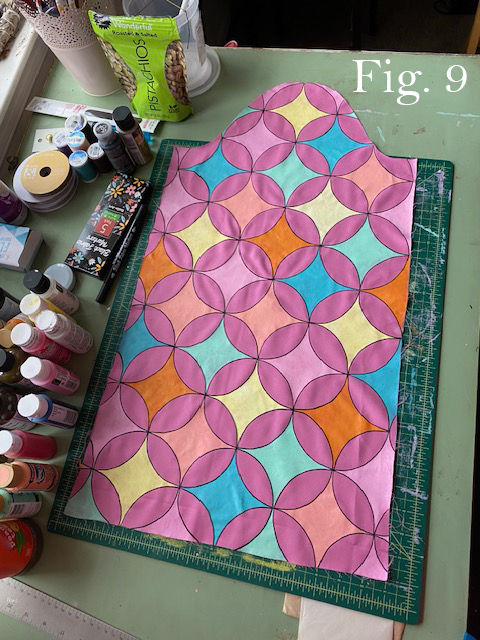
Step 3: Pink Top, cont.
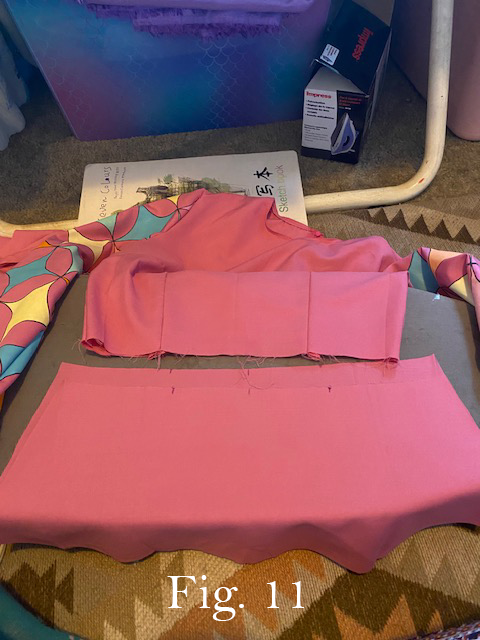
Sew your sleeves and bodice piece according to the pattern. Hem the bottom edges of your sleeves by creating a strip of bias tape from your leftover rayon fabric. In order to create the bottom piece of your bodice, trace the bottom of the bodice to a leaf of newsprint paper, taking note of where the front center and the dart on either side lay.
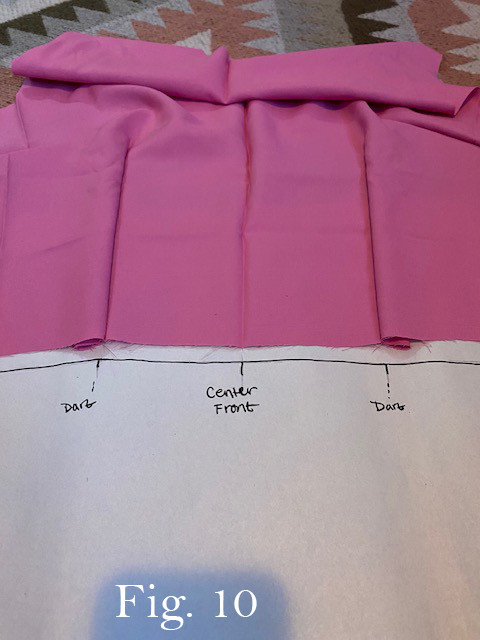
When drawing out the sides, allow them to flare out so that the bottom of your bodice is nice and open. For the bottom, allow the hem to curve slightly upwards at the sides for a shape that best matches Alfira’s shirt. Sew your bottom piece together and hem the bottom edge. Next, attach the bottom piece of your bodice to the rest of the shirt and install the pink invisible zipper.
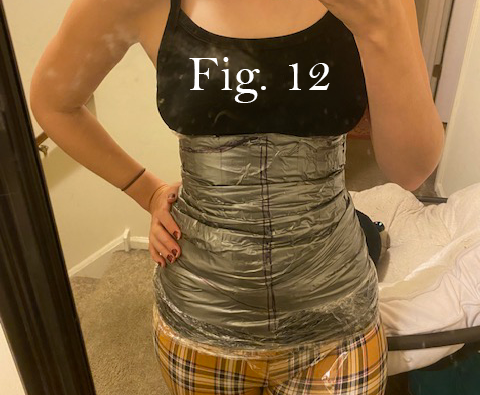
Step 4: Corset
In order to make the pattern for your corset, wrap your waist area in a few layers of cellophane, then wrap that same area up with duct tape. Using a Sharpie, draw a line straight down the center and on either side of your waist.
Cut the duct tape and cellophane off, and cut your pieces out according to your sharpie lines. Trace these pieces onto a piece of newsprint or sketchbook paper, and take this time to refine each piece’s shape.
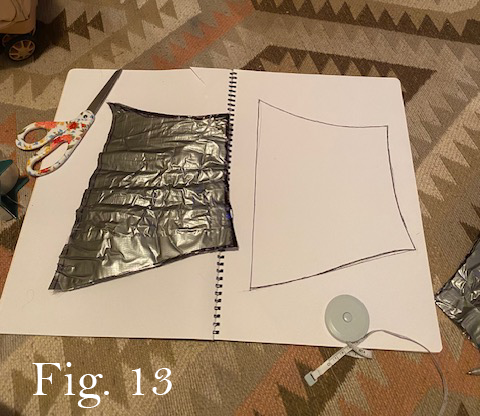
In total you should have 2 identical but inverted front pieces and one perfectly symmetrical back piece. (Note: I found that having one back piece, though true to Alfira’s costume design, caused my corset to look a little flat in the back. If you prefer a better fitting corset, my suggestion would be to have a friend trace a line down the center of your back in order to create a seam that will fit your spine better, and experiment with this pattern using muslin for a mock-up.)
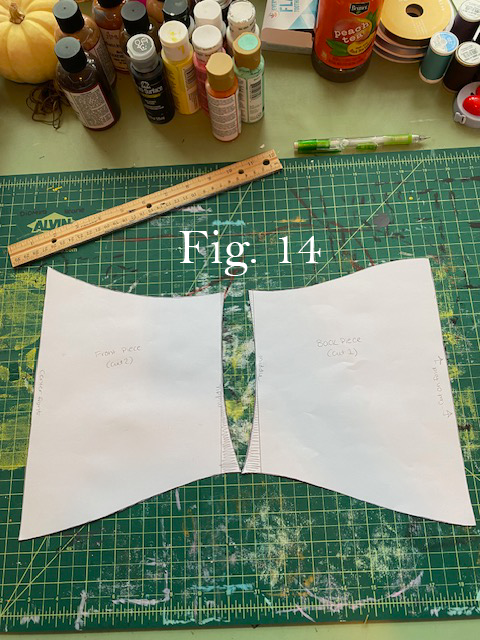
Next, cut your pattern pieces out of your non-stretchy faux leather fabric as well as your Antique Gold poly china silk lining (cut 2 pieces of each pattern piece for the lining.) Note: None of the corset pieces will be sewn to one another. We will attach them to each other later by installing grommets and weaving the ribbon through the grommets.
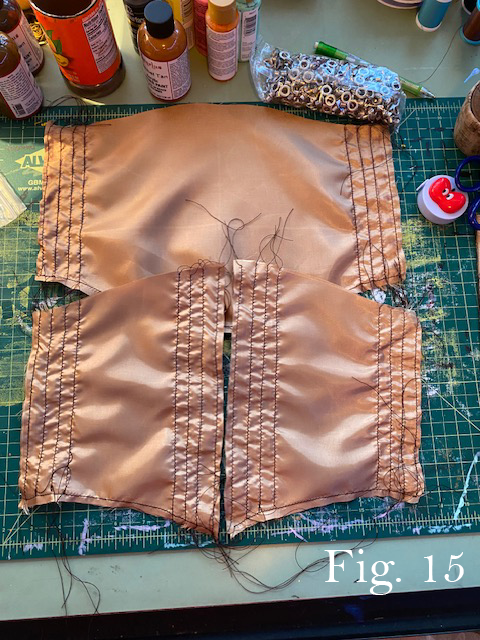
Sew your lining pieces together on the bottom and sides, leaving the top open. Sew channels into your lining pieces. Insert your boning into the channels and sew up the top.
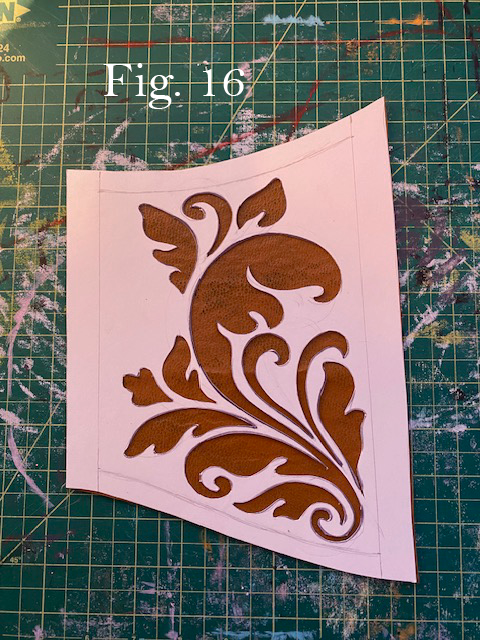
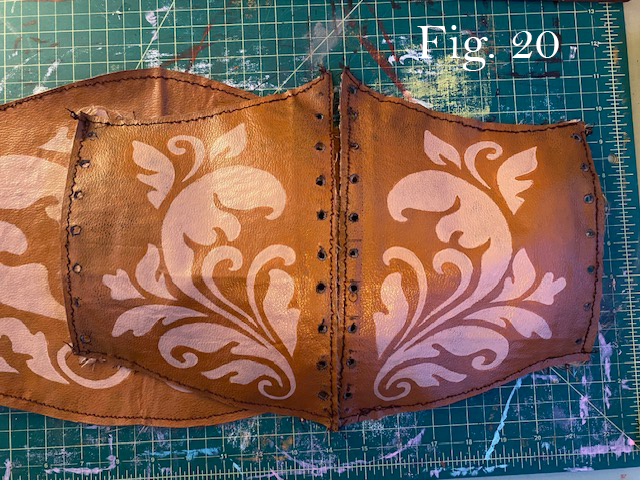
Step 5: Corset, cont.
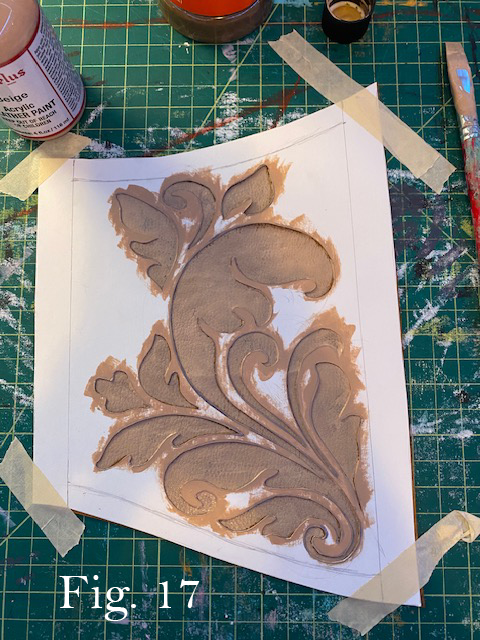
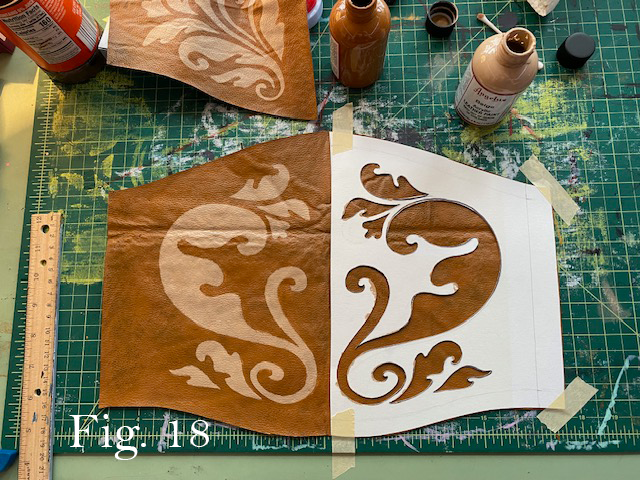
Paint your faux leather corset pieces with the Angelus leather paint in Satchel Tan. Using a piece of sketchbook paper, trace one of your front corset pieces and draw a floral design onto it. Cut out your design to create a stencil. Place your stencil on top of your leather corset piece and paint it using the Angelus paint in the color Beige. Flip the stencil over and repeat the process for the other front side of your corset.
For the back piece, fold your stencil in half so that there are 2 mirroring images on each side. Repeat the stencil making and painting process.
Step 6: Corset, cont. 2
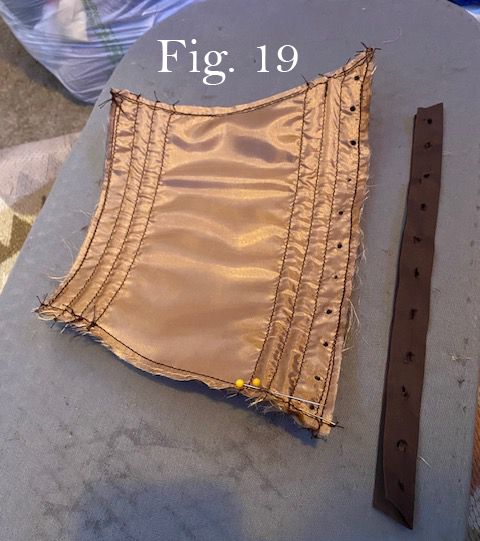
Sew the lining with the corset boning to the leather corset pieces. Note: For added strength, add a piece of Pellon 808 heavy weight craft stabilizer to the back piece, underneath the silk lining. This is an optional step, but I found that it gave my corset a much stiffer feel, which I prefer.
Next, create some bias tape from your brown cotton broadcloth. For the sides, measure your bias tape strips as precisely as possible, leaving a bit of extra fabric on the top and bottom, and mark off where you want to install your grommets. Make identical markings to the inside of your corset. Make sure your grommet markings are identical on each corresponding piece. The edges of the back piece will line up with the outer edges of the front pieces, and the inner edges of the front pieces will meet together in the middle.
Use a pair of fabric scissors to clip a small “x” on each grommet marking on your bias tape. For the corset, you can use an awl or a grommet making tool to punch a small hole where each grommet should be.
Line your bias tape up to your corset edges and install your grommets. Lastly, add your bias tape to the top and bottom of your corset and hem off your edges. Weave your light purple ribbon through the sides of your corset as well as the front.
Step 7: Overskirt Bottom
Using the Circle Skirt App by Hand London, create a quarter-sized, midi-length circle skirt pattern for yourself to cut from your rose jacquard fabric, adjusting the length to be a little longer. This will be your underskirt. (I would suggest making a mock-up of this skirt in muslin first so that you can make adjustments as needed.) Cut the same pattern from your lavender poly silk.
Cut a large slit through the back of your skirt piece, about 6 or so inches from the top. You can leave this as a slit, or do what I did and fold your skirt in half and cut a long, thin triangle out of the back so that your tail has a little more room to poke out through. Do this for your lining fabric as well.
Using your turquoise satin fabric, create a thick bottom border for your overskirt. Make sure that the upper edge of the border curves in the same way that the bottom of the overskirt curves. Hem the upper edge and sew the border directly on top of the rose jacquard overskirt. Hand sew the purple lace trim to the area between the rose jacquard and the turquoise satin using your dark lavender embroidery floss. Sew your lining to your overskirt, right sides together. Flip your skirt outside out and iron down your edges.
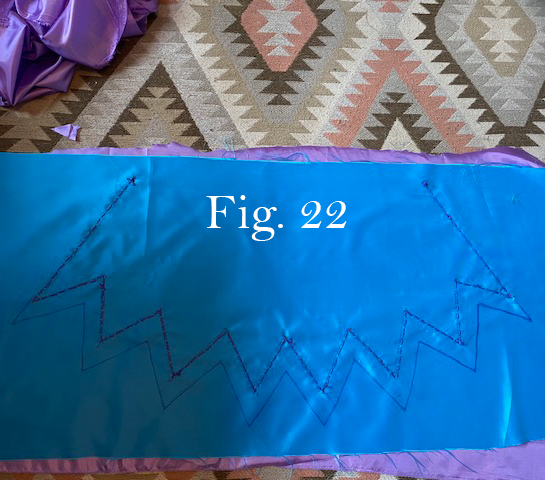
Step 8: Overskirt Top
Create a quarter-sized, mini-length skirt from your purple satin, adjusting the length to be a little smaller. Iron your Pellon 805 down to the back of your skirt piece. Measure out 6 equally sized and spaced triangles pointing downwards from the bottom of your skirt, with 2 half-triangles on each side edge.
Cut the triangles out, remove the Pellon 805 backing, and iron your purple piece down to the top side of your turquoise satin. For added strength, sew along the edges of your triangles all the way across the bottom edge of your skirt. Using your disappearing ink pen, mark a similar zig-zag pattern on your turquoise satin that is equidistant from the purple triangles all the way across the bottom, and cut.
In order to cover up the raw edge of your purple triangles, sew your dark purple ribbon all along the space where the purple satin meets the turquoise pattern, using a zigzag stitch. Hand sew your purple beads to the purple ribbon using the dark purple embroidery floss.
Sew the skirt to the lining fabric, right sides together, then cut your lining fabric into the shape of the skirt to ensure each piece meets up perfectly.
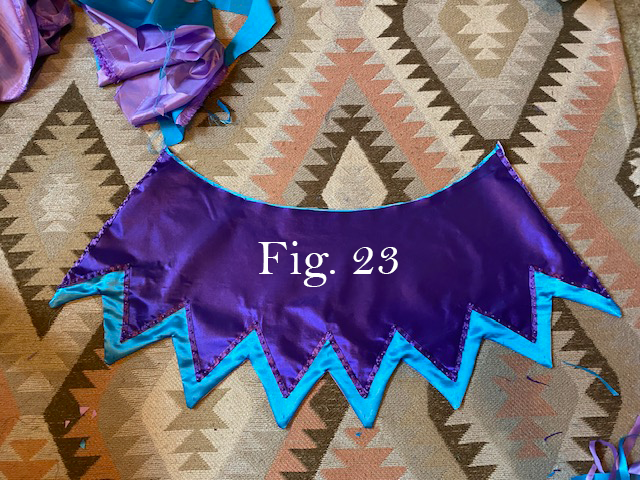
Flip the skirt outside out and iron down the edges. Sew the top part of the overskirt to the bottom part of the overskirt, with the front face of the top skirt facing the back face of the bottom skirt. Flip the top skirt over, iron down the seam, and sew a strip of elastic to act as your closure piece to the front sides of your skirt. Sew your jingle bells onto the bottom of each triangle by hand using the dark sea green embroidery floss.
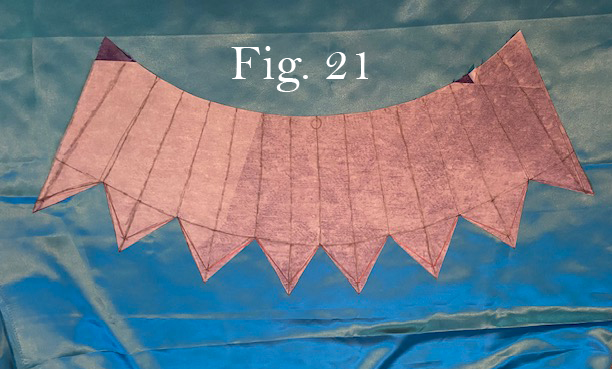
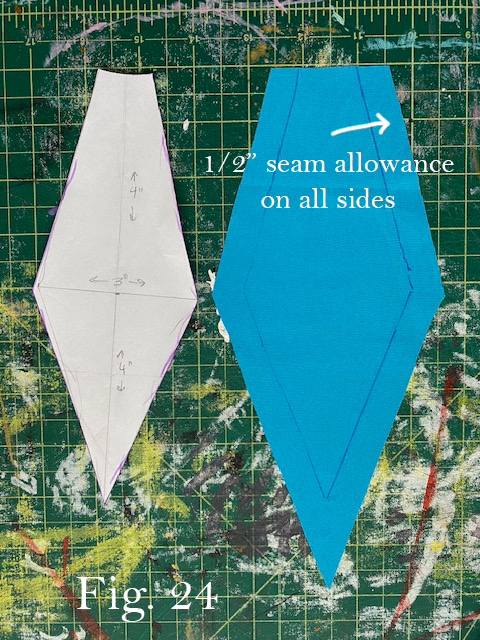
Step 9: Collar
In order to create a set of leaves for my collar, I created a full-sized, mini-length “skirt” pattern for myself once again using the Circle Skirt App, changing the “waist” dimensions to the measurement of my neck. I broke down the sections of the skirt into 10 equal parts, and added in the pointy ends of the leaf shape at the bottom of each part. I used 1 of the leaves to act as my pattern piece, and I cut 5 leaves from my turquoise satin and 5 leaves from my purple satin, cutting 1 of the 5 purple leaves in half.
I sewed the leaves together, alternating between the 2 colors, with the 2 purple half-pieces at each end, and ironed down my seams. I sewed the collar down to the lining fabric, right sides together, and then cut the lining fabric into the shape of the collar.
Next, I flipped the collar to the outside and ironed. I created bias tape from my satin fabric and sewed the bias tape along the edges of my leaves in their corresponding colors, and added some hand-sewn stitches with my embroidery floss as an added detail.
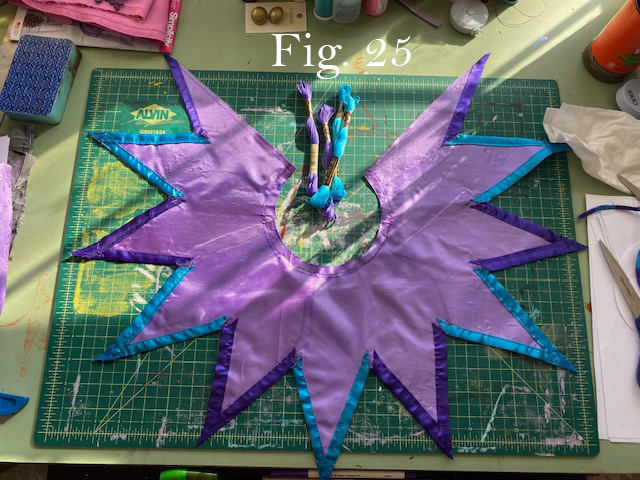
Lastly, I sewed on my jingle bells to the bottom point of each leaf, and sewed a small strip of turquoise fabric with small elastic loops connected to each end to act as an enclosure. I used my remaining 2 shank buttons as the enclosing buttons for the upper corners of the collar.
Step 10: Gloves
For the gloves, you can either trace your arm and hand out directly onto your light blue tricot fabric using the disappearing ink pen, or you can use Yaya Han’s glove pattern. Either will work just as well. I chose to make mine as tight as possible to avoid wrinkles and rolls. Sew the top and bottom part of each glove down using the white elastic thread. You can either glue your black nails directly onto the fingertip of each glove, or you can sew in a “nail bed” made from felt onto each fingertip and glue the nail onto the felt bit using either tacky glue or hot glue. I found that creating a nail bed helped the acrylic nails to bond better with the glue. Finally, paint each nail with a bit of your silver nail polish, mostly at the tips and avoiding the lower part of the nail.
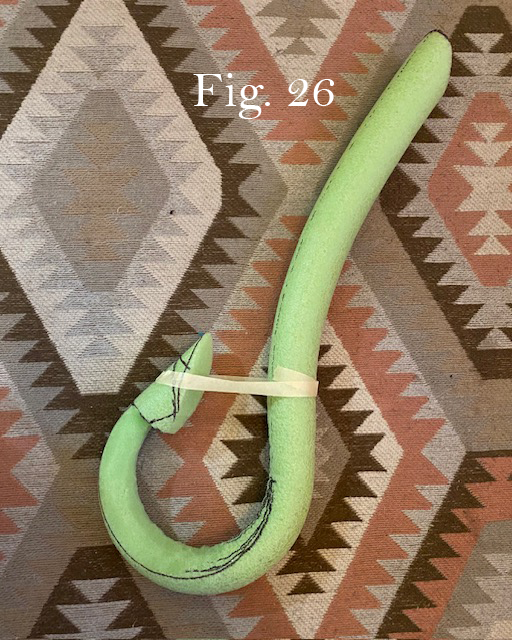
Step 11: Tail
Use a Sharpie marker to draw out the bottom end of your tail onto your pool noodle, to create that upwards-facing point that Alfira has and cut it out. Make sure to cut the top of the tail at a bit of an angle so that it sits properly on your lower back.
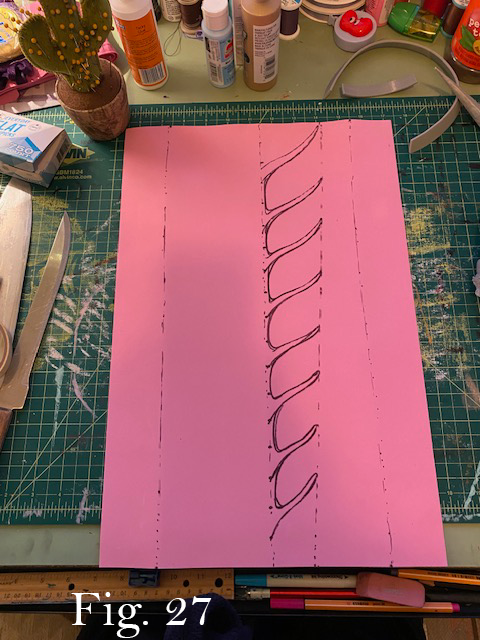
Fold a piece of your thin foam in half and draw out the ridges of your tail, then cut out your ridges. It’s much easier if you have all the ridges connected in the center, that way you have one full piece that is perfectly symmetrical and evenly spaced. (Note: basting spray is excellent for keeping your folded-over foam in place while you draw and cut.)
Glue your foam to the top part of your tail using your tacky glue. Allow it to dry completely.
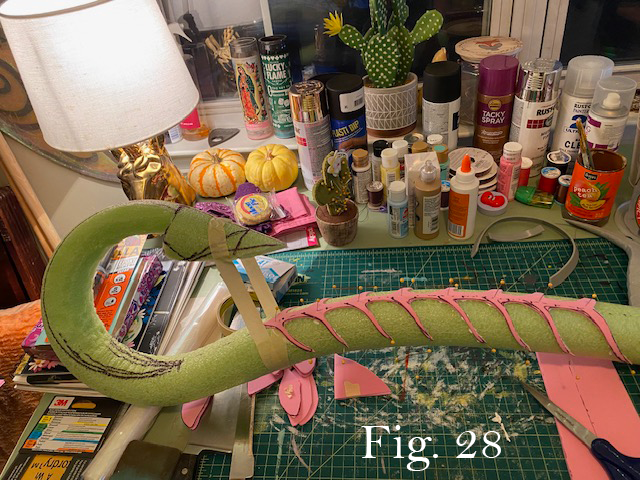
As an extra step, you can paint your tail with foam paint of any color to cover up your Sharpie marker lines.
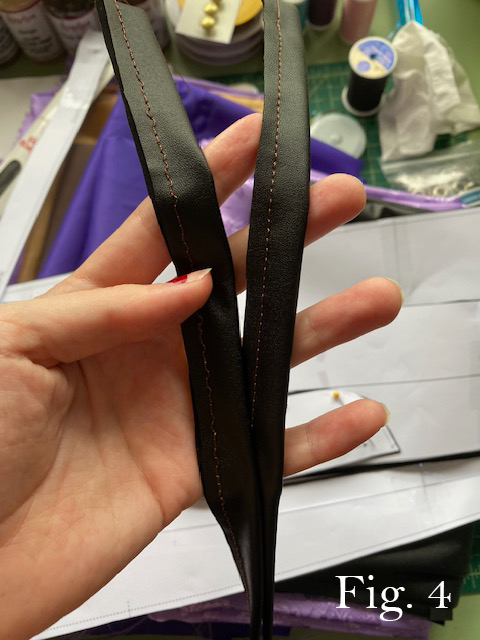
Next, fold your tricot fabric in half and line your tail up to the folded edge so that it lays flush. Trace the other edge of your tail with your disappearing ink all the way from top to bottom. Cut out your tail piece.
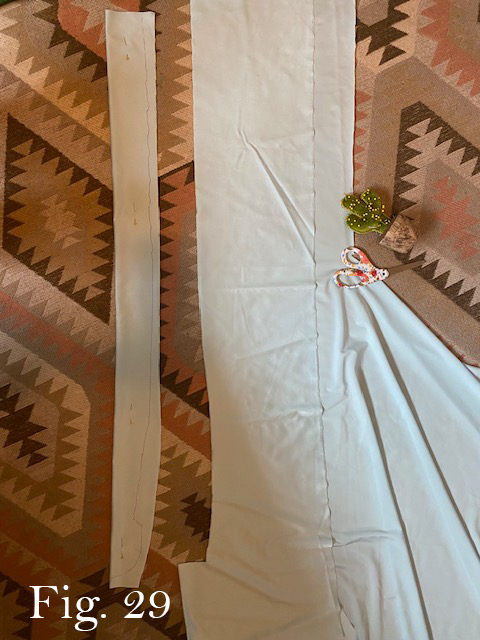
Sew a small strip of folded-over fabric into the seam of your tail similar to how you sewed the detail seam into your leather pants. Flip your tail “sock” outside and tuck your tail into it. Run a length of 12 gauge jewelry wire into the channel you made using the sewn-in folded over fabric tubing. Sew up the top, and attach your Velcro to the slanted upper part of the tail.
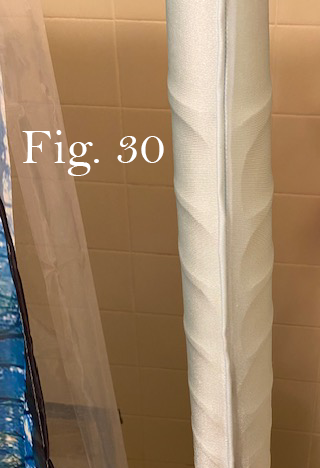
Sew a patch of Velcro to your pants as well. Lastly, Sew a loop of elastic to the top part of your tail, and thread another elastic “belt” piece through that loop for added support.
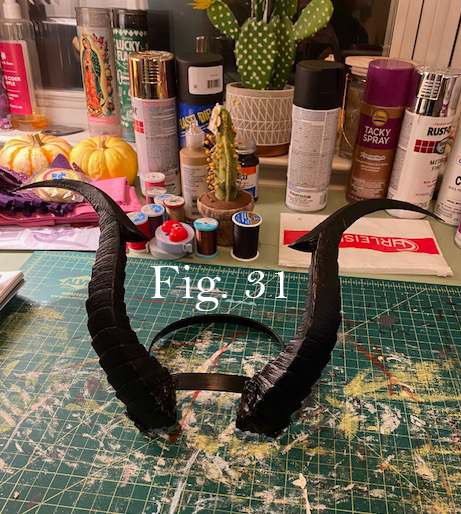
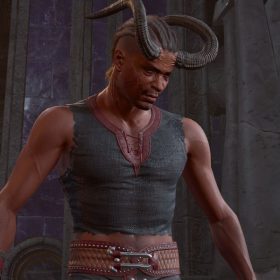
Step 12: Horns
When printing out your horn pattern, please be aware that the pattern also includes horns for Karlach, so make sure you are printing Alfira’s set. Glue your pieces together using the 2 part epoxy. Sand, spray paint, and seal your horns and you’re all set.
Step 13: Ears
Mix a 1:1 ratio of your blue cotton paint and liquid latex. Add one thin layer of paint to each of your larger-sized elf ears, allowing the natural skin color to show through. Use a bit of blush to the tips and ridges of the ears to add more dimension to them.
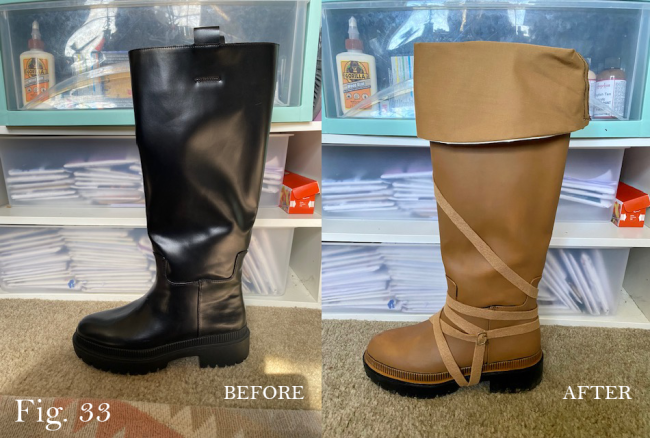
Step 14: Boots
Finally, grab a pair of tall, plain boots and paint them with a layer of beige, then dark taupe, then satchel tan Angelus paint using a regular dish sponge. Create a long strip of bias tape from the dark gold broadcloth and wrap it around each boot, either sewing the edges together or installing a small belt buckle. For the boot flap, use the same idea as the circle skirt method that we used for the collar, except this time using the widest part of your calf as the measurement, plus a few inches.
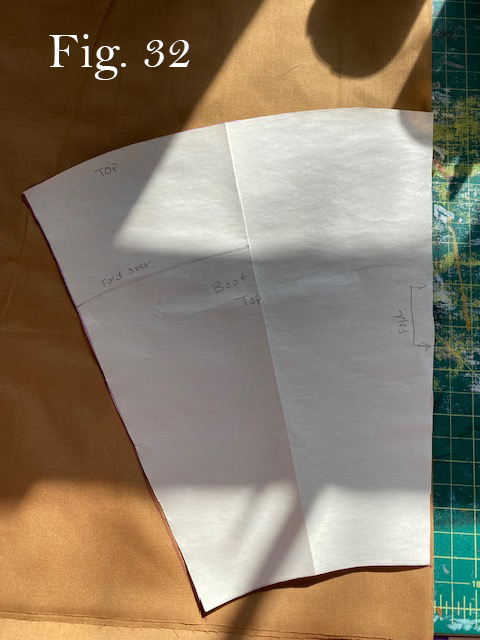
Cut out 4 of these circle pieces to act as both the outside piece and lining piece for both boots. Sew them together, and add a strip of Velcro to each edge. These boot flaps will be tucked into your boot, so they will be removable.
And with that, you’re done! Remember to stay safe… and maybe avoid camping with strangers if you can help it.
“Moon reminds me of your grace
All the love I can’t repay
Rest and know that I will pray
Farewell my dear old friend”
About the Author
Diomira Keane
Cosplayer, artist, cat-lover, party princess extraordinaire.


There are no comments yet, add one below.
Stay connected. Don't miss out!
Get new costume guides in your inbox once a month.


Leave a Comment