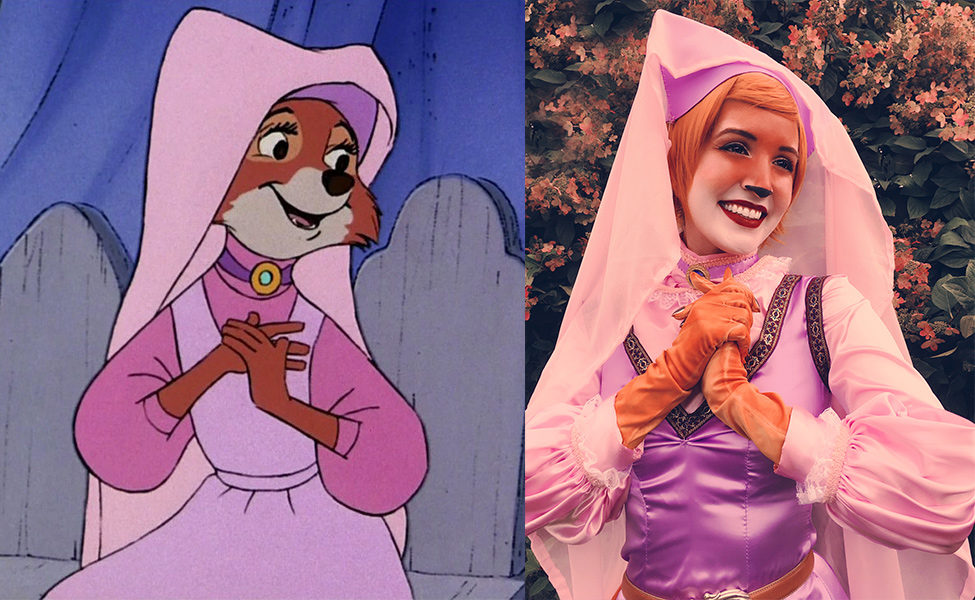
Make Your Own: Maid Marian from Robin Hood
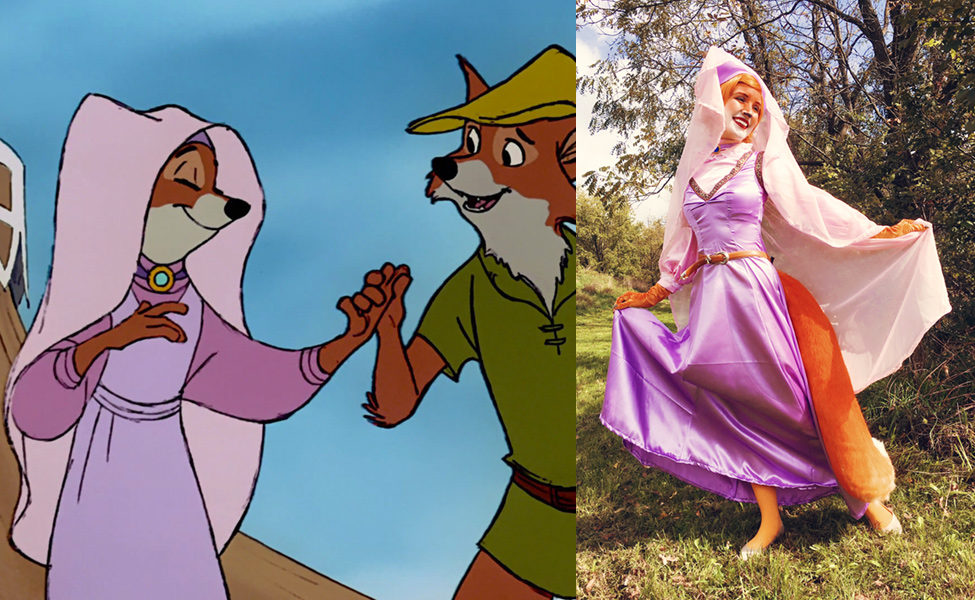
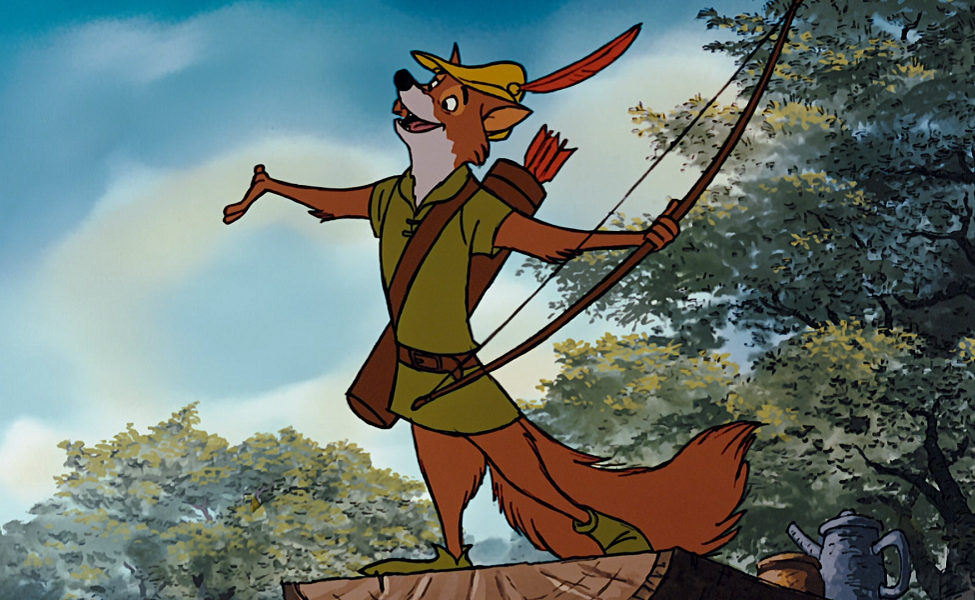
The Bronze Age of Disney saw a great many animal-centric classics such as Oliver and Company, The Fox and The Hound (cue all the tears forever), and of course, Robin Hood. Released in 1973, Disney’s Robin Hood was a sweet little toe bean-footed baby honey bunch who absolutely needed all the snuggles while he took on the bourgeois. But who could forget his foxy lady friend, Maid Marian? When she wasn’t staring wistfully out of windows or playing badminton with Klucky, she was lending her sympathies to the political causes of the fifteenth century – one vivacious vulpes to be sure. Here you will find a tutorial for the intermediate cosplayer on how to make Maid Marian’s signature costume, with a little bit of extra flare, if you like. Enjoy!
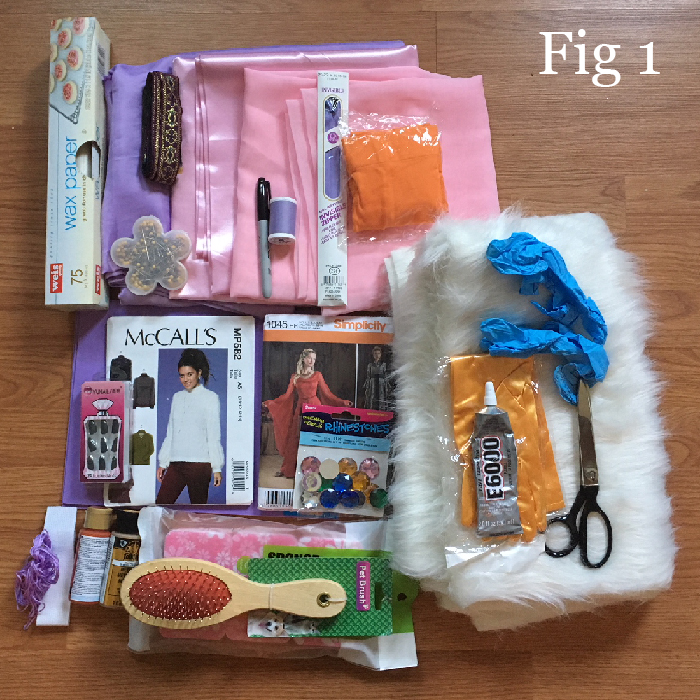
You Will Need
1. About 5 yards of lavender fabric
2. About 3 yards of STRETCHY soft pink fabric
3. About 2 yards of light pink chiffon
4. 1045 Simplicity dress pattern
5. MP582 McCall’s shirt pattern
6. Lavender thread
7. Soft pink thread
8. Lavender embroidery floss
9. 3 sheets of purple 1 ply craft foam
10. Lavender ribbon
11. Large blue craft gem
12. 1 sheet of thick craft foam
13. Gold acrylic craft paint
14. Gold fabric puff paint
15. Hot glue gun
16. Hot glue sticks
17. Sketchbook paper
18. #2 pencil
19. Sharpie marker
20. Scotch tape
21. About 2 yards of white faux fur
22. Burnt orange acrylic craft paint
23. Burnt orange embroidery thread (about 2 rolls)
24. About 1 bag of stuffing
25. 1 pair of orange satin gloves (long)
26. 1 set of black acrylic nails
27. E6000 glue
28. 1 pair of orange tights
29. 20-22 inch invisible zipper
30. Pet brush
31. Dish sponge
32. Elastic
33. Pinking shears
34. Straight pins
35. Disposable gloves
36. Pin backs
37. Wax paper
38. Embroidery needle
39. A belt of your choosing
OPTIONAL SUPPLIES
1. Fancy trim of your choosing (for the dress)
2. Fancy trim of your choosing (for the undershirt)
3. Matching embroidery thread in your choice of color
4. Lace of your choosing
5. A wig of your choosing
STEP 1
I always start with the biggest piece first, so let’s start with her lavender dress. To begin, cut out your Simplicity Dress pattern (pieces #1, #2, #2A, #3, #3A, and #4) on your lavender fabric. Do not cut out the sleeve pieces. Instead, when you construct your dress, make it sleeveless.
Pro Tip: When cutting satin fabric or any similar fabric that frays easily, it is preferable to use pinking shears to keep the fabric from unravelling too much.

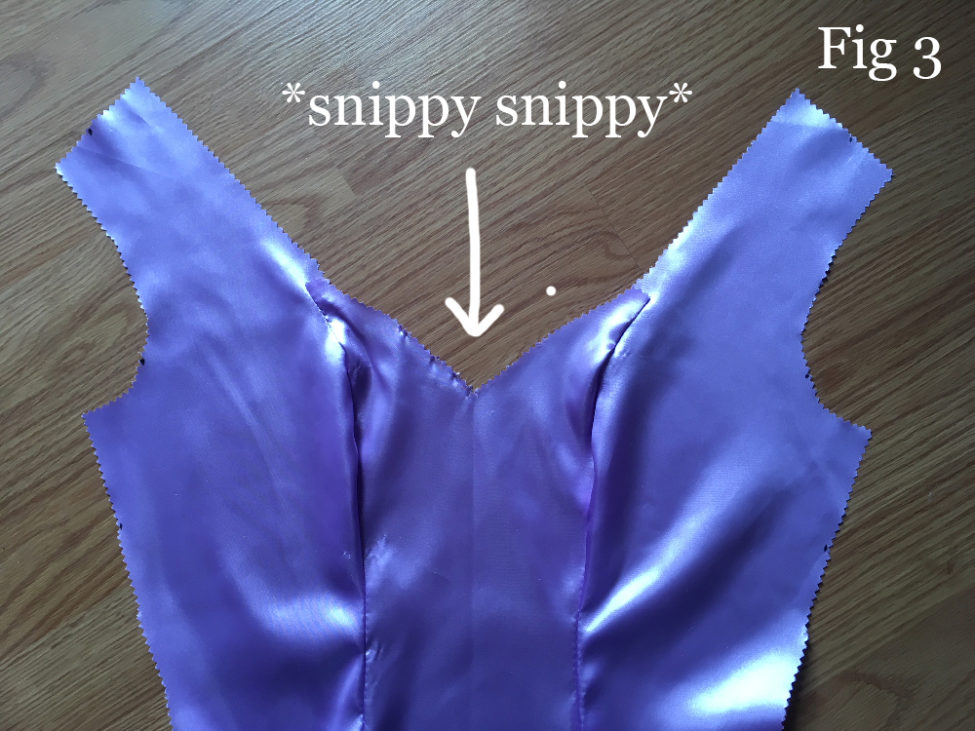
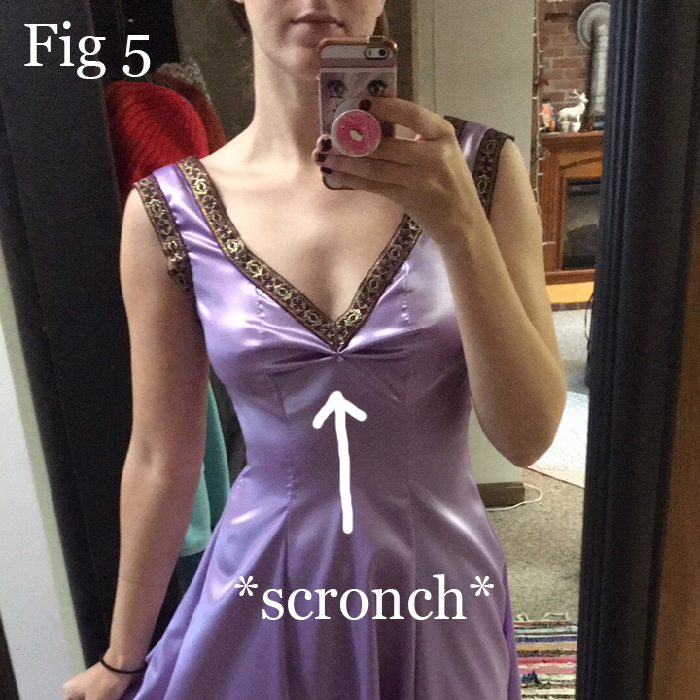
Since Maid Marian’s dress has a V-neck and this particular pattern has a round neck, we are going to make a small adjustment to this pattern. Fun fun! To do this, simply cut a small, triangular snippet out of the neck and voila!
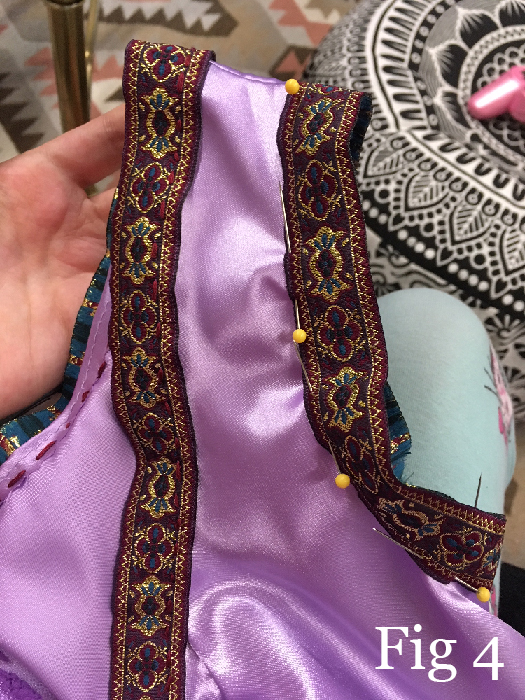
OPTIONAL STEP
After you’ve hemmed the skirt part of your dress and sewn down all the edges, you can now use your straight pins to put any fancy trim you may have in place around the edges of the neck and sleeve holes. With your matching embroidery thread, stitch the trim in by hand.
OPTIONAL STEP
You may notice that since you cut a V-neck into your dress, the overall shape of the upper part of the dress has changed a bit or left more space open in the chest area than the pattern previously allowed for. In order to compensate for this, you can fold a little accordion ruffle into the middle of the torso, right under the point of the “V”. Stitch it together in place with your lavender embroidery thread.
STEP 2
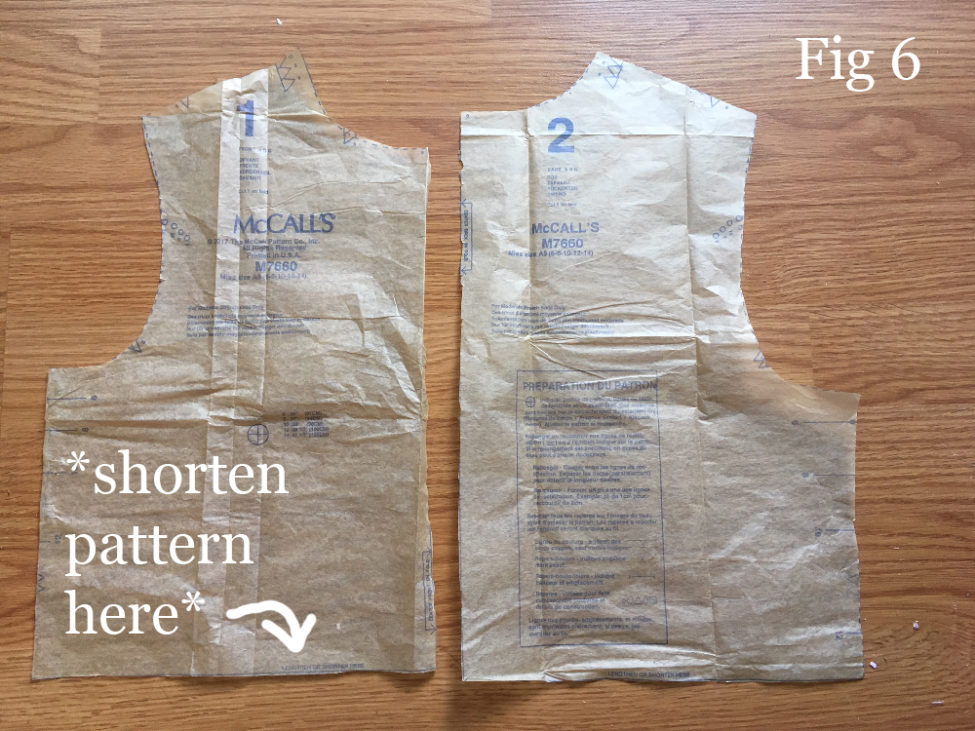
Okay! Moving on to the undershirt. Using your soft pink fabric, cut out the pattern pieces that coordinate with “Style A”. You will notice that pieces #1 and #2 will give you the option to shorten your shirt into a crop top. Since this will be the undershirt, you may choose to do this in order to save yourself some fabric, since this part of the shirt will not be seen anyway.
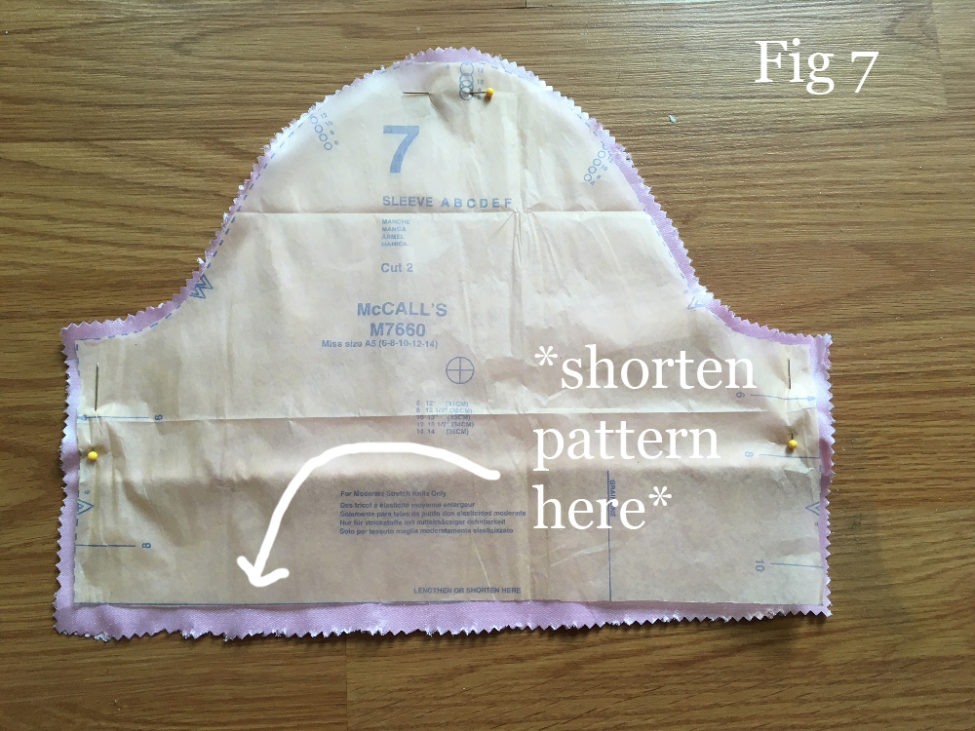
Additionally, you will notice a similar option for sleeve piece #7. Go ahead and shorten that piece, as it will raise the height of the lower end of the sleeves just a bit. Doing this will make the sleeves look more like Maid Marian’s undershirt.
Pro Tip: Don’t forget, this pattern calls for semi-stretchy fabric since it has a turtleneck!
STEP 3
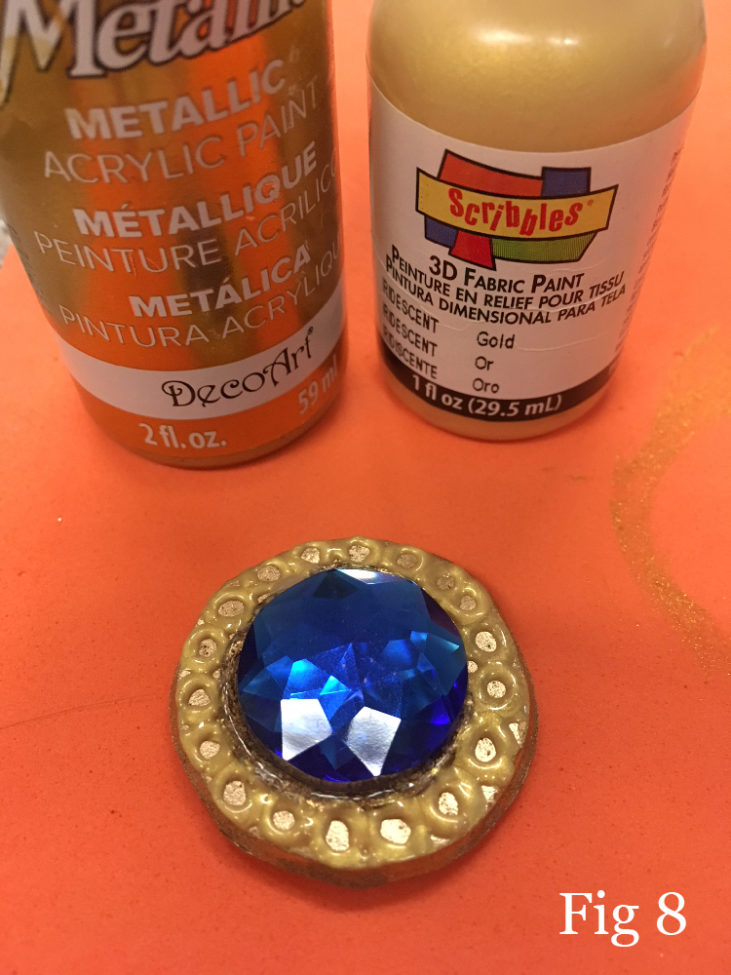
Now it’s time to make Maid Marian’s blue gem. You can simply glue a pin back on to your large blue gem using E6000 glue OR hot glue, or you can choose to make it fancy-shmancy by adding a gold border to it.
If you’re going the fancy route, cut out a small circular piece of thick foam that is slightly larger than your gem and paint it gold. Next, using your hot glue, attach the gem to the foam. Lastly, add in a quaint little design around the border of your gem using your gold puff paint, glue a pin back to the back of the foam, and you’re good to go!
STEP 4
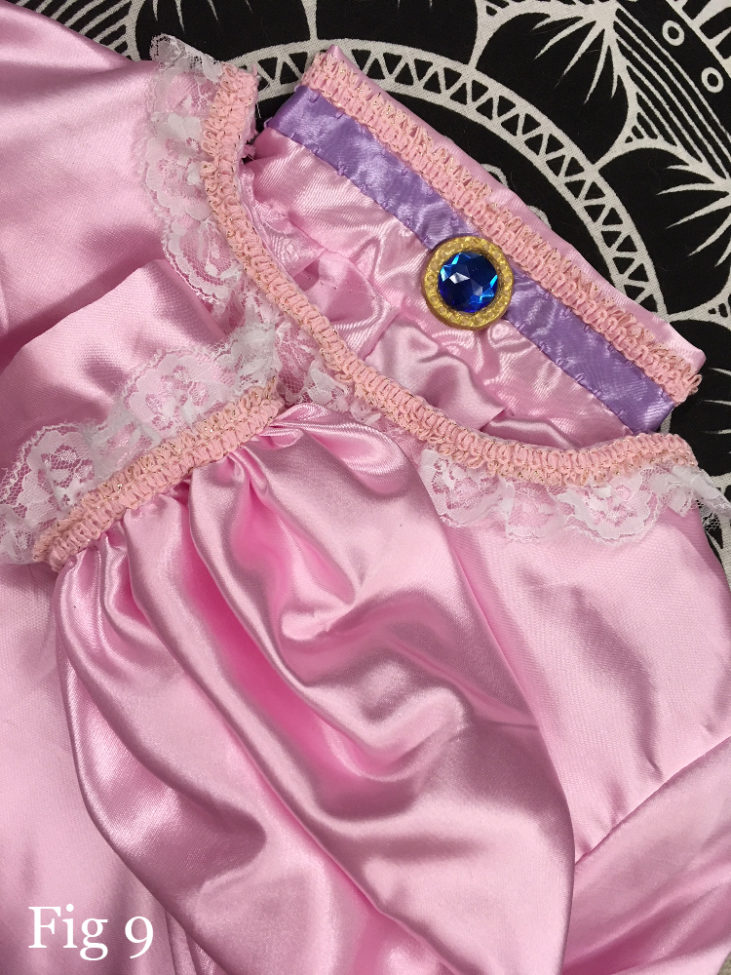
Using your lavender embroidery thread, sew your purple ribbon around the turtleneck collar of your undershirt.
OPTIONAL STEP
If you’re really feeling extra, now is the time to add some trim and lace to your undershirt as desired. It is advisable that you do so by hand, using your choice of embroidery thread.
STEP 5
Pin your blue gem to the turtleneck collar of your undershirt. All done!
STEP 6
Now that you’re all done with the main part of the costume, it’s time to focus on the accessories. Next up: Maid Marian’s hat!
To begin, draw out your design on a few pieces of sketchbook paper using your #2 pencil. These pieces should include a FRONT PIECE which curves at the bottom around the frame of the face a bit, a BACK PIECE which is almost identical to the front (minus the curve that goes around the face), and a TOP PIECE which connects the two at the top.
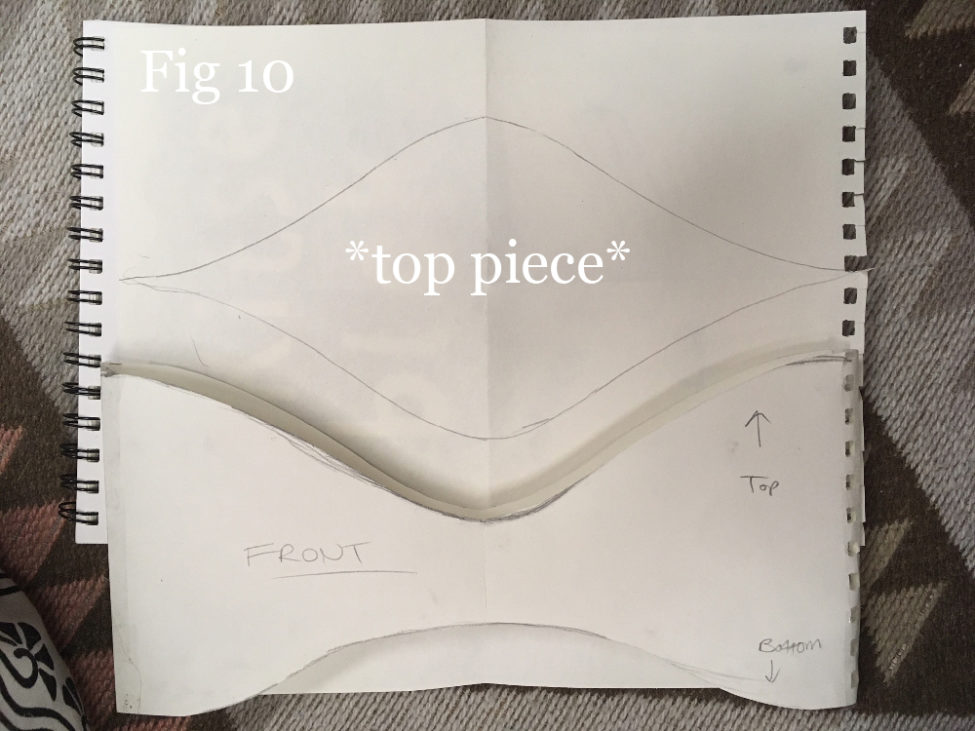
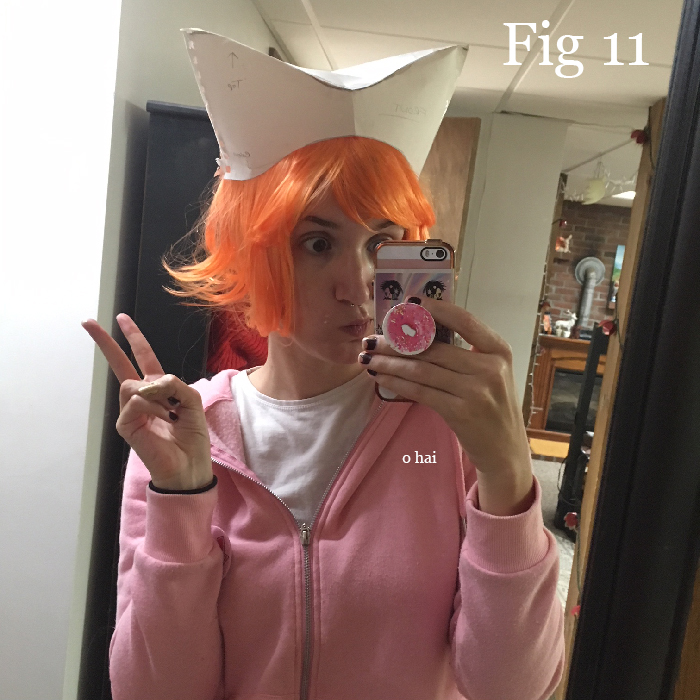
Maid Marian’s hat vaguely looks like 2 little fox ears, so keep this in mind as you’re making your design. It’s okay if it takes you a few tries! Cut out your pieces and tape them together, creating a mockup of your hat, as shown below in Fig 11:
STEP 7
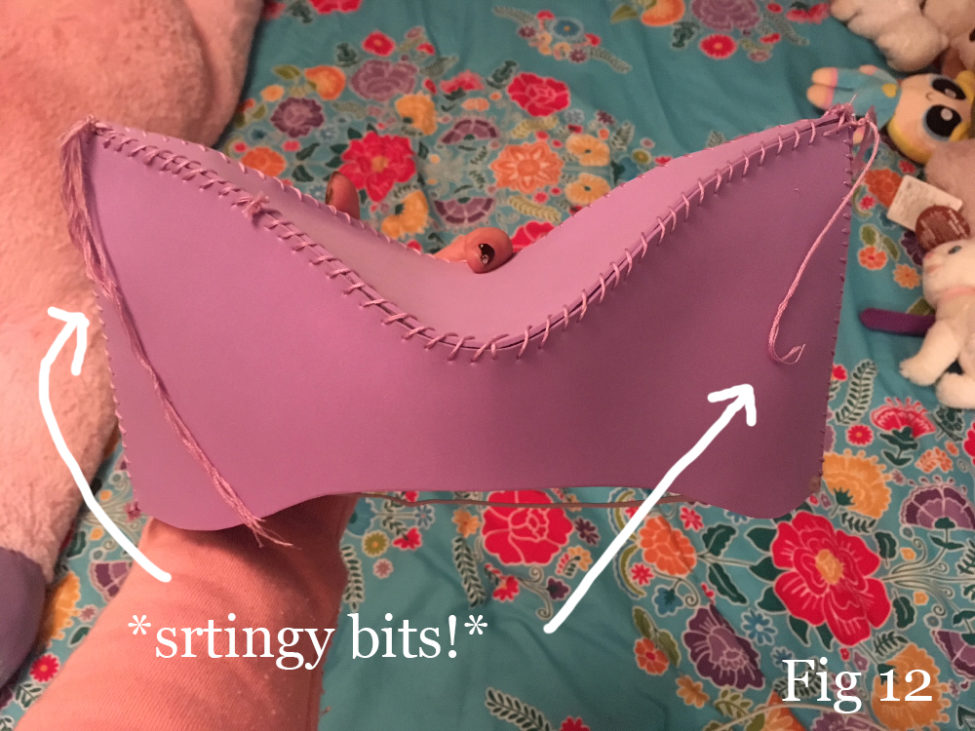
Now that you have all the pieces of your hat fleshed out, it’s time to trace them onto your purple foam. Cut the pieces out and tape them all together just like you did for your mockup, except this time, tape the inside so that the tape is hidden. You will notice that the tape won’t hold too great, and that’s okay! Using your lavender embroidery thread, you can sew little anchors around your hat to keep it all in place when you’re done taping.
Next, take your embroidery thread once more and sew the pieces of your hat together. Be gentle though; you don’t want to pull the thread too hard, otherwise your foam might rip. The tape will act as a protector against this, but it’s better to be safe than sorry.
After you’re all done sewing your pieces together, leave a few little strands of embroidery thread hanging at the top 2 corners of the “ears” of your hat. We will be using this thread to sew through the chiffon veil and anchor it to the hat.
STEP 8
The last step in finishing your hat is to attach an elastic band around the bottom. This elastic band can be pulled around the back of your head to keep your hat in place. To attach the elastic, simply use your embroidery thread.
Pro Tip: Since there might be a lot of pulling and tugging on the elastic, it’s a good idea to put a drop of hot glue on top of your stitches where you attached the elastic to keep the foam from ripping.
STEP 9
Time for the veil! Fold your chiffon fabric in half and, using your pinking shears, cut the corners down until, after you unfold it, it looks like one big oblong shape. Next, hem the edges by hand using your soft pink thread. Once you’ve done that, it’s time to attach your veil to your hat using the embroidery thread anchors that you’ve left for yourself. And with that, your hat is complete!
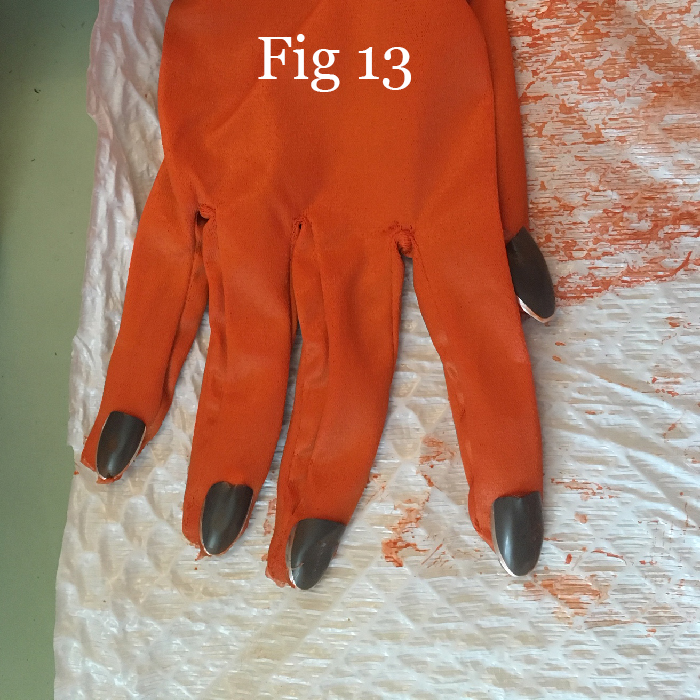
STEP 10
Moving on to the paws. The paws are very simple, but can get a bit messy. To make your paws, simply put on your orange gloves and, using your E6000 glue, attach your black nails to the tops of the fingers. That’s it!
STEP 11
The tail. Oh boy, the tail. This part is like, really fun you guys. First, fold your fur fabric in half and draw out your tail design on the back of the fabric. Once you have a design you are satisfied with, you can go over your lines in black marker. (You can also experiment with designs using wax paper if you prefer). Cut out your design on the folded-over fabric in order to get 2 identical, mirrored pieces.
Since I had a hard time finding faux fur in the color I wanted, I bought white fur instead and chose to dye it using burnt orange acrylic craft paint.
To make your dye, simply put a little less than half your bottle of paint into a bowl and mix it with roughly 3 cups of steaming water. Your dye should have the consistency of watered-down milk. You definitely do not want your dye to be too thick with paint, otherwise your fur will become sticky and hardened.
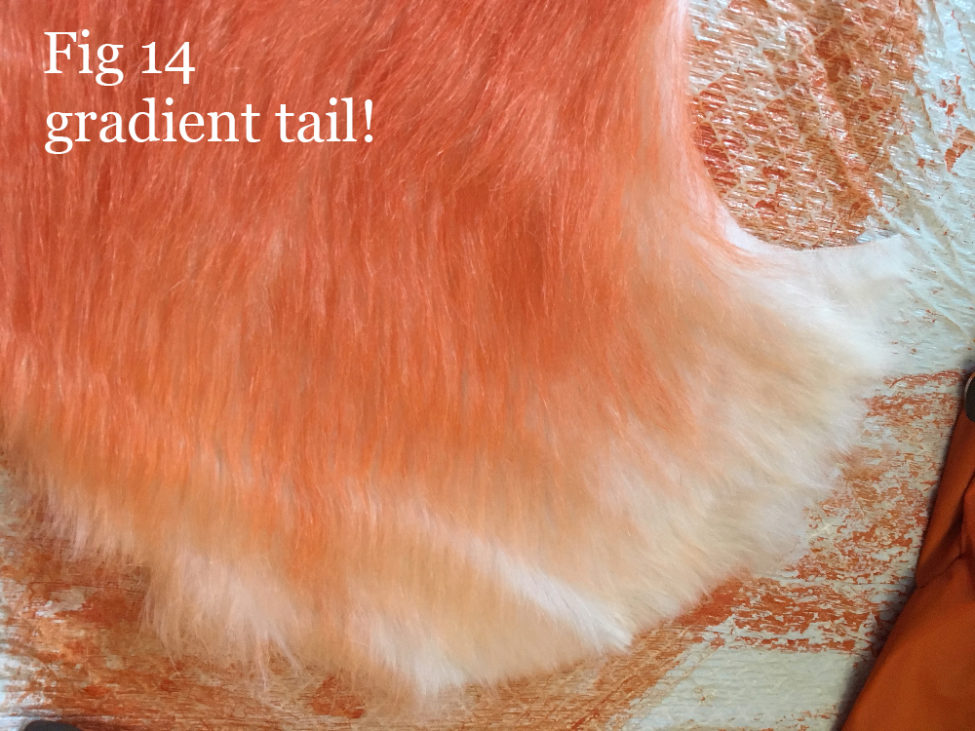
Next, take your sponge and dip it into your dye mix. Gently drag your sponge along your fur in the direction of the fur. Alternate between dabbing your color onto your fabric and brushing it through with your pet brush. If you like, leave the very end bit of your tail white so that it has a gradient effect at the bottom. Brush your pet brush through the fur in the opposite direction of the fur as well to ensure maximum coverage. You can blow dry your fur to speed up the drying process or simply leave it out to dry. You may, however, want to keep an eye on it as it dries to make sure that none of the fur “stiffens up”. You can do this by regularly running your pet brush through it as it dries over time.
STEP 12
Next, lay your tail pieces on top of each other with the fur facing up. Stitch the two pieces together by hand using your burnt orange embroidery thread. Leave a generous hole at the top of the tail and fill it with stuffing. When it is filled up to your liking, stitch it shut and attach a loop of elastic to the very top. You will thread your belt through this elastic loop to hold your tail in place.
If you would like a visual, more in-depth (but easily digestible!) look at how I made my tail, check out my tutorial on YouTube where I walk you through the process.
Interested in a good old fashioned makeup tutorial? I’ve got you covered for that, too! Check out my YouTube video on how to get the full Maid Marian look.
And… that’s it! Now you’re all set to go on adventures with your fox boyfriend and rebel against all sorts of oppressive regimes, you saucy vixen, you!
About the Author
Diomira Keane
Cosplayer, artist, cat-lover, party princess extraordinaire.

4 Comments
Leave a Comment
Stay connected. Don't miss out!
Get new costume guides in your inbox once a month.


Please do the how to make the Maid Marian costume and do the closeup pictures of the shoes.
By the way, I love your costume.
Used this to make a Maid Marian crown and dress for my toddler for Halloween, thanks for the great idea! For the crown I used a stiff felt (like felt paper) and a zigzag stitch on my machine bc I wasn’t sure if toddler playing would rip the foam. Your pattern idea made my project turn out much better than I would’ve on my own – thanks!
This is fantastic, Miss Fox!
By the way-I’m sorry this doesn’t have more comments. Not only is this cute I love the fact people are still celebrating this wonderful character. You do her justice and deserve more praise. This has been shared in tons of places so even if you might not get a ton of people talking here a lot of people really love your creation. I hope you’re doing okay and that the love Robin and Marian share shines plenty of loves light into your life, too. Thank you for the smile as I really appreciate it.