Make Your Own: The Mandalorian
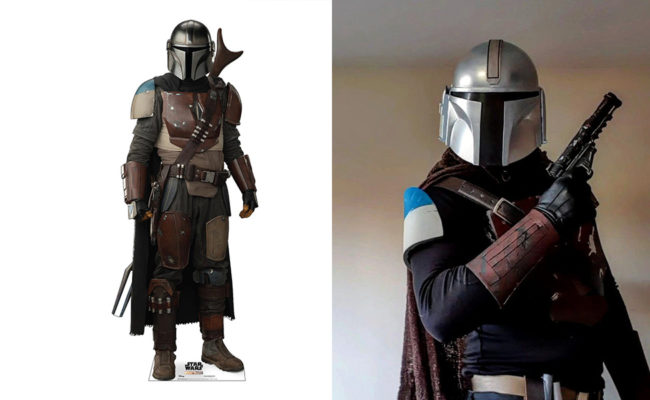
In the Disney+ hit Star Wars series The Mandalorian, set between the events of the Revenge of the Jedi and The Force Awakens, you follow the title character Din Djarin (Pedro Pascal), a bounty hunter of Mandalorian origin (the same as Boba Fett, who decides to protect The Child, a powerful baby from the same species as the Jedi master Yoda, who is being targeted by other bounty hunters for unknown reasons.
Follow this guide to make your own Mandalorian costume. All it requires are the following materials, being handy with a utility knife and heat gun, and some elbow grease. And don’t miss our beginner costume guide for other popular Star Wars characters for the rest of your crew.
Materials
Helmet
Armor
- 5mm EVA foam
- 1mm EVA foam
- Black long-sleeve tactical shirt
- Black tactical trousers
- Brown shotgun shell belt
- Balaclava
- Dark brown woven poncho
- Elastic strap
- Black leather gauntlet gloves
- Silver paint marker
- Blue, Brown, Sand, Silver acrylic paint
Tools
Part 1: Helmet
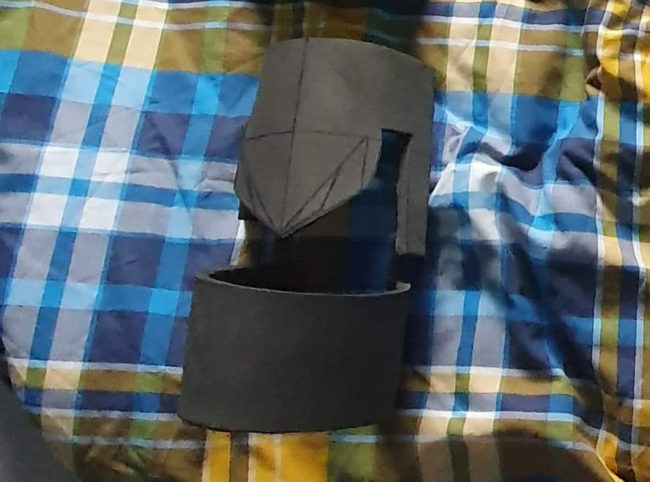
Begin by masking the visor with masking tape and then lightly sanding the two halves of the helmet. When finished sanding, remove any excess dust with a damp cloth. When dry, attach the two halves together using superglue on the inside of the helmet. Once the glue has cured, apply flexi polyfilla to the gap that runs across the top of the helmet.
Once dried, sand any excess filler so that it’s flush with the helmet, and with a cloth removes any dust or dried filler and then prepare to prime the helmet.
Using a flat grey primer, give the helmet long even sprays, keeping the can approximately 30cm away from the helmet.
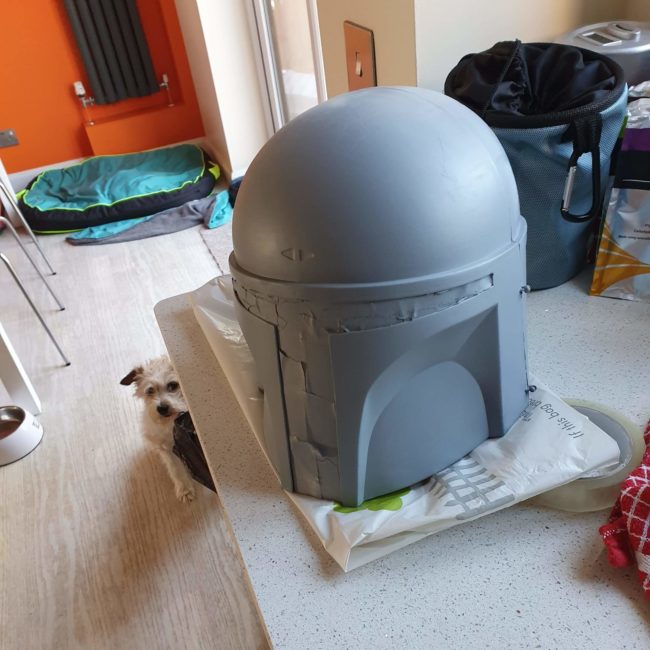
When dried, follow the same steps now using the chrome spray paint. Give the spray paint 24 hours to fully cure (this may require 2 to 3 coats).
When you’re happy with the helmet, take a measurement from the top of the visor lip round all the way down to the bottom back of the helmet. Using the 1mm foam, cut a strip at around 3-3.5cm wide and then the length of the helmet long. With a black sharpie, add the black trim to the fin of the helmet.
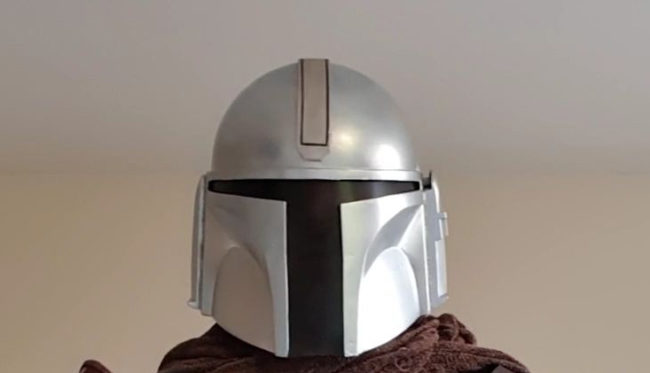
You might want to use the 5mm foam to cut out strips that can fit within the helmet to pad it out so that it fits your head more comfortably.
Part 2: Chest Armor
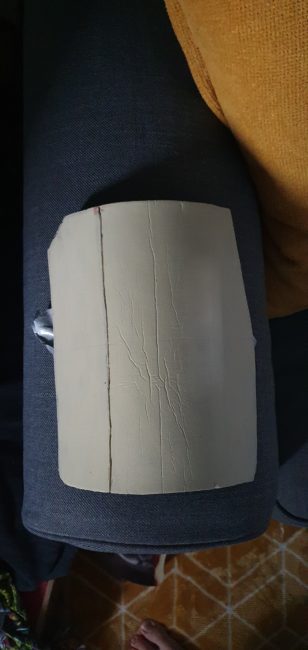
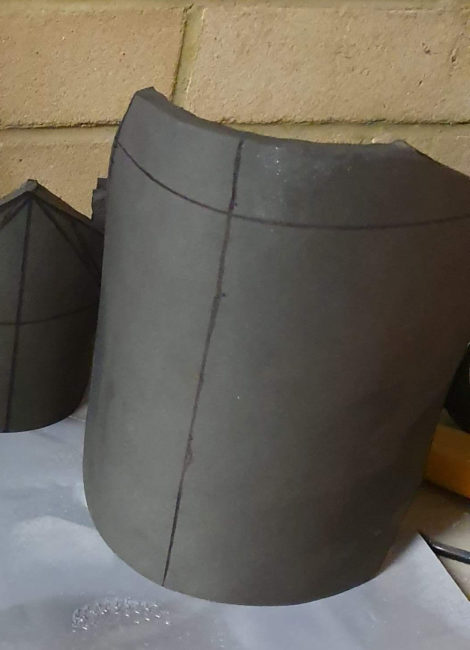
Take measurements from across the top of your chest starting a couple of centimeters from your armpit and ending in the same place on the other side. Then take a measurement from the top of where you took your first measurement to just below your ribs. Then draw these measurements on to your 5mm foam in the shape of a T, drawing the line down from the centre of your top line.
Then make the T onto the square/ rectangle by connecting the edges. Once connected, begin to shape the bottom of the armor to a rounded point with a sharpie (shape shown in picture) and then cut out the chest piece.
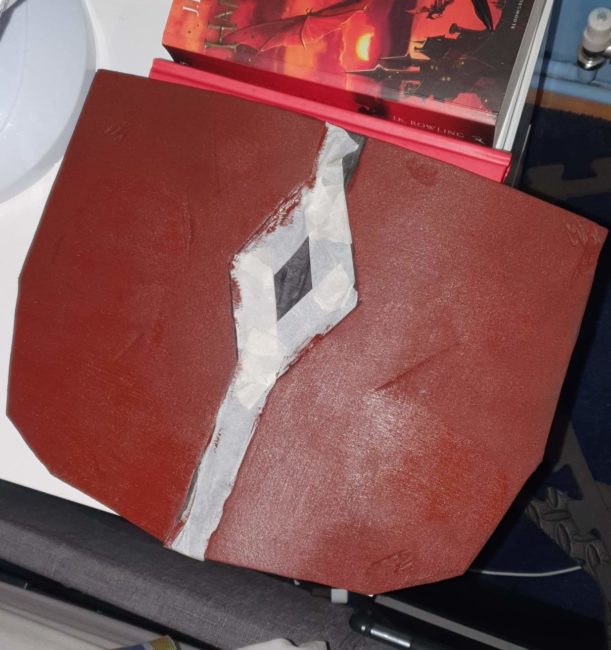
Put on your black shirt and mark out with a sharpie the outline of where you want the chest piece to sit (you may need another person to help). When marked out and happy with the placement, paint the chest piece brown acrylic paint. Once dry, glue gun the back of the armor to your compression shirt where you marked out. When on the shirt, apply pressure for about 30 seconds and then leave to dry.
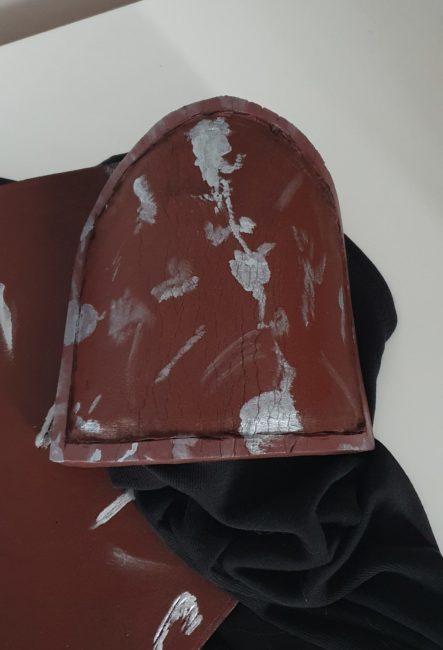
Part 3: Shoulder Armor
Measure halfway around your bicep and then take a measurement from the top of your shoulder down to where you wish the armor piece to end. Draw the length of your bicep in a straight line across the EVA foam and then a line of the length from your shoulder to bicep in the center of the first measurement going up. This will create an upside-down T. Then connect the ends.
When making the left shoulder piece follow the exact same steps only add an extra 3 to 4 cm to the length and when connecting the edges make the lines longer and slightly thinner than the width of the right shoulder piece.
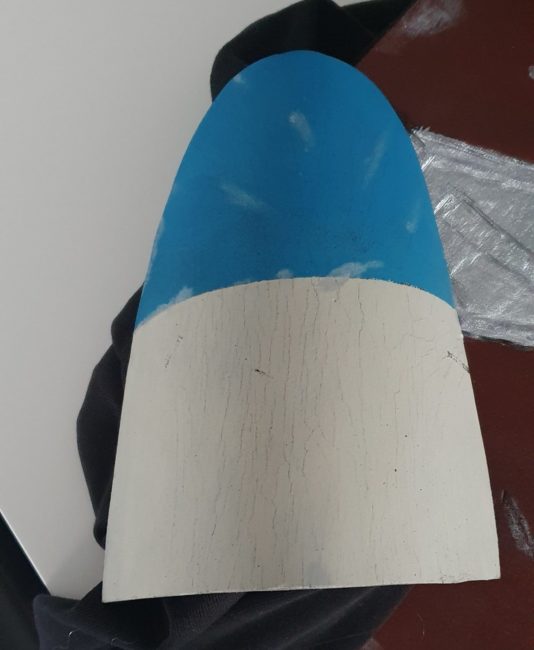
For the edging of the right shoulder piece, use a lighter color from what you plan to paint the shoulder piece with paint around the edges with the lighter color. When happy with your look, heat form the foam and round it until it comfortably sits on your shoulder.
Next, cut the elastic strips to the length of the back of the shoulder piece and then superglue the elastic straps to the inside edges to allow your arm to slide through. Or mark out where you want the shoulder pieces to sit on the shirt and superglue to the shirt.
Part 4: Gauntlets
Take measurements from around your wrist and your forearm (to the point of where you want to go on the gauntlet to end). Be sure to allow a few extra centimeters for when wearing clothing.
Join the edges of them horizontally and cut out. When cut out, heat form around your arm. Once heat formed, sand or Dremel the first 2 to 3 cm of the inside to allow your hand to pass through easier when glued together.
Glue together using superglue and allow it to cure, using elastic bands to help keep the shape while it dries.
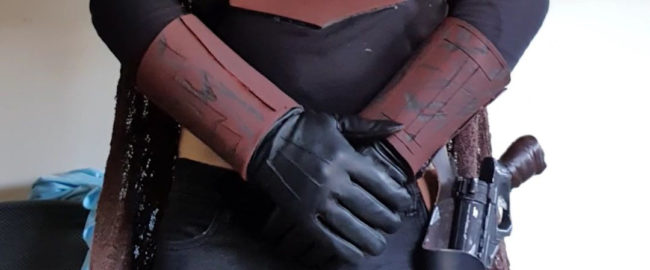
When dry, pencil on any battle damage you may wish to add to gauntlets and then using a utility knife, cut in the battle damage. Paint the gauntlets your desired color using acrylic paint. When dry, add silver paint by dry brushing the silver into the dents and scratches of the battle damage.
Part 5: Thigh Armor
Take measurements around the top of your thigh and a measurement just above your knees, as well as taking the measurement between the two points you have just measured around. Draw these measurements onto the 5mm foam in the shape of an I with the knee measurements being at the bottom.
Left Thigh
Connect the edges to form a rectange. From the top righthand side, mark a measurement 2 cm in and cut a diagonal line to the righthand side as shown in the picture. Then cut the left hand corner off in a straight line and then round the bottom edges.
3 to 4 cm from the left-hand side inwards, draw a straight line down through the thigh piece and then cut down the line with a utility knife, not going all the way through the foam, but only cutting in about a couple of millimetres.
Then heat the foam using your heat gun until the piece sits around your thigh comfortably. Then attach elastic straps to the back of the piece, allowing room for your leg to pass through. Or mark out on trousers and then glue to the trousers.
Right Thigh
Repeating the process of the left thigh piece, take the same measurements but on your other thigh and draw the measurements onto the foam into the shape of an I. Create a rectangle connecting the edges, then cut off the top corners in a diagonal line and then round off the bottom edges
Next, keep the foam until it fits comfortably, then attach elastic strap with glue on the inside edges or mark on the trousers and glue to the trousers
With the 5mm foam, cut out a strip the length of the thigh piece and about 3 to 4 cm wide, and glue it down the middle of the thigh piece.
Part 6: Shin Armor
Left shin
For the top half of the shin piece, take the measurement halfway around the knee. Transfer the 5mm foam in a straight line from the centre of the line for a line 8 cm down (needs to be able to cover your knee) and then another line parallel to your first line 2 to 3 cm less than the original measurement.
Then connect the edges forming a square shape. Heat form to fit around the knee. Attach the elastic straps or glue to trousers.
Take a measurement a few centimeters below your top piece. Measure around your leg and draw a straight line of the measurement onto the 5mm foam. From the beginning and end of your line draw a 8 to 9 cm line down by either end and then connect them. Cut out the strip, then heat until it fits around your leg. Finally, attach either the elastic strapping to either end or attach to trousers.
Right shin
Take the measurement from the bottom of your leg (just below your ankles) to below your knee. Then measure halfway around your lower leg and half way around below your knee. Also take the measurement from the bottom of your leg to below your knee. Draw the measurements onto the 5mm foam in the shape of an I.
Connect the edges of the top measurement and the bottom measurements in a horizontal line, then cut out the shape. Cut off all corners in a straight line and then heat to fit around your leg. Finally, attach the elastic strap the back edges of the piece or glue to trousers.
Part 7: Finishing Touches
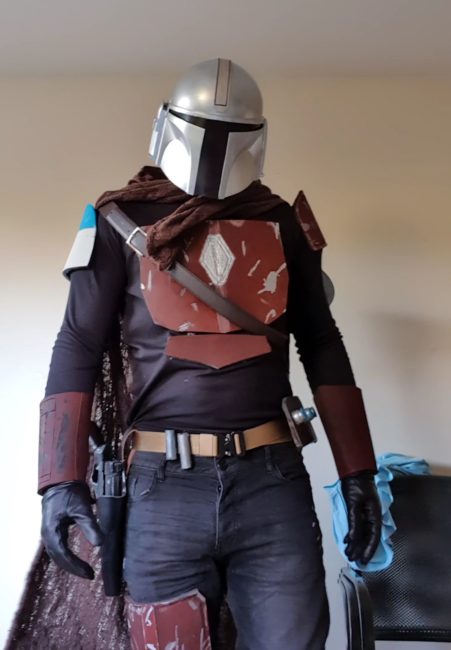
As described in earlier steps, go ahead and paint your pieces to give the desired color and battle worn effects. Combine the armor you’ve made with your other pieces, such as your gloves, belt, and helmet. With that, you’ve created your very own, very respectable, Mandalorian cosplay!
About the Author
Tom
On television, film, music, and all the rest.
3 Comments
Leave a Comment
Stay connected. Don't miss out!
Get new costume guides in your inbox once a month.


Soooo cool!!!
GREAT COSPLAY AND TUTORIAL BUT YOU DID NOT PRIME YOUR FOAM AND IT LOOKS A LITTLE BIT BAD :(. PLEASE PRIME YOUR FOAM NEXT TIME. I USE A THIN LAYER OF PLASTIDIP AND IT MAKES A HUGE DIFFERENCE :). THIS WILL CAUSE IT NOT TO CRACK WHEN YOU SHAPE AND PAINT IT :). SEALING WITH A CLEAR LAYER OF SPRAY PAINT CAN ALSO MAKE A HUGE DIFFERENCE. GOOD START THOUGH!
Great, thanks. Saludos desde Chile.land of mandalor