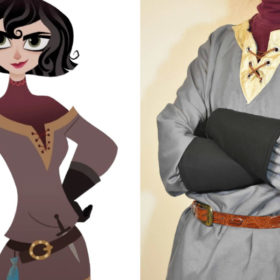
Make Your Own: Suu from Clover
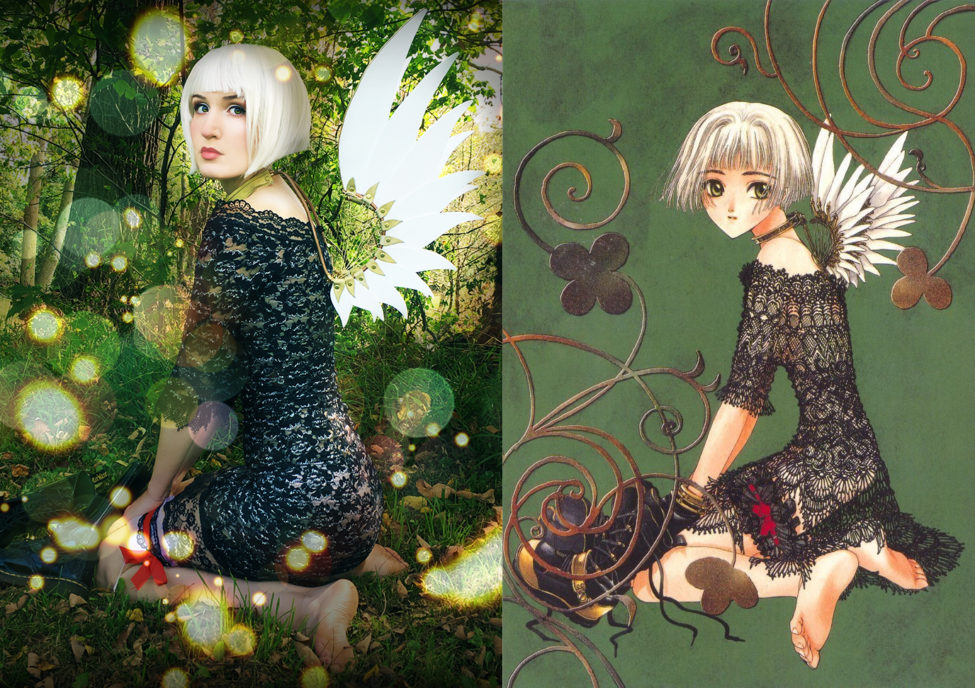
For those of you who are familiar with shojo manga, Clover may hold a special place in your heart. Despite not being especially well-known, this CLAMP series is both surreal and touching. Though the style of the manga illustrations themselves are surprisingly minimalistic, much of the promotional artwork is exceptionally detailed, and arguably serves as one of the best examples of the steampunk aesthetic that is sometimes seen repeated throughout many works of manga and anime.
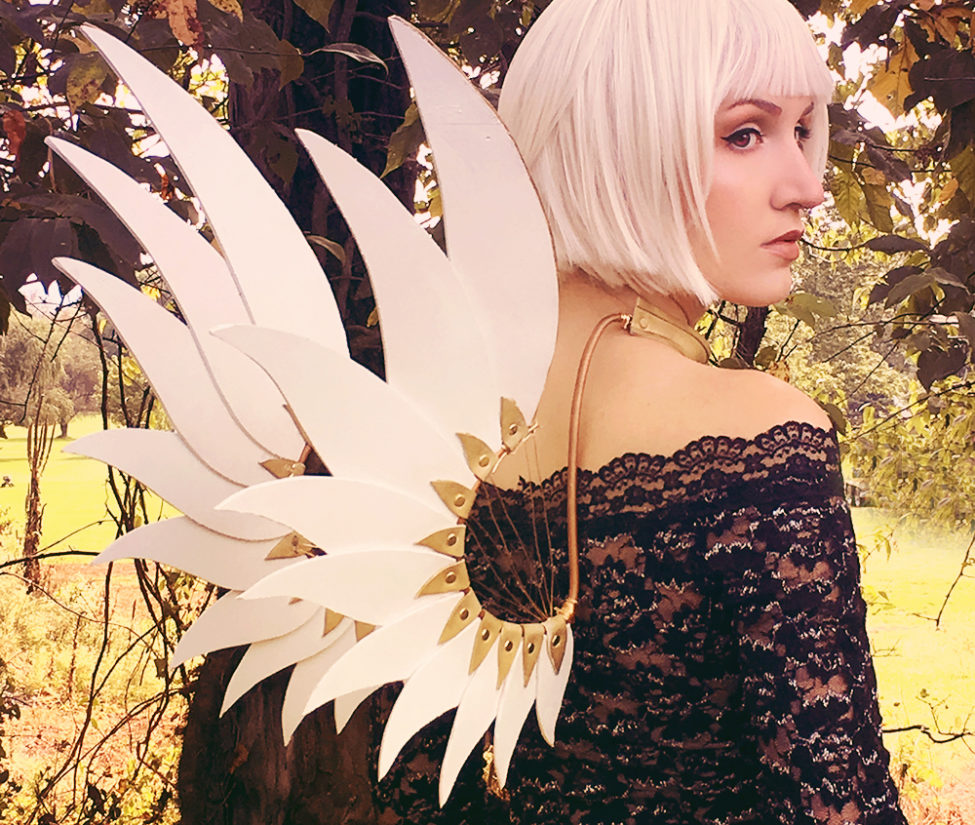
In this tutorial, I will be presenting you with a step-by-step guide on how to make Suu’s entire costume. Suu, one of the main leads of this story, is seen on the front cover of the very first issue in a black lace dress, wearing a pair of small mechanical angel wings – an iconic image of the series. To start, let’s begin with the most challenging aspect of this costume; the wings themselves.
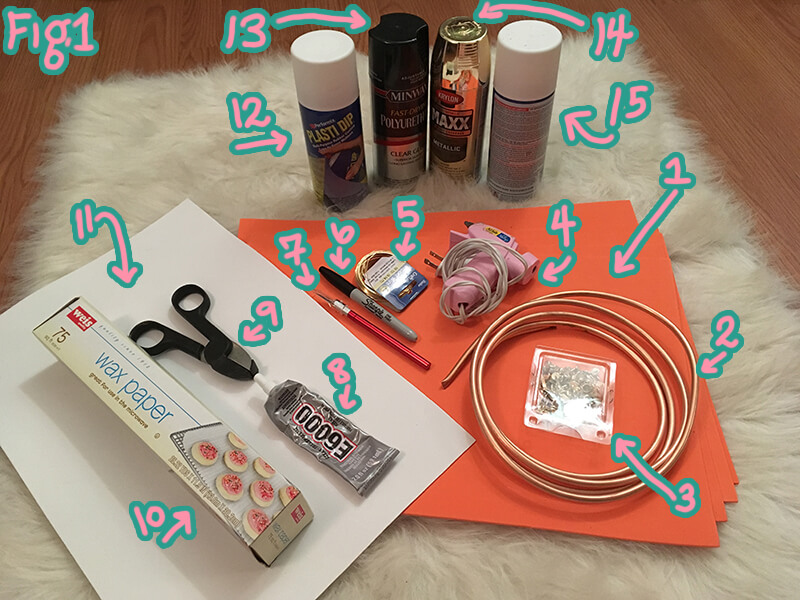
Supplies
1. Thick craft foam (at least 2 sheets)
2. Copper wire (found at Home Depot or Lowes)
3. Paper fasteners (1 pack)
4. Hot glue gun and glue sticks
5. Thin jewelry wire (1 pack)
6. Sharpie
7. X-acto knife
8. E6000 glue
9. Wire cutters
10. Wax paper
11. Thin craft foam (at least 1 sheet)
12. Plasti Dip (at least 1 can)
13. OPTIONAL: Polyurethane (1 can)
14. Gold spray paint (1 can)
15. Glossy white spray paint (at least 1 can)
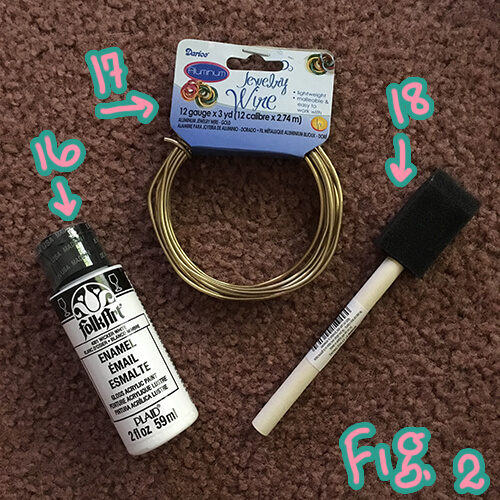
16. OPTIONAL: Glossy white acrylic craft paint
17. 12 gauge jewelry wire (1 pack)
18. OPTIONAL: Sponge brush
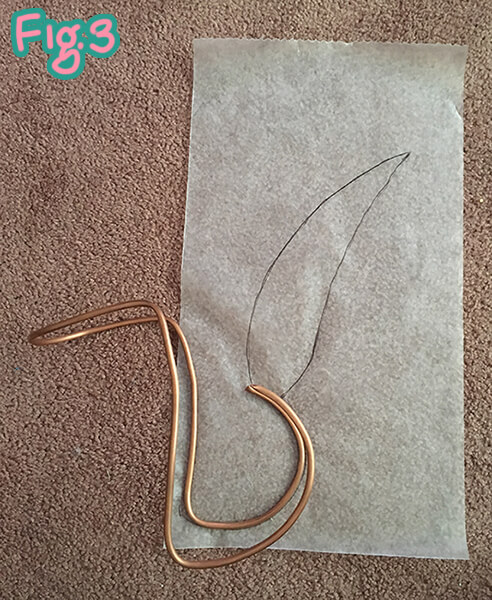
STEP 1
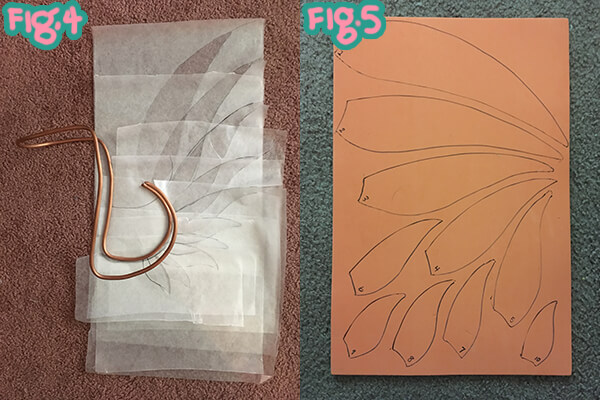
To begin, start from one end of the copper wire and begin to bend it into the shape shown in Fig. 3. This will be the base for the wings and will also serve as the “choker” piece from which the wings extend. Copper wire is extremely flexible, so it may take some manipulation before you arrive at your desired shape. This base piece will go around your neck, down your back, and then arc upwards slightly at the ends. Work this shape into the wire before trimming any excess. When you’re satisfied, you can use the wire cutters to clip away the extra copper. Next, grab a piece of wax paper and lay your base piece on top of it. Using a Sharpie, trace the “arc” shape at the end of the base, and from there, begin by drawing the first leaf of your wings.
STEP 2
Continue using new sheets of wax paper to draw each leaf of the wing, making sure to align each new sheet of paper with the curved shape you traced of the base piece. This will ensure that your leaves are lining up along the curve properly, and will allow you to check your new leaf against the one you just drew. When you are finished, your leaf drawings should line up perfectly, as seen in Fig. 4. Next, cut out your wax paper leaves and trace your patterns twice onto 2 separate sheets of THICK craft foam (one set for each wing), as seen here in Fig. 5:
STEP 3
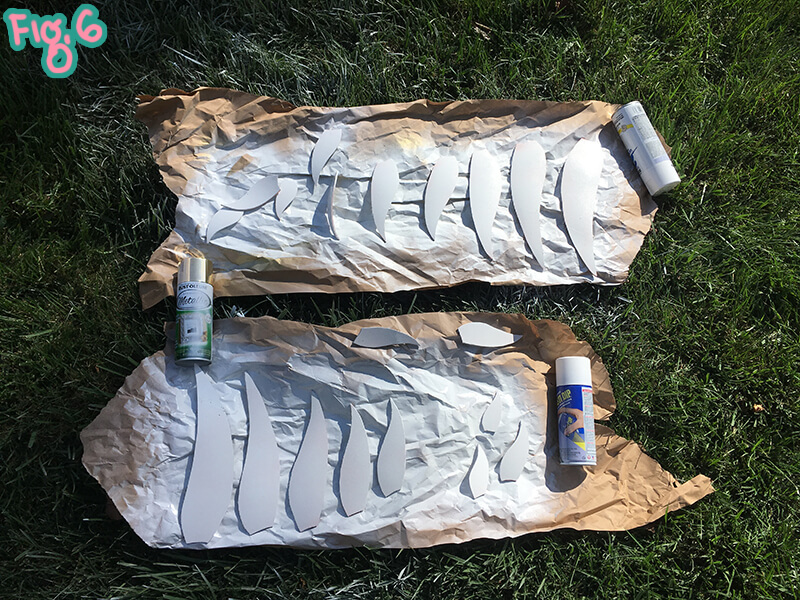
Before cutting out your leaf shapes, make sure to spray BOTH SIDES of your foam sheets with Plasti Dip. Wait until the sheets are completely dry, then add a second coat if necessary. After you feel your foam is sufficiently covered, use your x-acto knife to cut out each of your leaf shapes. Proceed by spray painting both sides of each leaf with glossy white spray paint – and don’t forget the edges as well.
STEP 4
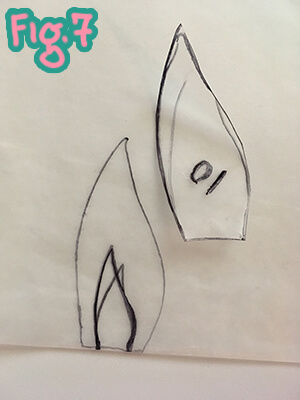
Next, using your SMALLEST leaf pattern as a guide, fold your wax paper along the end and draw a slightly smaller leaf shape inside, sprouting from the folded bottom edge. This will be the shape for the gold fastening piece for each leaf of your wings. While still folded, cut your shape out so that it is doubled and symmetrical. Trace this shape onto the THIN sheet of foam, once for every leaf you have on BOTH wings. (For instance, each of my wings has 10 leaves on it, for a total of 20. As such, I made 20 gold fasteners.)
As with the wing leaves, spray your sheet with Plasti-Dip before cutting your shapes out as many times as you see fit. Then simply cut them out and paint them using your gold spray paint. You do not have to spray paint both sides, as you will eventually be gluing the back faces of each fastener around the bottom of each leaf. (Relax, we’ll get there!) You can seal your fasteners with polyurethane if you like to give it a glossy look.
STEP 5
Now that you have all your leaves and fastening pieces ready to go, line your leaves along the curve of your base, like so:
Fold your gold fastening piece around the end of your base’s curve and sandwich your first (largest) white leaf between it. Push a paper fastener (with the head facing the outer surface of your wing) all the way into the gold fastener, white leaf, and straight through the other end. Fold the arms of the paper fastener out to secure your leaf in place. Do this with each leaf on both wings, making sure to overlap them equally and consistently.
STEP 6
Using your THIN jewelry wire, make a loop and tuck it around and under the arms of the paper fastener that is located at the bottom “elbow” of your wing. Use this as a base to come back to as you continue to loop this wire back and forth, tucking each loop around and under your paper fasteners. In my case, I did this 4 times, creating 8 legs in my “web”. Secure the ends of your wire by twisting them tightly around the base.
Next, top off the opened arms of the paper fastener with E6000 glue so that it will harden in place. Using your hot glue gun, secure the flaps of the gold fastener pieces to the surface of each leaf to ensure each fastener stays in place.

STEP 7
To strengthen your wings and keep them from floppin’ around all willy nilly, cut a length of your 12 gauge wire that is longer than the length of your biggest leaf by about an inch and a half. Bend this wire to fit the curve of the uppermost part of your leaf and glue it along the edge using E6000 glue. Wrap it around your copper base ONCE and tuck the extra inch or so THROUGH the first gold fastener, where it is wrapped around the copper base. You will have to hold this wire to the edge of the leaf you are gluing it to until the E6000 becomes tacky (roughly 5 minutes). This part may get a little messy, so consider wearing latex gloves while you hold your wire in place.

STEP 8
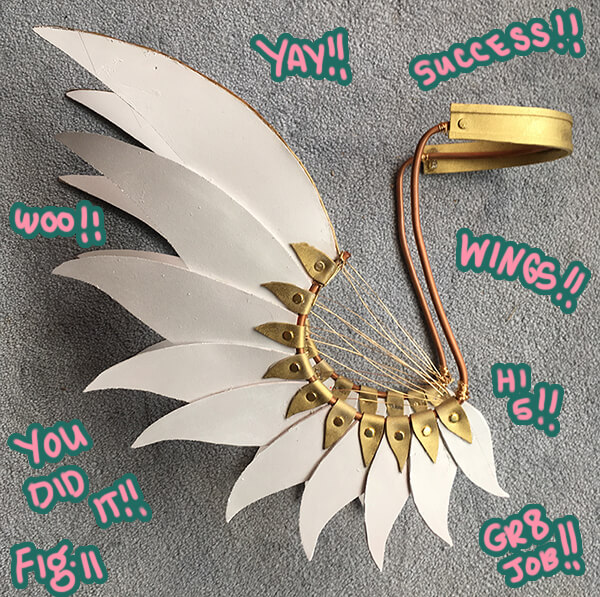
Lastly: Your choker. Cut a strip of THIN foam and 2 smaller strips to glue on the top and bottom of one side of your initial strip. Spray with Plasti Dip, then with gold paint and polyurethane. Place a paper fastener through each end of your strip, and loop a thin piece of jewelry wire around the arms. Open the arms to secure these loops in place. Leave the ends of the loops LONG, and wrap these ends around the “choker” piece of your copper base to secure the foam in place. Dab on a little bit of E6000 glue along the edge where the copper base and the foam meet for extra security. If the paint on any of your leaves looks splotchy, use your acrylic paint and sponge brush for any finishing touch-ups. Congratulations; you’ve finished your wings!
STEP 9
Now onto the dress!
Supplies
1. 2 yards of black lace fabric
2. 1 roll of black lace
3. Black thread
4. Wax paper
5. Pins
6. Sharpie
7. Sewing scissors
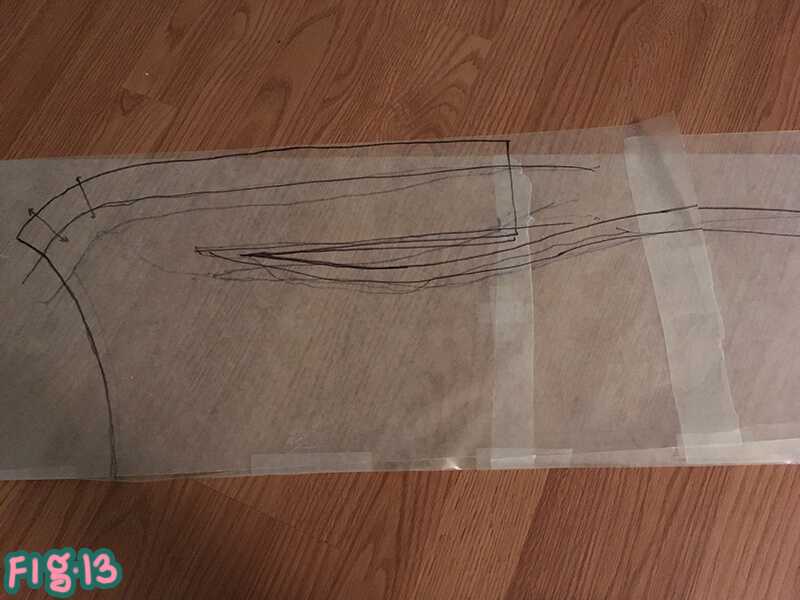
For this dress, I used an extremely simple pattern that I made myself by tracing the shape of my torso (including my arms and down to my knees) on a few pieces of wax paper taped together. I marked off the ends of the sleeves, the scoop of the neck, and the length of the dress.
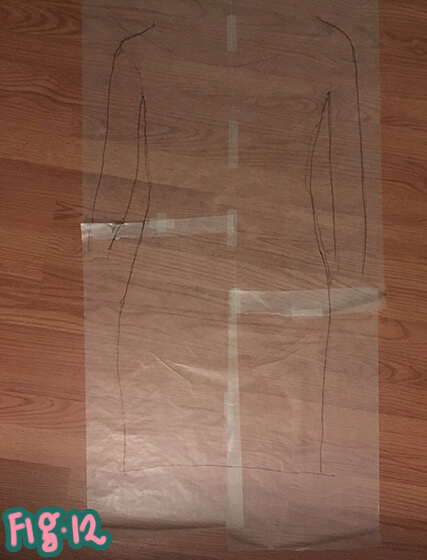
I then folded the wax paper over down the middle in order to ensure that the pattern would be symmetrical. I drew around the shape of my body, about 2 inches away from where I had traced. These 2 inches will give you some leeway as to how tight the dress will be, so make sure you have enough room so that it’s not too tight, but not so much that it’s too loose, either.
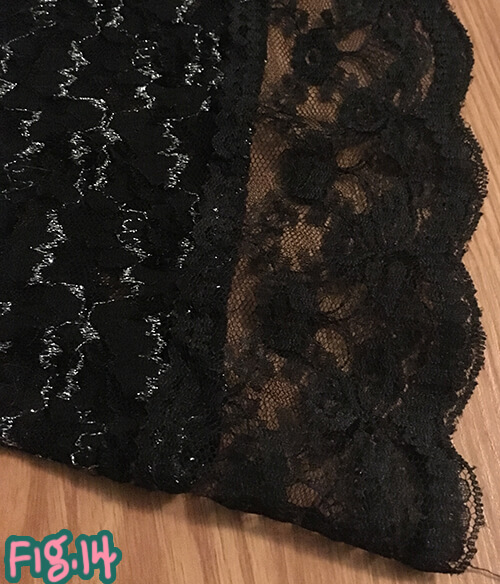
Suu’s dress is extremely-form fitting, so I made sure that the lace fabric I used was also stretchy enough to allow for this and didn’t fray, and I would highly recommend you do the same.
Next, cut out your pattern and place it on top of 2 separate and folded pieces of fabric. Make sure the fold of the fabric lines up with where you folded your pattern. Pin your pattern down so that it doesn’t shift as you cut your fabric out. When you are done, you should have 2 symmetrical dress pieces. Sew these pieces together, right sides together.
STEP 10
Embellishments! Find a roll of black lace that suites you and hand-stitch a length of it to the ends of the sleeves, the hem of the skirt part of the dress, and around the edge of the neckline.
Last but not least, you can use this black lace and a small piece of silky red ribbon to tie around your thigh for her garter as well. (As for me, I stitched the black lace and ribbon to an existing white garter to make it look extra dramatic.)
Congratulations! You’re all done! Enjoy your new cosplay and have fun searching for some four-leafed clovers!
About the Author
Diomira Keane
Cosplayer, artist, cat-lover, party princess extraordinaire.


One Comment
Leave a Comment
Stay connected. Don't miss out!
Get new costume guides in your inbox once a month.


You look beautiful, awesome job.