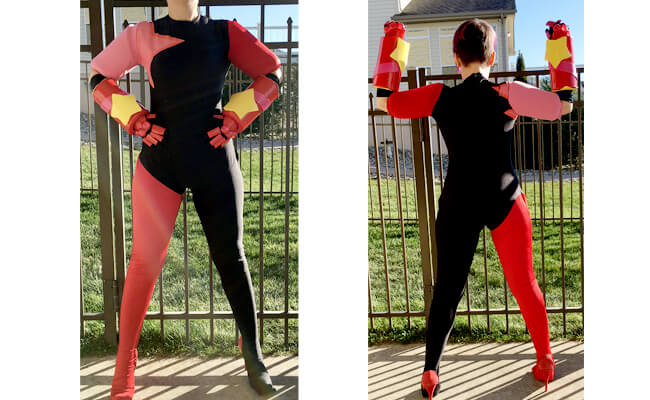
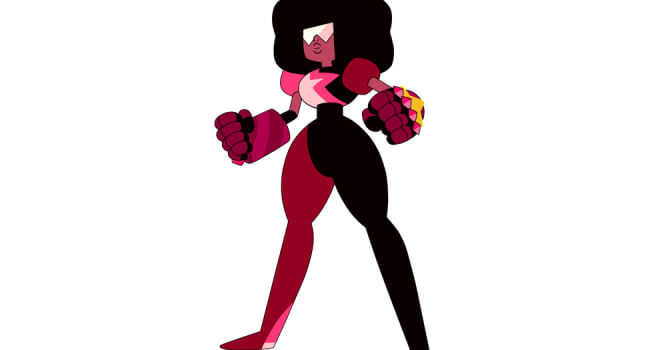
Make Your Own: Garnet from Steven Universe
Skill Level: Intermediate
This is a detailed, step-by-step guide to help you create your own Garnet costume from Steven Universe with sewing and fabrication. For the easy version of a Garnet costume and accessories like sunglasses and afro wig, visit this guide.
Most of materials you can find at your local hardware store and craft store. We’ll be using EVA foam for your props, which is lightweight, flexible, and relatively inexpensive to create. A lot of these techniques can be applied to other costumes.
Glove Tutorial
Materials:
- 3/8” EVA Foam floor tiles
- EVA craft foam sheets
- Black elbow length gloves
- Super 77 spray adhesive
- Hot Glue sticks
- Mod Podge
- Spray paint (I recommend Design Master): Flat White, Red, Yellow
- Craft Paint: Pink
- Clear sealer
- Gems: Clear resin, red nail polish, tin foil, clear craft glue, mould release, paint trays to cast jewels OR red acrylic craft gems
Tools:
- Heat gun
- X-acto Knife
- Sharp craft scissors
- Pencil
- Rotary tool/Dremmel
- Fabric tape Measure
- Electric sander (optional)
- Fine grit (180 or above) Sandpaper
- Hot glue gun
- Cheap foam paint brushes (for applying Mod Podge)
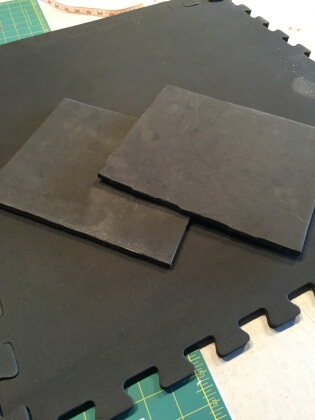
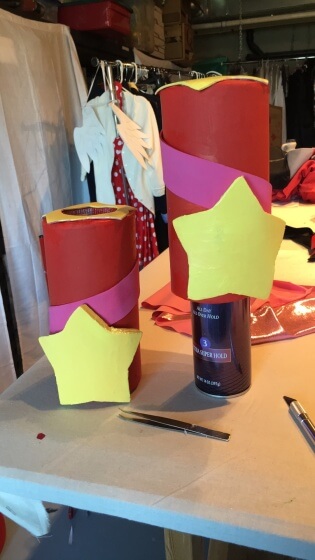
Measure the widest part of your forearm, then measure from your wrist upward to determine how high you would like your gloves to go. To allow for movement room, add 1/2”-1” to the width of your forearm. Take these measurements, mark them with your pencil carefully, and cut 2 rectangles out of your 3/8” EVA foam using your X-acto knife.
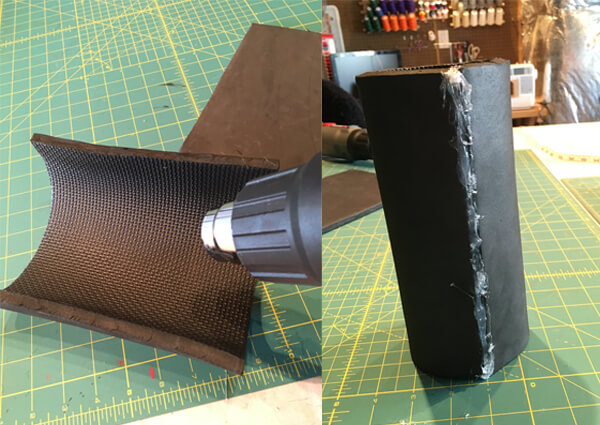
Using your heat gun, heat your Eva foam until it becomes mailable, being careful to not hold your heat gun too close to the foam so it does not burn or melt. Gently form this around your arm until you can form around it. This may take several steps of heating and bending. Using your hot glue gun, glue together seams in the back. Repeat for your other arm.
Note: Now may be a good time to just check that you can easily remove this part off of your arm. There is no good to making a costume you can’t easily get on or off!
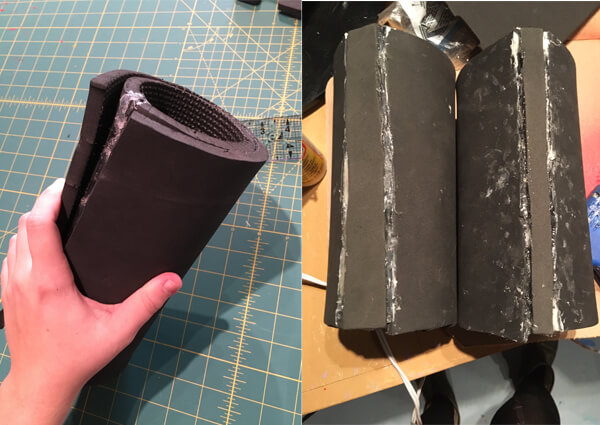
After you have your two cylinder shapes together, measure around them with your tape measure. Add 1/2” to this measurement. Measure and cut a rectangle that is the measurement by the length of the existing cylinders. from your 3/8” EVA foam. Repeat the heating and shaping steps around the smaller cylinders. Spray both pieces with super 77 (smooth side on smaller cylinders, rough side on larger shapes) to attach. Hold them together until they are dry. Fill in any gaps with hot glue. If you have a significant gap, you can cut a thin strip of foam, and glue that in place.
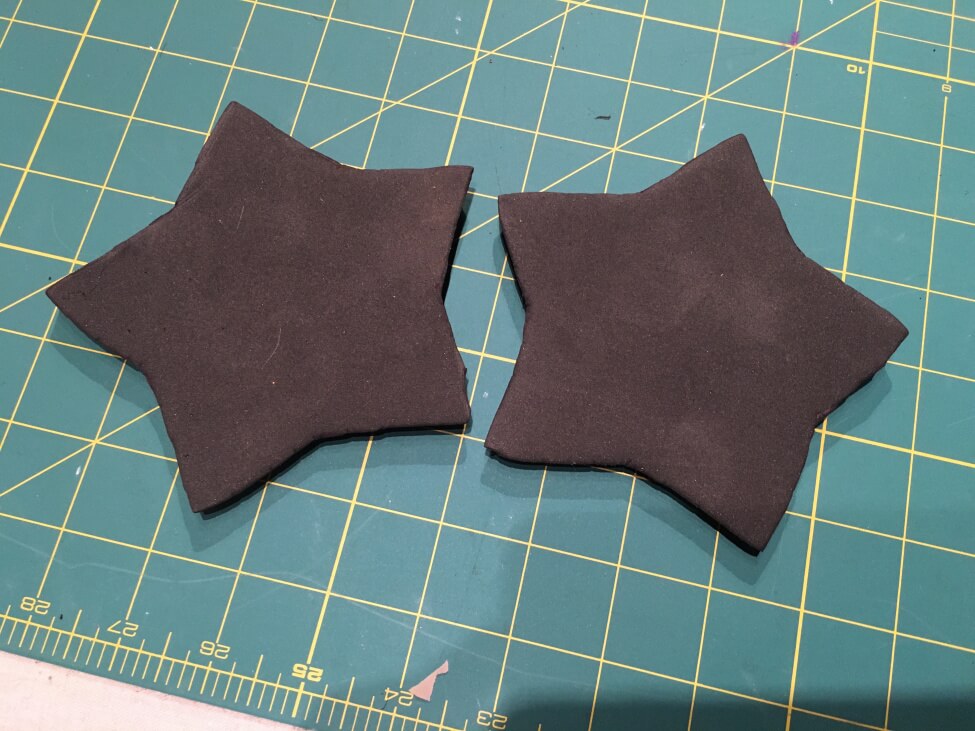
Using a stencil, cut out a star shape from your 3/8” EVA foam. Heat and gently curve to curve of upper glove. Set aside.
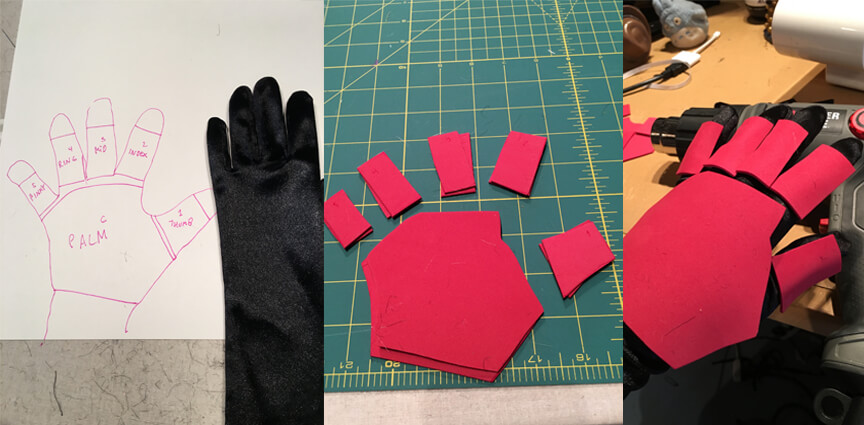
With your purchased gloves on, trace your hand (hand turkey style) onto a piece of poster board or paper. Divide your hand up as shown to create your hand pattern pieces. Cut out individual pieces, trace onto your thin craft foam, and cut out 2 sets of pattern pieces. Using your heat gun, gently heat and mold around your gloved hand.
Note: I recommend numbering or labeling the back of your hand pieces gently so you don’t get confused later.
Using your rotary tool, electric sander, or sand paper, smooth out any uneven edges. Sand over any uneven glue from your seams I typically choose to bevel and smooth out my edges to make them look a little more realistic.
Note: Use a fine grit sandpaper if you are using an electric sander, or a finer grit attachment. You can run your low-grit sandpaper attachment on your rotary tool over a piece of concrete, sidewalk, etc to dull it a bit before use. Too rough of a sanding tool will chip away the foam.
Cut another set of stars big enough to attach to the top part of your arm guard pieces out of the thinner craft foam, and trace a circle in the middle big enough for your armhole. Cut out the circle you traced for your armhole. Cut 1 1/2”x18″ thick stripes out of your thinner craft foam. Set these aside; they are going to act as the decoration pieces for our gloves.
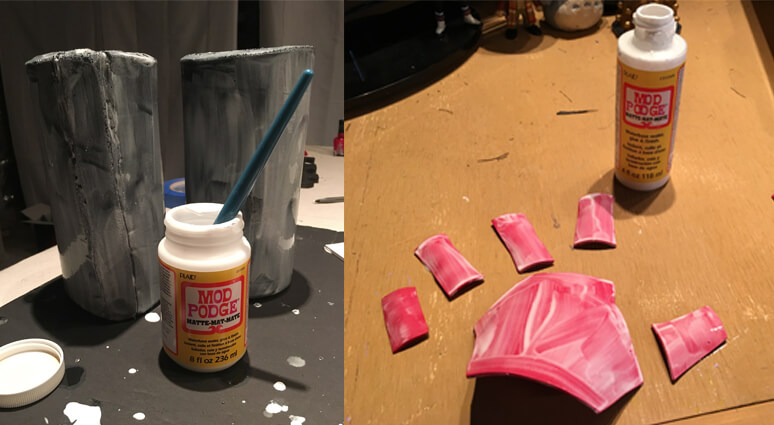
Prime all of your foam pieces using Mod Podge. I typically recommend you do about 3-4 even coats just to be safe. Once dry, use your fine grit sand paper, sand out any air bubbles or small imperfections. Touch up with more mod-podge if need be.
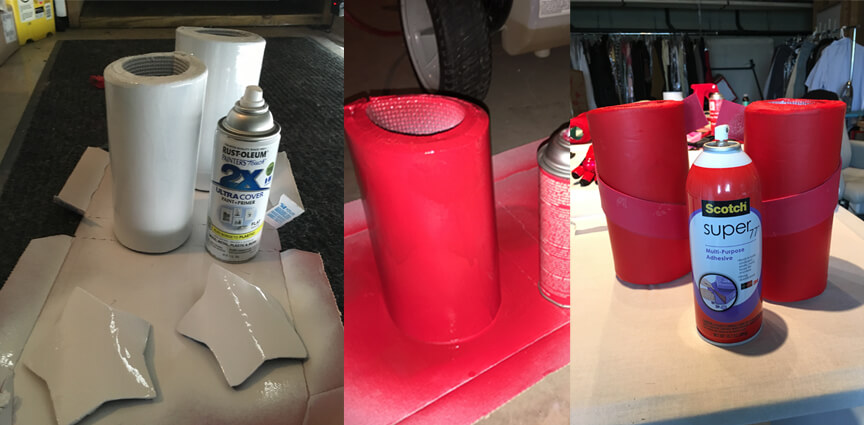
Spray your stars, hand pieces pieces, and upper glove pieces with a flat white base to act as a primer. Take your hand pieces and spray red. Set aside and let dry. Spray your stars yellow, set aside and let dry. Spray main arm base red.
Using your super 77 spray adhesive, spray the back of your thin detail pieces, and attach them to the larger glove part. Using your regular paint, paint the stripe pink. Spray all pieces with clear gloss sealer and allow to dry fully.
Attach thin craft foam glove pieces to glove with either hot glue or spray glue. Optional: You may attach your upper glove pieces to the physical glove with sticky back velcro, one piece on the glove, and one piece on the gauntlet. I opted against this to make the glove a bit easier to remove.
Gems (If you’re using ones from the store, skip this step):
Following instructions on resin packaging, mix two part components of your resin. Be careful to not mix too hard, or you will create air bubbles in your gems. Pour into your rounded paint trays that have been sprayed with mould release, and allow to set for time listed on instructions.
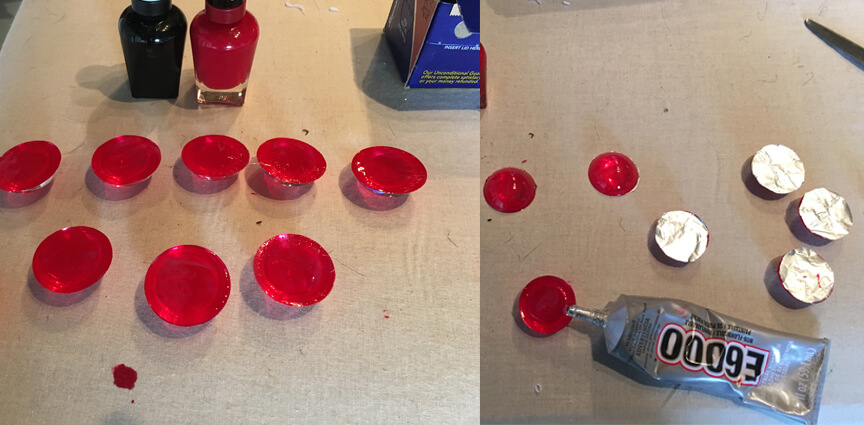
When completed, take red nail polish, and paint backs of gems. Let dry. Cut tinfoil to size of gem and attach with clear craft glue. You’ve now created your own gems!
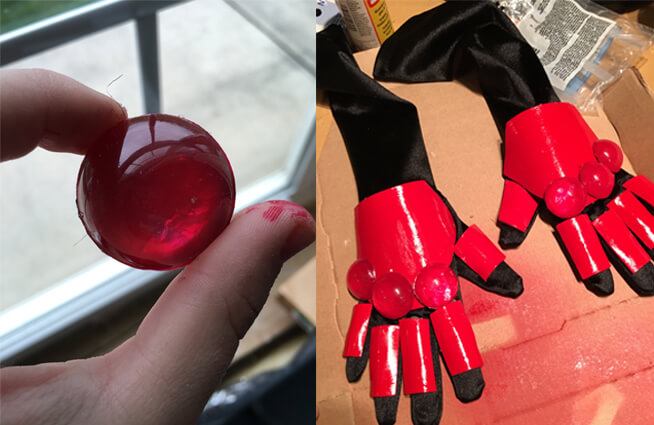
Attach your gems to knuckles of your gloves using your hot glue gun. And viola! Your very own set of Garnet gloves.

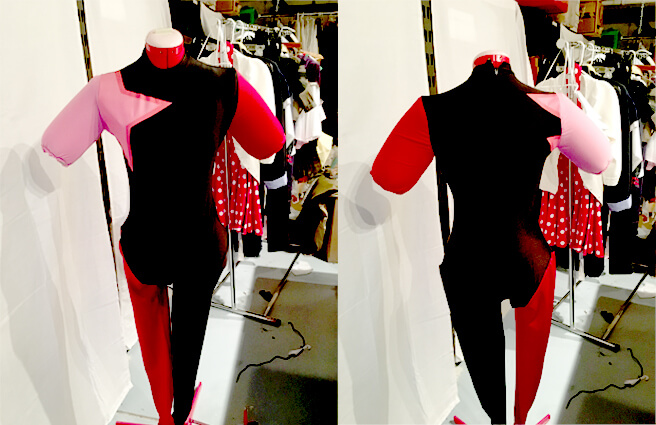
Jumpsuit Tutorial
Materials:
- Pattern: McCall’s M7217 or other Jumpsuit pattern of choice
- 1 ½ yards 60-in wide 4-way stretch Black spandex
- 1 yard 60-in wide 4-way stretch Red spandex
- 3/8 yard 60-in wide 4-way stretch Pink spandex
- Thread
- 1/2” thick craft foam 36” x 12”
- 2 yds 1/2” elastic
- 1 yd 1/4” elastic
- 18” – 22” Zipper (Invisible or Polyester)
- Star Graphic: Dark Iron-On Transfer paper or Pink fabric paint (I recommend Jacquard textile paint), Red fabric paint, ½” wide painter’s tape
Tools:
- A sewing machine with zig zag stitch ability, fitted with a ball point/stretch needle
- Fabric shears
- Paper craft shears
- Marking tools (Fabric chalk, fabric wax, fabric pencil)
- Clear quilting ruler
- Clear french curve
- Fabric tape measure
- Pencil
- Straight pins
- Overlock serger (optional)
Note: This is a jumpsuit made to a standard American medium size. Please adjust my fabric and foam yardage to your size, if you need more or less.
PATTERN: This pattern did need to be altered for accuracy to the costume. If you don’t care about a few extra seams, you can leave the pattern as is. If you have another catsuit pattern you’d prefer to use, you may skip these patterning instructions.
Cut out pattern according to your size to view B, the view with zipper in the back and legs attached.
With a pencil, gently trace out 5/8” borders on pattern pieces 1, 2, 3 (or 4, 5 depending on your size), 6, 7, and 8. This will allow us to overlap the pieces, eliminating certain seams.
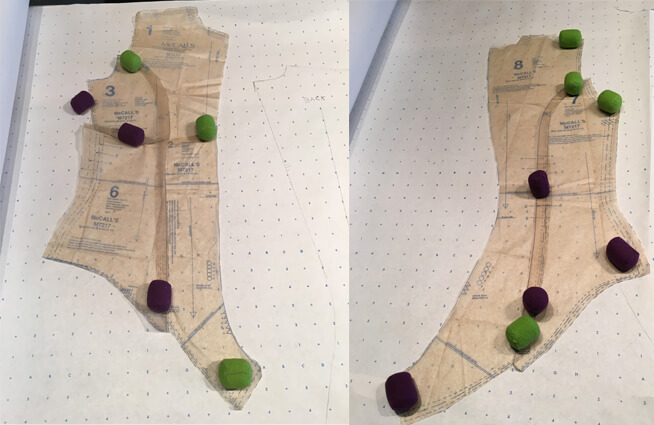
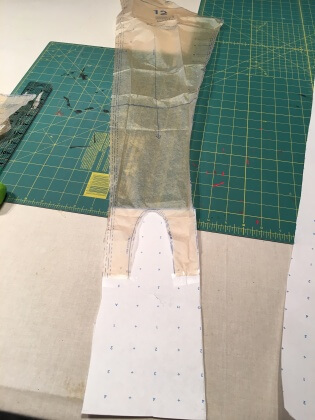
Overlap pieces 3 bottom to top of 6, matching notches and your traced line to one another. Tape together. Gently trim and blend any excess paper. Follow same step for pattern pieces 1 and 2. Combine your 1&2 piece to your 3&6 piece at the side seams, matching notches and seam allowances. Trim 5/8” off the center front, and mark to cut this piece on the fold of your fabric. This is your new front piece.
Note: You may need to slightly straighten out the center front to allow this to be more easily cut on the fold, including straightening the crotch point to be a bit straighter at the bottom.
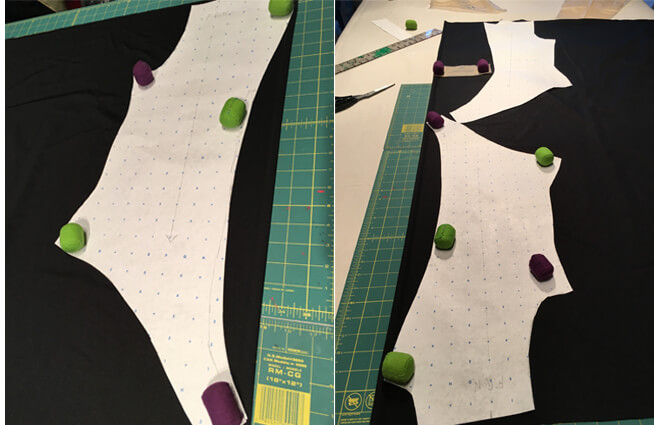
Match notches on pieces 7 & 8 on sides, and tape together. Gently trim and blend any excess paper that might be hanging off. This is your new back piece.
Take piece 9, your collar, and cut in half on fold line.
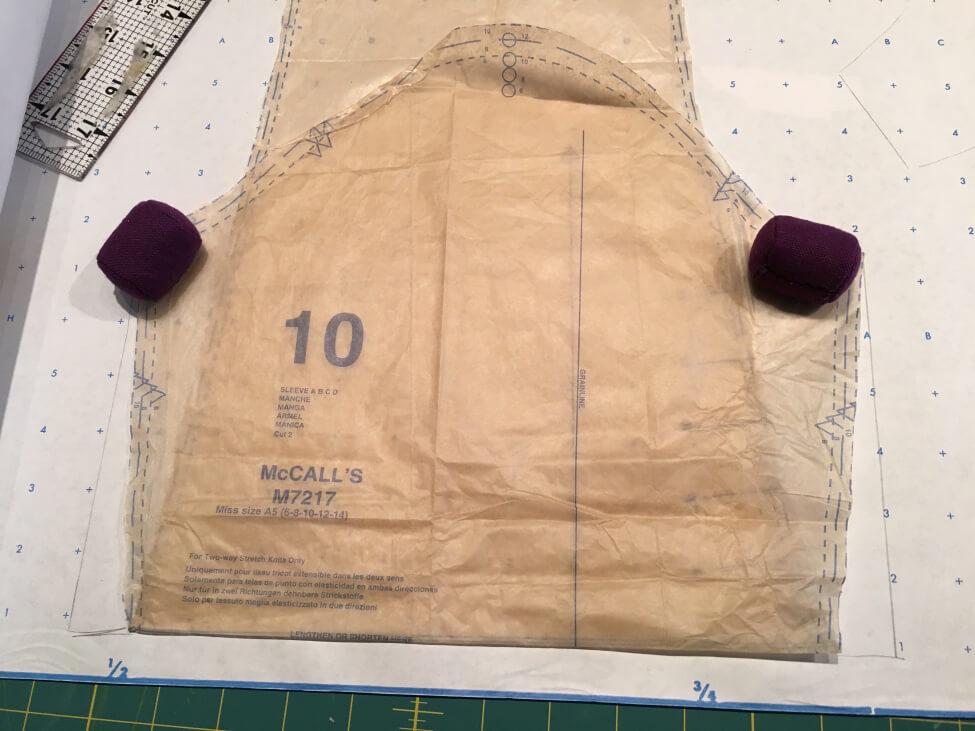
Take piece 10, your sleeve, and shorten to the “lengthen/shorten here” line. Take a ruler, and flare out sleeve sides 1” at the bottom, drawing a straight line down from the underarm.
Take piece 12, pant front, and extend foot 6”-8”, depending on foot size, and create a straight tube shape. Cut another 6”-8” rectangle matching the width of this shape, this will cover the bottom of your foot.
Note: I traced mine onto pattern paper to preserve this pattern for future use, if you’d prefer to make new pieces out of these ones and not have them stuck together, this is also an option. If you do choose this, just make sure to transfer all your notches onto your new pattern. I also had tried this on after sewing, and it was slightly large, so you may want to take the side seams in anywhere from 5/8” to 1” on either side.
CUTTING: Lay out your front piece along fold of your black fabric. This will most likely not be a straight line, but that’s ok, just make sure your top and bottom edges are lined straight against the fold, you may need to use chalk to straighten out the crotch portion. Cut all pieces, right sides of fabric together, in corresponding colors: black for body suit and left leg (one of piece 12 and 13 plus 6”-8” rectangle for foot), red for right leg and left sleeve (only one of 12 and 13 plus foot rectangle), and pink for right sleeve. Cut two sleeves out of your 1/2” thick foam, trimming 5/8” off of the top and sides, and set aside for later. Mark all notches from pattern onto fabric with chalk or fabric pencil.
SEWING: Follow instructions on pattern to assemble the body of your suit. Attach collar to pattern instructions.
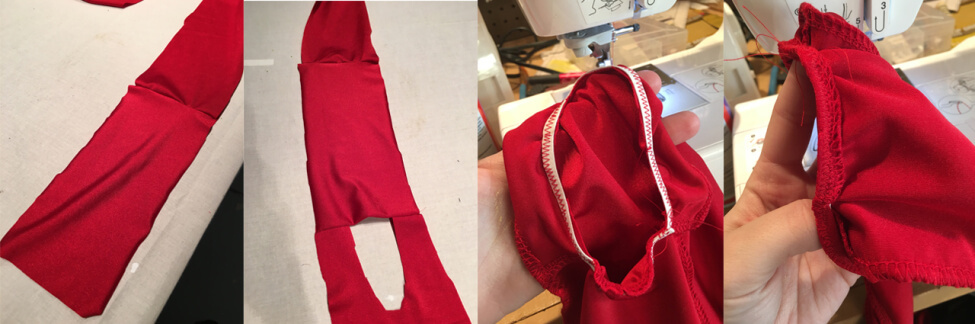
Sew your rectangle foot shape to bottom of pant front. Sew other side to pant back. Sew pant front pieces to pant back pieces in corresponding colors. This will leave you with a hole in the back of your pants allowing for the heel of your shoe to stick out when worn. Zigzag stitch 1/4” elastic around hole, pulling taught while sewing. Flip edge in a zig zag stitch again, pulling fabric straight while sewing.
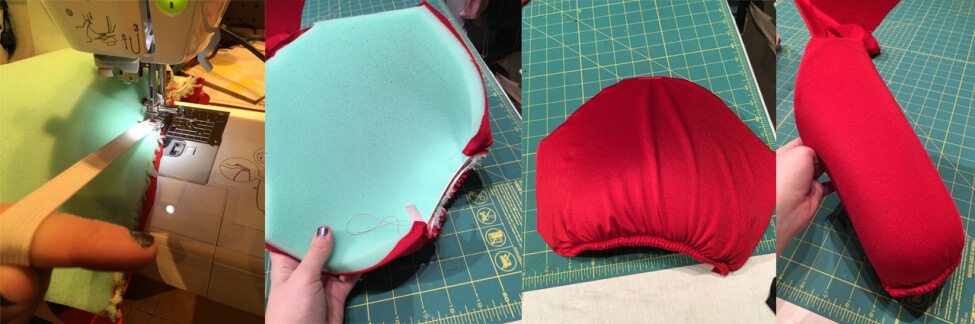
Sleeves: Baste stitch your foam pieces to your spandex pieces at bottom at 1/4” seam allowance. Using a wide zig-zag stitch, sew your 1/2” elastic into the bottom of the sleeve, matching elastic to bottom edge, and stretching elastic as much as possible while sewing. This will gather the bottom of our sleeves and create the giant puff shape. Flip edge underneath, and pull straight. Zig stag stitch. Sew sleeve seams together.
Sew sleeve into shoulder seam***.
Sew zipper into your suit.
Note: FIT IS EVERYTHING! Try pieces on as you complete sections. It’s easier to fit your body suit before you sew the legs and arms on. You can take things in or let them out if need be at this stage. With the legs and sleeves on, you will more than likely have to disassemble most of your costume. If you are using an overlock serger, make sure to serge your seams between each seam. This isn’t required.
THE STAR: ***Iron On: If you choose this version, I HIGHLY recommend you apply your iron on’s BEFORE you sew your pink sleeve on!!!
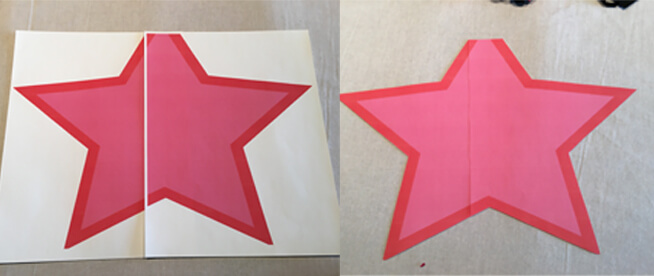
Create your star graphic in a digital image generator/find an image online and size to be large enough for your suit. I created my graphics on Adobe illustrator rather simply by just using the star tool. Cut out your star pieces.
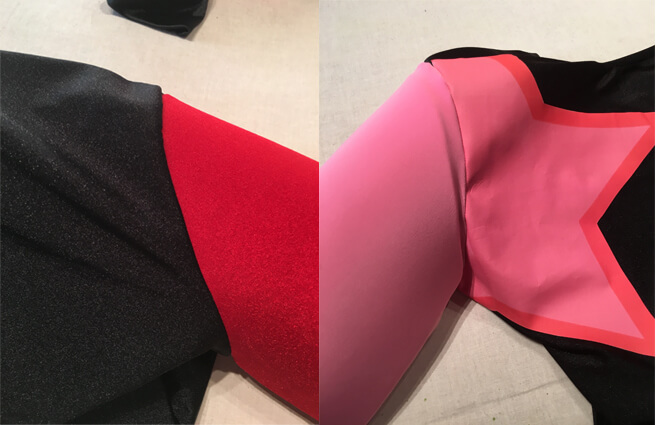
Take the front piece, and peel off the protective backing With your jumpsuit on an ironing board, with the ironing board in between your front and back, position your star to the desired location. Place your protective tissue provided with your paper on top of the design, and iron on high heat with no steam for 10-15 seconds, or until adhered, being careful not to burn your design or fabric.
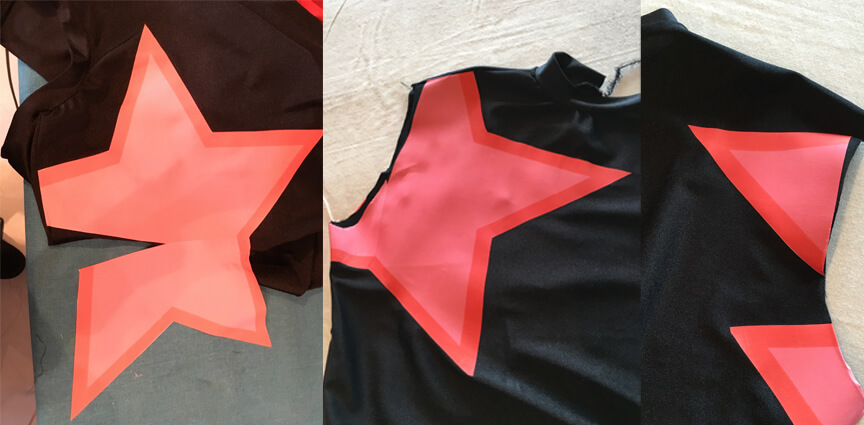
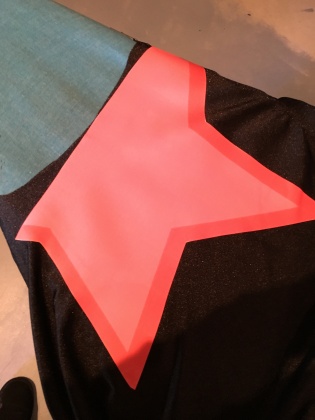
Take your back piece, and hold it up to the front piece. Match and overlap the bottom edges, and iron together. Trim any excess that overlaps in the armhole, and iron the remainder. It may not be much, mine was the lower star edge and one point in the back, as pictured. Now you may attach the pink sleeve.
Painting: Place a layer or two of cardboard inside of your suit to prevent paint bleeding. Using painter’s tape, very carefully trace out your star shape. Make sure to really press edges of tape down so your paint doesn’t bleed. Apply multiple layers of corresponding pink and red paint to create your star, allowing for drying time in between coats. Remove painter’s tape.
And with that, your Garnet costume is complete!
About the Author
Alexa O'Neill
Costume Designer and fabricator by day, Magical Girl crime fighter by night. Cosplay enthusiast extraordinaire .
One Comment
Leave a Comment
Stay connected. Don't miss out!
Get new costume guides in your inbox once a month.


thank you so much. i had no idea modge podge had that much effect on the outcome of gauntlents. (seeing it in action helped me see the progress) I’m super excited to use this to make my garnet costume. thanks :)