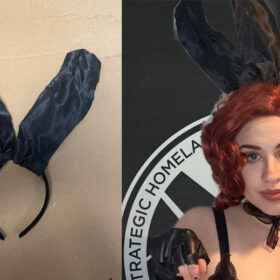
Make Your Own: Black Widow’s Bite
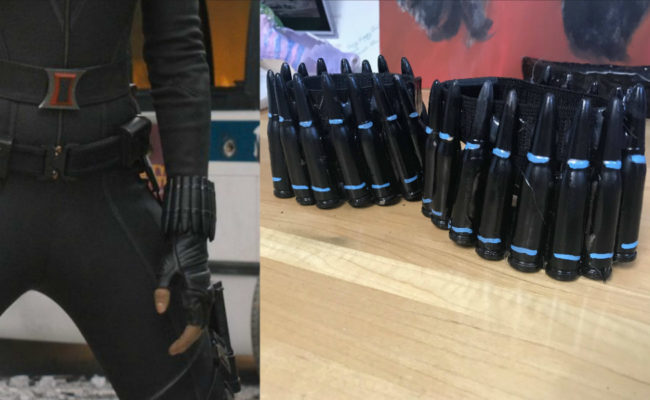
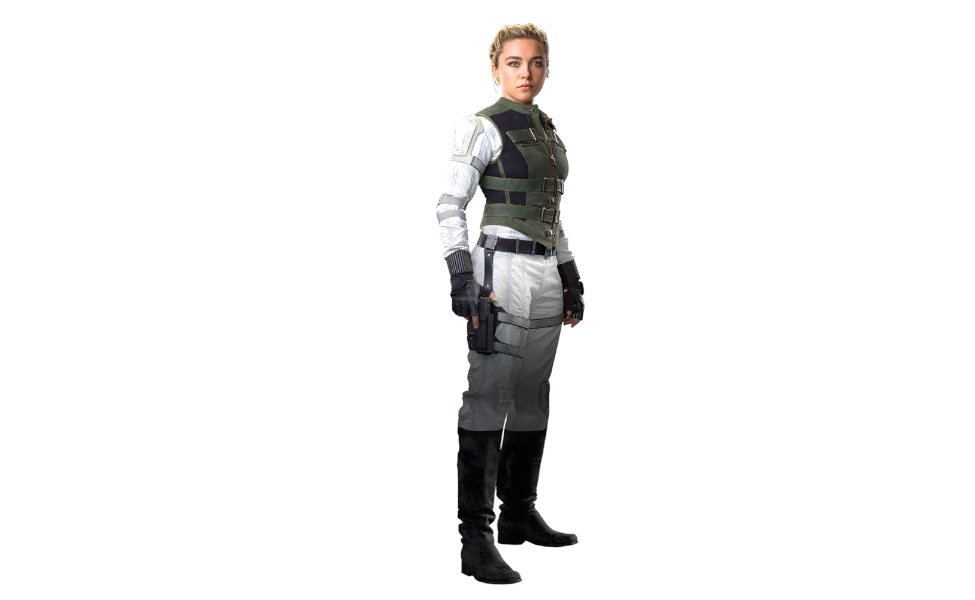
Natasha Romanoff, aka Black Widow, is a trained assassin. She uses her expert hand to hand combat skills to help the Avengers defeat villains like Loki and Thanos. Although S.H.I.E.L.D. has given her some helpful tools, such as twin handguns, batons, and her bite.
Black Widow’s Bite are two wristlets used to electrocute her opponents. The blue lights from electrical capacitors activate their abilities. The bites also contain a grappling hook, taser disks, and a garrote. Tony Stark modifies and upgrades these gauntlets to strengthen her abilities.
In this tutorial, I will show you how you can make her bites, cheap and easy. They make the perfect accessory to a Black Widow cosplay, which you can wear to the new movie coming out on May 1. Follow our full Black Widow costume guide to complete the look.
What You Need:
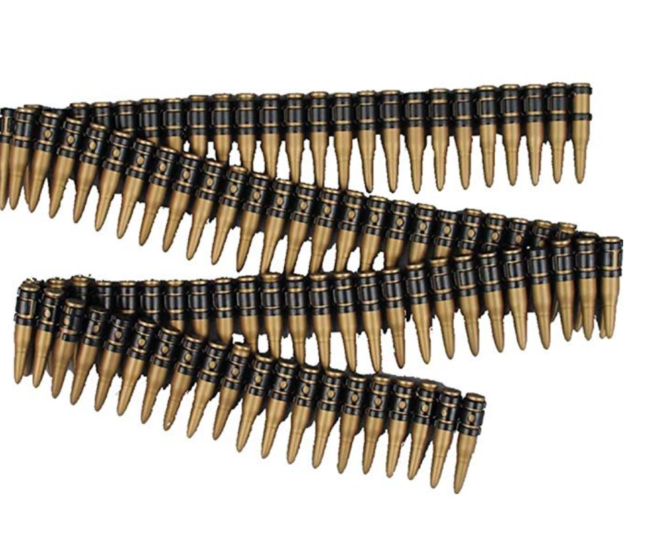
- Ammo belt
- Black spray paint
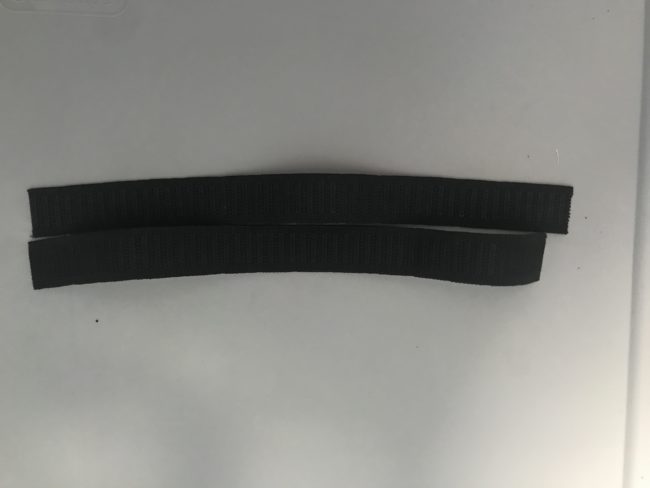
- Black elastic
- Hot glue gun with sticks
- Black duck tape
- Neon blue paint pen
- Silver paint pen
Step 1:
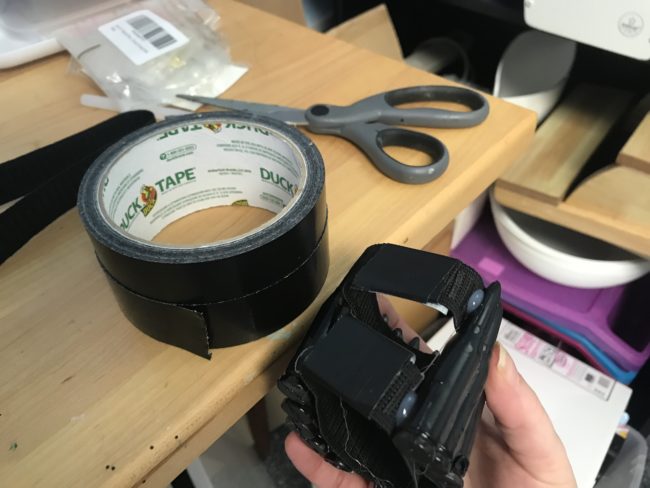
Upon opening the ammo belt from its packaging, pop all the pews out of the belt. You can throw away the black casings.
Step 2:
Spray paint the ammo black on a non-stick surface. Make sure to do this outside or in a ventilated area. If you’re cosplaying her comic book outfit, skip this step, since those bites are gold.
Step 3:
While waiting for those to dry, wrap the elastic around your wrist and cut it to size. Not too tight though (aka, don’t make the same mistake I first made)! Leave some space at the end because you’ll need room to secure the bracelet. Then measure that strip and cut another one. Line them up parallel.
Step 4:
Plug in your hot glue gun and wait for it to warm up. After inserting a hot glue stick, place a dot of glue on the top piece of elastic and the bottom piece of elastic. Take a spray painted pew and hold it down onto the glue. Work from the center of the bracelet outwards.
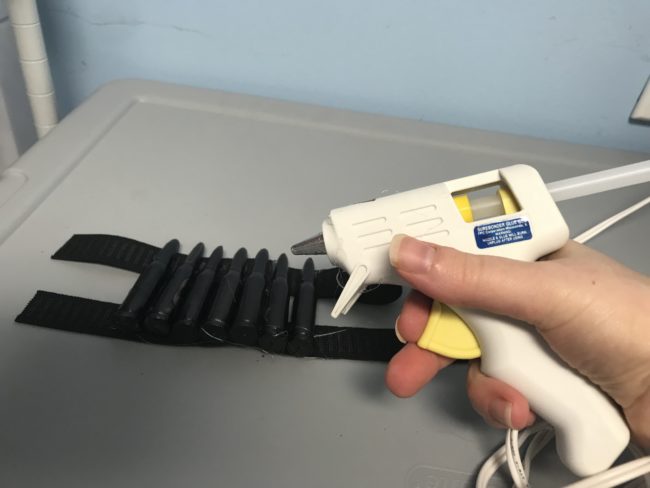
Repeat this step, but make sure to leave some space at the end. Do not fill the entire bracelet with bullets. I was able to fit around 12 on each bracelet.
Step 5:
Wait for the bracelet to fully dry — it shouldn’t take too long. Then wrap the bracelet (which should be easy because of the elastic) around your wrist. Secure the ends with two pieces black duck tape, one for the top and one for the bottom.
Do a test fit! They should be able to slide on easily, with some room to spare.
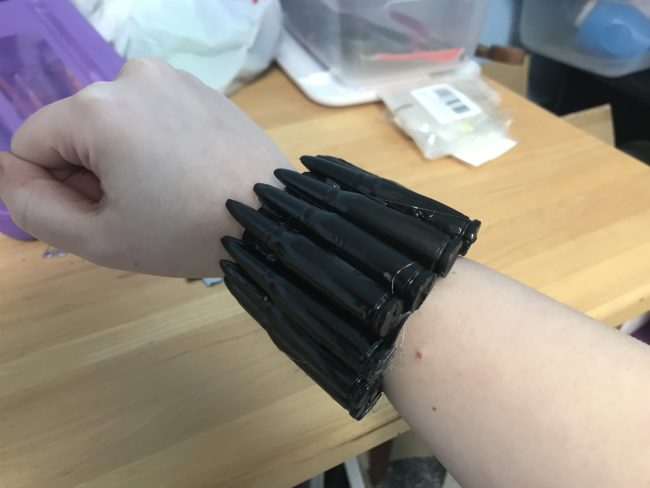
Perfect! I actually like this one better than the first one I made!
Step 6:
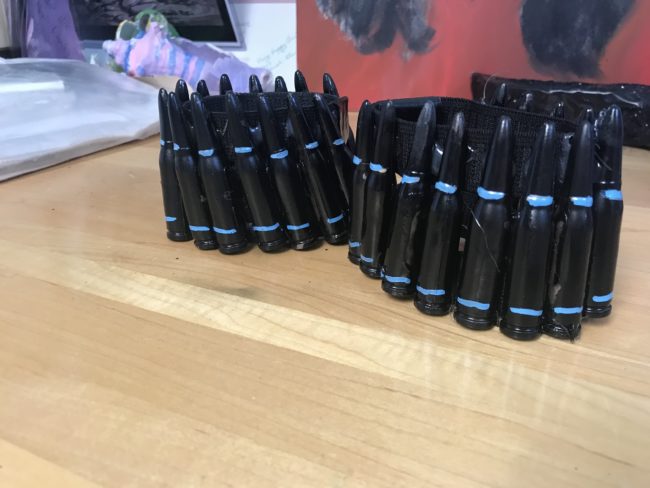
Use blue paint pen to make the electric strips on each piece, as seen in this picture. Make two horizontal markings on each pew: one underneath the pointed bullet and above the rim. Use the silver paint pen for metallic accents.

Step 7:
Repeat the whole process to make a second bite. Be sure to measure using your other wrist, as one wrist might not be the same exact size as the other. Once you do that, you’re ready to suit up and fight alongside the other Avengers!
About the Author
Mandy
Cosplayer, creative writer, cookie connoisseur. Pronouns: she/they.


There are no comments yet, add one below.
Stay connected. Don't miss out!
Get new costume guides in your inbox once a month.


Leave a Comment