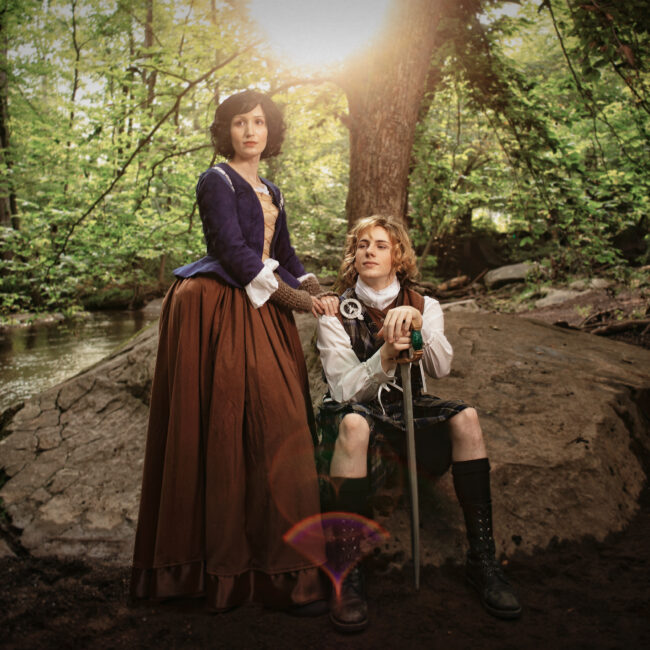
Make Your Own: Claire from Outlander
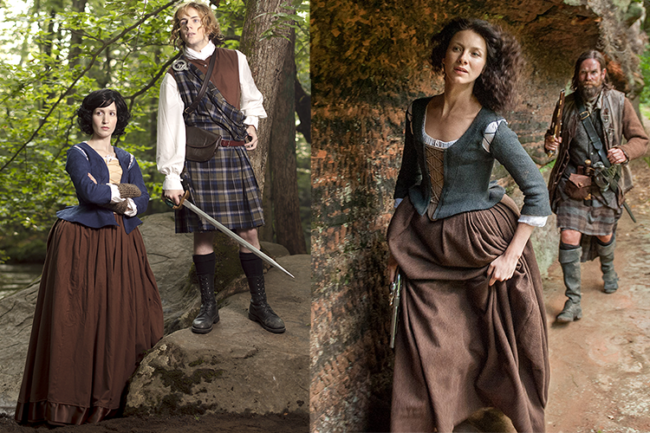
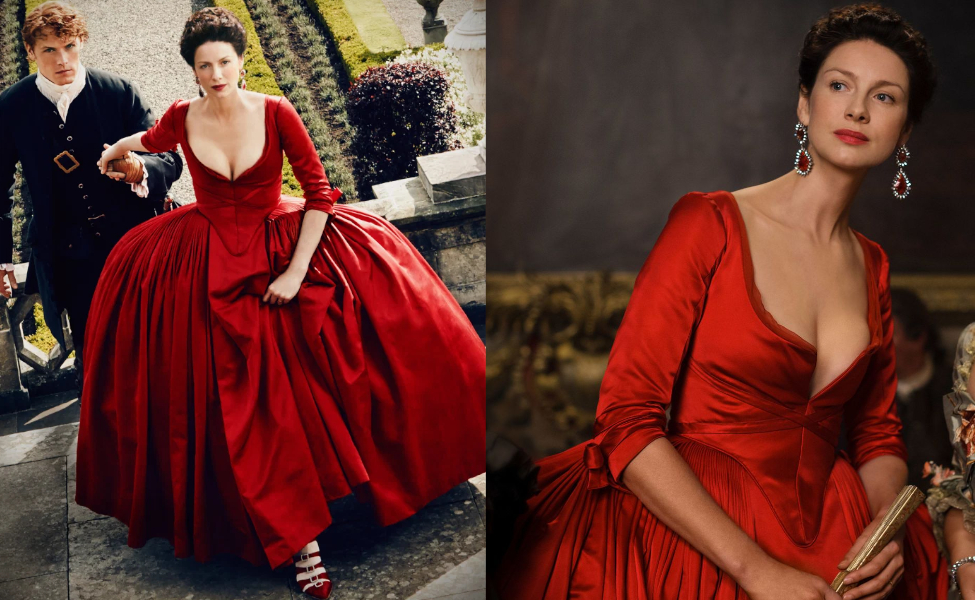
If you’re a fan of fantasy, romance, and political intrigue, Outlander comes out ahead in all three categories. The gripping novel-turned-series blends the ambiance of Scottish culture with the thrill of time travel and high stakes espionage. The series follows Claire, a World War II nurse on her fantastical journey through Scotland 1743, where she meets James Fraser, a Jacobite on the run from the British Army.
We’ve covered Claire’s iconic 1940s white dress from the first episode already. In this tutorial, we’ll be exploring one of the most iconic outfits of the series; Claire’s Highland dress.
You will need:
- McCall’s pattern M7735
- Simplicity pattern 8162
- 5 and ½ yards of bleached muslin
- 12 oz bag of Polyfil
- 1 and ⅛ yards of twill tape
- White thread
- Blue thread
- Brown thread
- 7 yards of brown flannel
- 2 and ½ yards of blue faux suede
- ½ yard of tan broadcloth
- 4 yards of fusible midweight interfacing
- Hook and eye kit
- Sew-in Velcro
- 1 spool of thin beige ribbon
- 1 spool of 1/4″ white ribbon
- 1 spool of thin blue ribbon
- 6 medium sized snaps
- 2 skeins of blue embroidery floss
- Blue single fold bias tape
- Extra thick brown ribbon (optional)
- Embroidery needle
- Thimble
- Straight pins
- Heavy Duty machine needle
- Fabric glue
- Seam ripper
Step One:
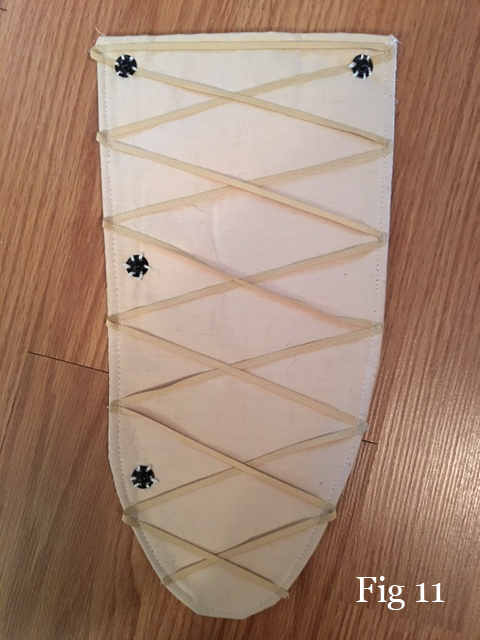
Begin with the Simplicity pattern 8162 and cut out your pattern pieces for A (the under garment) and B (the bustle). As far as these patterns are designed, the instructions in the pattern booklet are straight-forward and easy to follow. In my rendition of Claire, the only adjustment to this pattern that I made was that I did not include the ruffle around the neck (Pattern Piece 3).
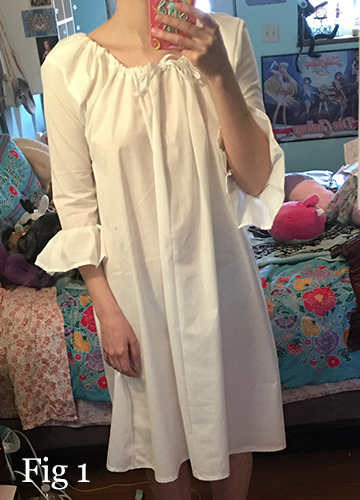
Pro Tip: For the white ribbon that is used to tighten the neck, I sewed the ribbon inside the casing (Pattern Piece 4), very carefully, so as not to catch the ribbon itself under the needle. This was much easier than trying to shove all that ribbon into the long, skinny casing, and paid off really well in the end.
The bustle is rather easy to construct as well. When installing the ruffles, make sure to pin them evenly inside the top and bottom pieces, so that when you flip the piece inside out, the ruffles are on the outside. Leave an opening to fill your bustle, then sew it shut with a blanket stitch.
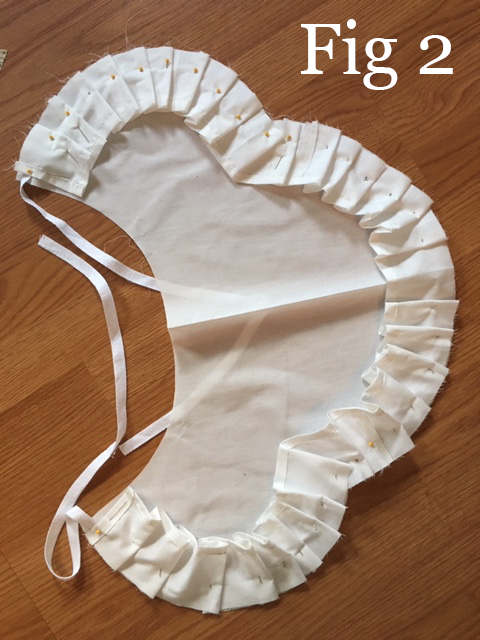
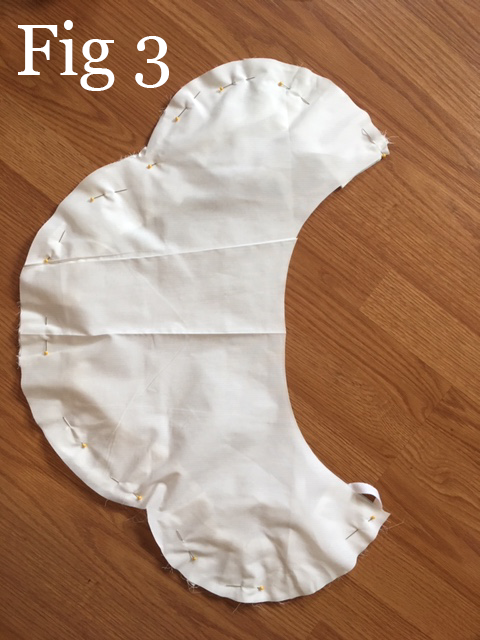
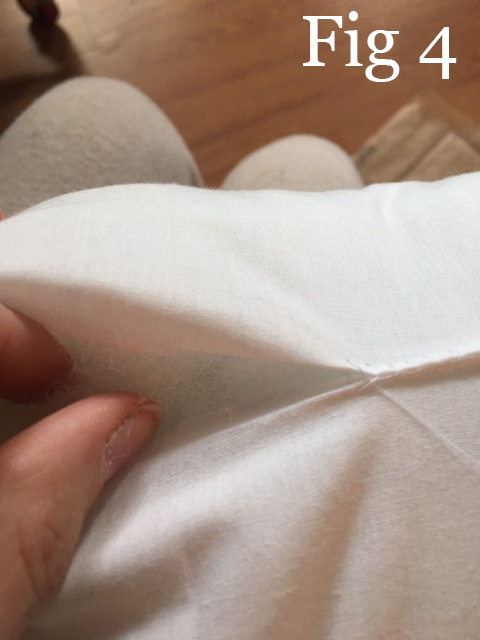
Pro Tip: Do not over-stuff your bustle! Though it can be tempting to do so, an overstuffed bustle will sit too high on your hips, and will not give you the desired, period-accurate look you’re going for. Before sewing your bustle shut, see what it looks like on and decide whether or not it is filled up enough.
Step Two:
Next up is the skirt. Though it uses a lot of fabric, it’s relatively easy to put together. After your dress is assembled, add on the optional brown ribbon as a trim along the hem. Then sew in your Velcro and hook and eye.
Pro Tip: Before hemming your skirt, try it on OVER THE BUSTLE first! This will give you a more accurate look at how the dress sits, and how long it will be. If you wear it without the bustle, the skirt will appear too long, but do consider that the length was designed with the bustle in mind.
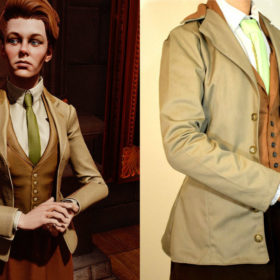
Step Three:
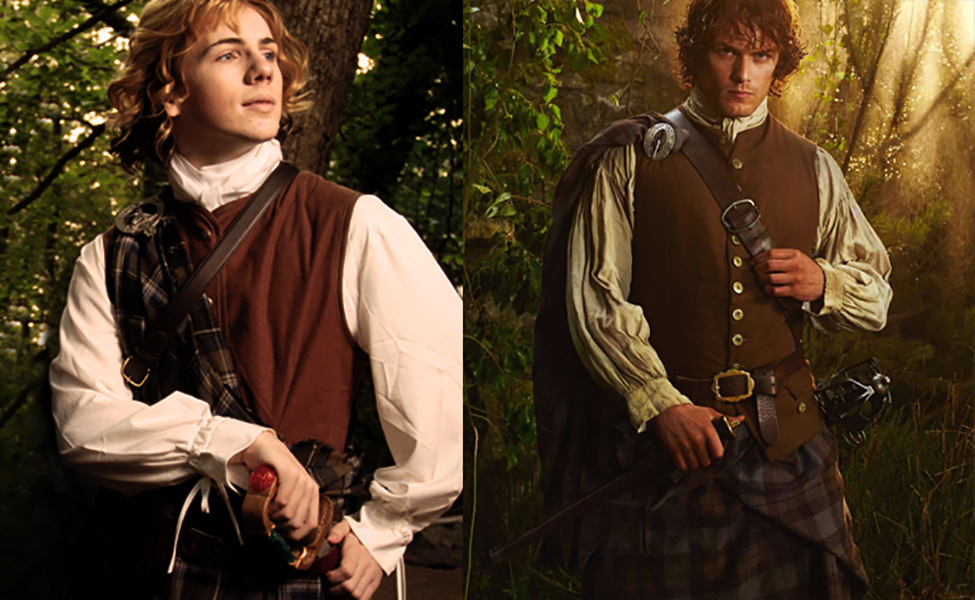
Claire’s blue jacket isn’t a complicated garment to construct, but it does require patience and diligence. To start off, cut out all your pattern pieces, including the interfacing pieces. Iron on your interfacing carefully, starting from the inside and outward towards the edges.
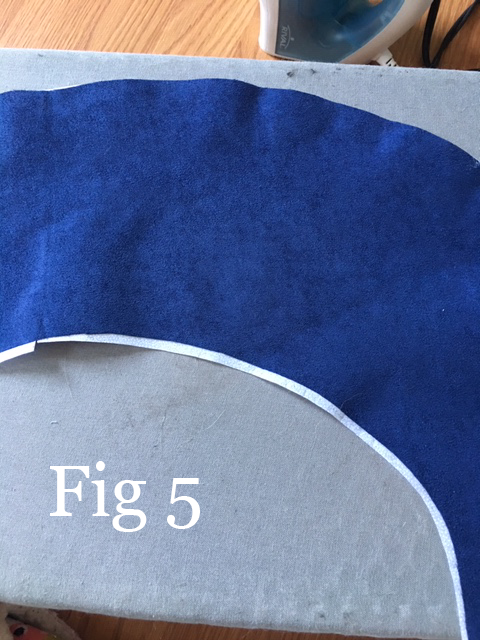
Once your interfacing is ironed on, begin constructing the jacket. When working with fabric and interfacing such as this, curves can be difficult, so make sure you have a seam ripper handy, and allow yourself a few tries until your seams are even and neat.
Step Four:
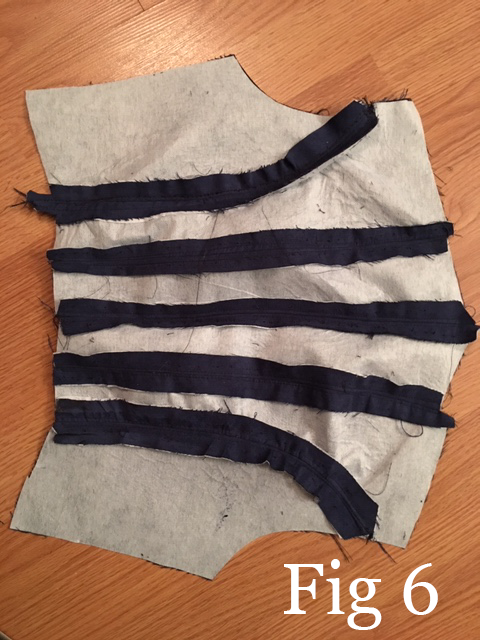
Once the main piece of your jacket is completed, add the peplum. Do not add the sleeves just yet. Instead, stitch your blue bias tape to the opening of the armholes of each sleeve.
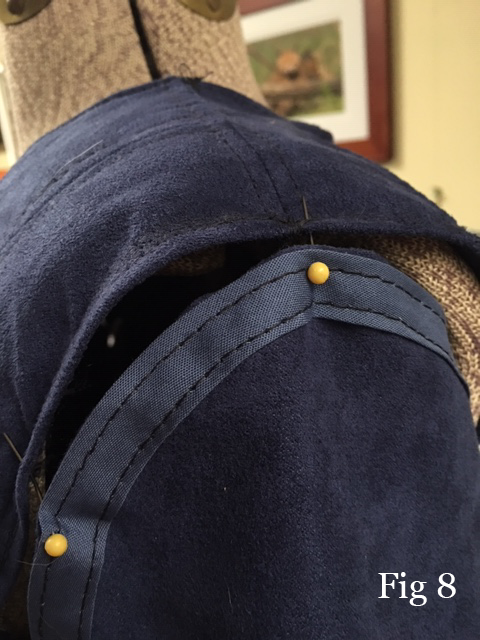
Pro Tip: Because the microsuede material and midweight interfacing can make the pattern pieces very thick, I ended up having to stitch the peplum on to the bottom of the jacket by hand using embroidery floss. In the end, I found this process to be a bit easier than using a machine, as I had more control over how the pleats in the peplum came together. You may want to try this as well, using embroidery floss, an embroidery needle, and a thimble.
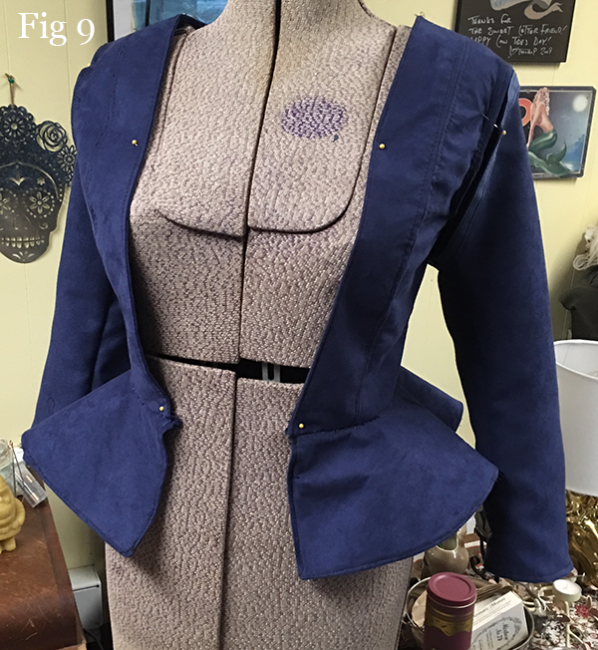
Step Five:
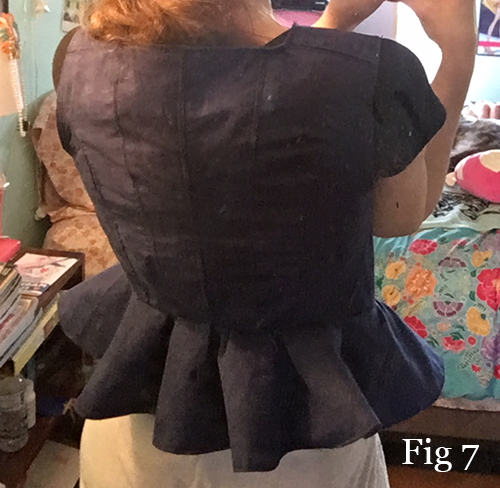
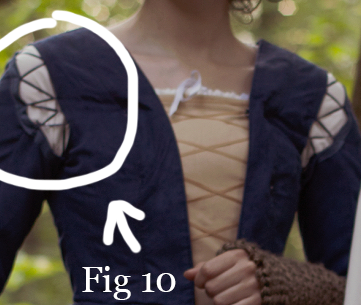
Now that your jacket is mostly finished, it’s time to attach the sleeves. However, instead of attaching the sleeves directly to the jacket as the pattern booklet instructs us, we are going to instead install small, alternating loopholes with embroidery floss between the sleeve and the armhole of the jacket using the thin blue ribbon, and securing each loop with fabric glue.
Once the loopholes are installed, take the rest of your thin blue ribbon and weave it through the loops in a zigzag pattern.
Step Six:
Next, cut Pattern Piece 12 from your tan broadcloth. This will be your front inset. Instead of installing rings into the blue jacket like the pattern suggests, I actually sewed the beige ribbon directly onto the inset itself. You may choose to do this as well. I generally found it easier to get in and out of the jacket this way.
Once that’s done, install your snaps into the jacket as well as the inset. I did this by hand using what was left of my embroidery floss.
After that, your garment is complete, and you’re ready to dive right into some 18th century Scottish politics!
About the Author
Diomira Keane
Cosplayer, artist, cat-lover, party princess extraordinaire.


There are no comments yet, add one below.
Stay connected. Don't miss out!
Get new costume guides in your inbox once a month.


Leave a Comment