How to Create the Borderlands Effect for Your Cosplay

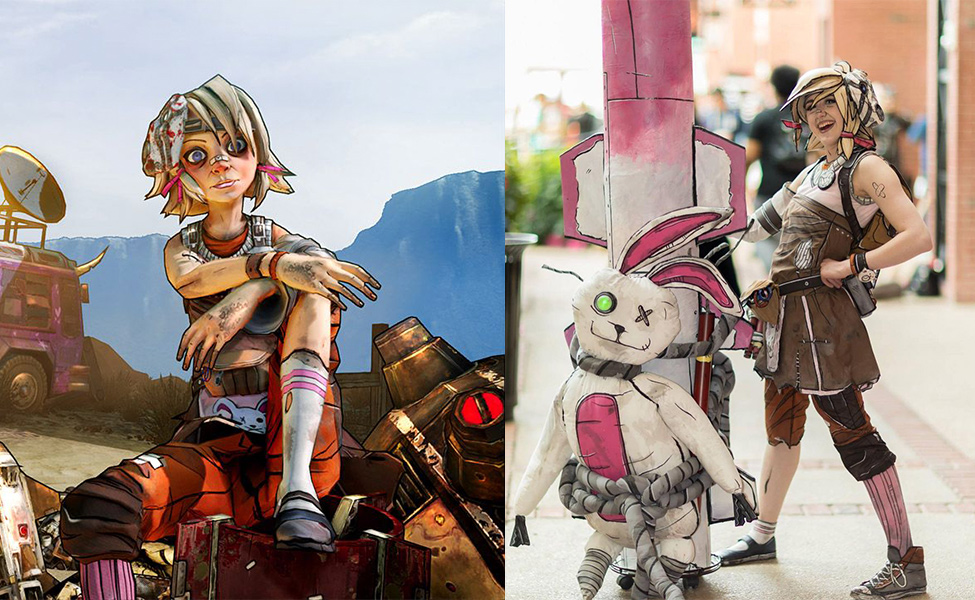
The “looter shooter” game Borderlands has extremely unique art style characterized by heavy, hand-drawn black outlines and colorfully shaded textures. Some call it cel-shading, others describe it as comic-book style, cartoonish, or ink-textured. Whatever the term, we all know it as the Borderlands effect and it’s simply legendary.
But when cosplaying as Mad Moxxi, Handsome Jack, a Psycho, or your favorite Borderlands character, how do you achieve this Borderlands effect?
Luckily, Labinnak & Mangoloo Cosplays is here to help you nail the look. We’re here to share her process for recreating the Borderlands effect for her jaw-dropping Tiny Tina cosplay. Seriously you’ll have to look real close to see any difference between her cosplay and the original game art.
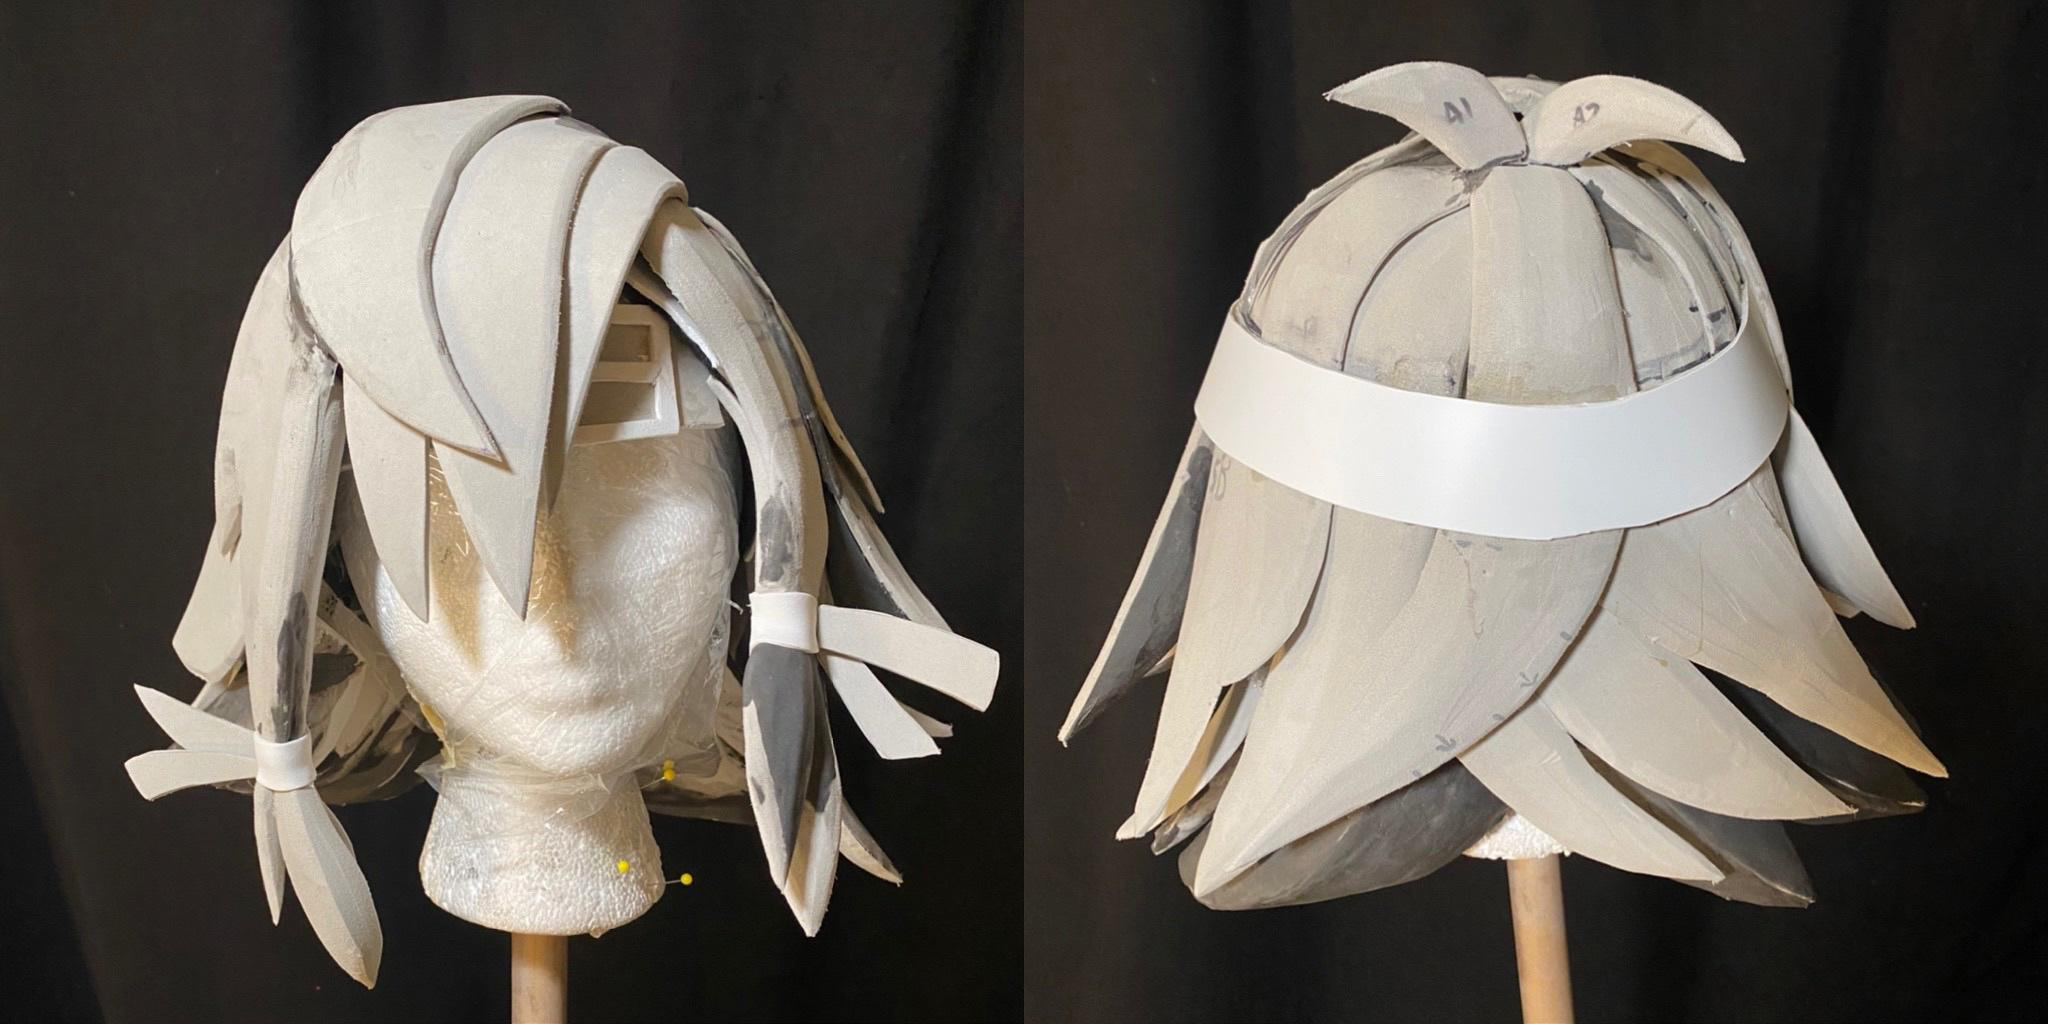
The Wig
Perhaps the toughest part of a Borderlands cosplay is getting the hair right. According to Labinnak, start by making a base with 2mm EVA foam. Next, cut and sand craft foam of different thicknesses, mostly 5mm and 10mm, to match the shape of Tiny Tina’s locks. Floral wire is used to hold the different layers in place, and foam clay to give the wig some fullness and fill in the gaps.
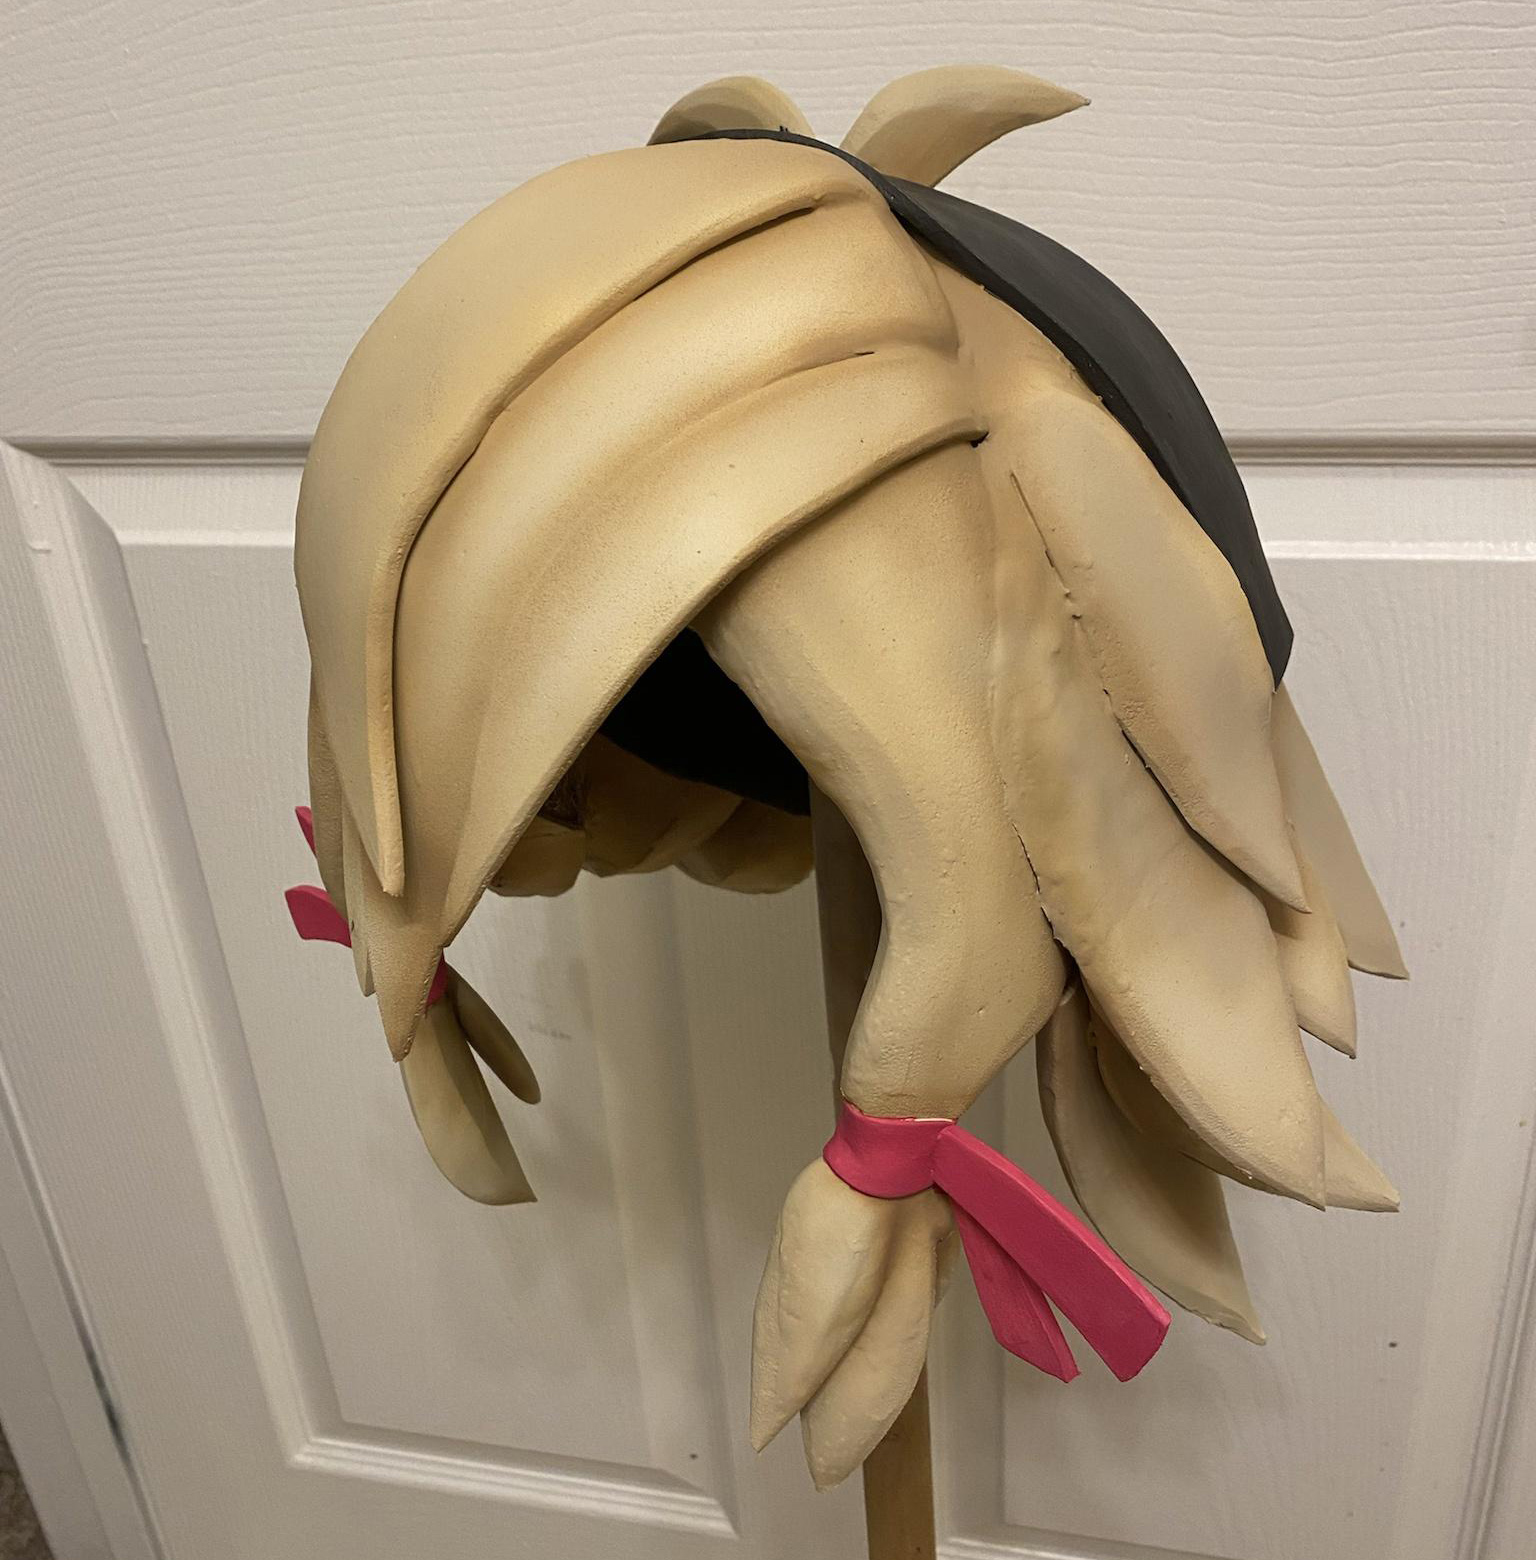
Next, apply a coat of Hexflex primer to the wig. This water-based primer is flexible, meaning it won’t crack, and sets a base for the paint to adhere to. Follow this by airbrushing a base coat of paint. Make sure to match the colors well and give the wig some contouring.
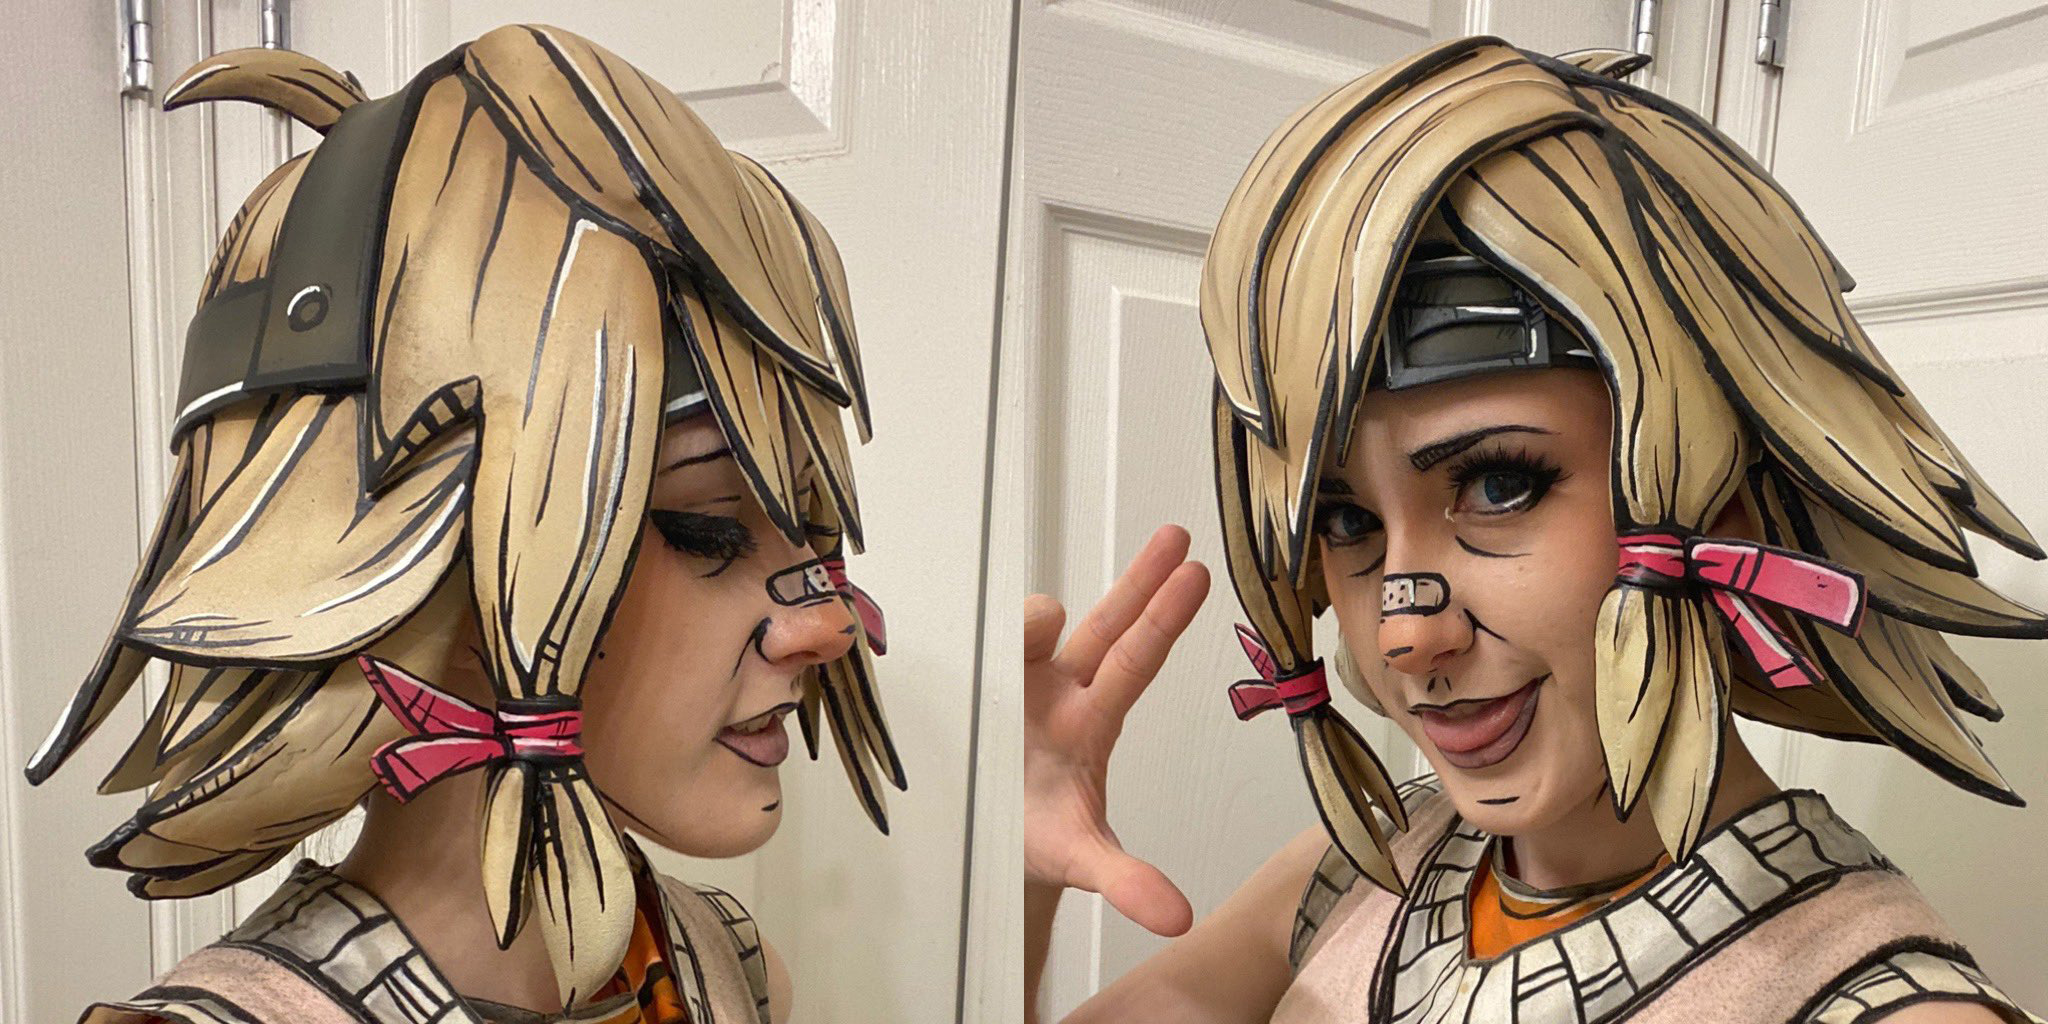
Once the paint has dried, use a black marker to draw the borders. Maybe this is the real reason the game series is called Borderlands. For this, you can use Black 2.0 Paint or black acrylic paint pens. Anyway, set aside plenty of time to color in the black outlines, as it’ll be a lengthy process to get it just right.
Labinnak shares that an eyebrown pencil can be good for adding shading to emphasize the lines, given how soft and blendable it is.
The Makeup
For the perfect cosplay, you’ll want carry over the Borderlands look to your makeup. If you don’t have a reference photo of the Borderlands character you’re cosplaying as out yet, you’ll definitely need one for this step. There will be slight variations depending on the character.
Start by applying a foundation that’s slightly lighter than your own skin tone to your face.
Next, you’ll need to contour. Pick up a contouring kit and contouring brushes if you don’t already have them.
Starting with the darkest color in your contouring palette, shade under your chin, blending into the sides of your neck. You want to give your jawline some definition. Also shade your cheekbones, temples, and around your eyes.
It’s time to add highlights. Pick a color that’s a few shades lighter than your skin tone. Use it to tone your nose, chin, and forehead. Apply some more highlights from just below your temples to the apples of your cheeks. You can also use a white eyeshadow, white crayon, or face paint to really lighten around your eyes and at the tip of your chin and nose.
Now you’ll have an exaggerated look to your shading. Use some intermediate colors from your contour kit to blend the different areas and give your shadows a more natural look.
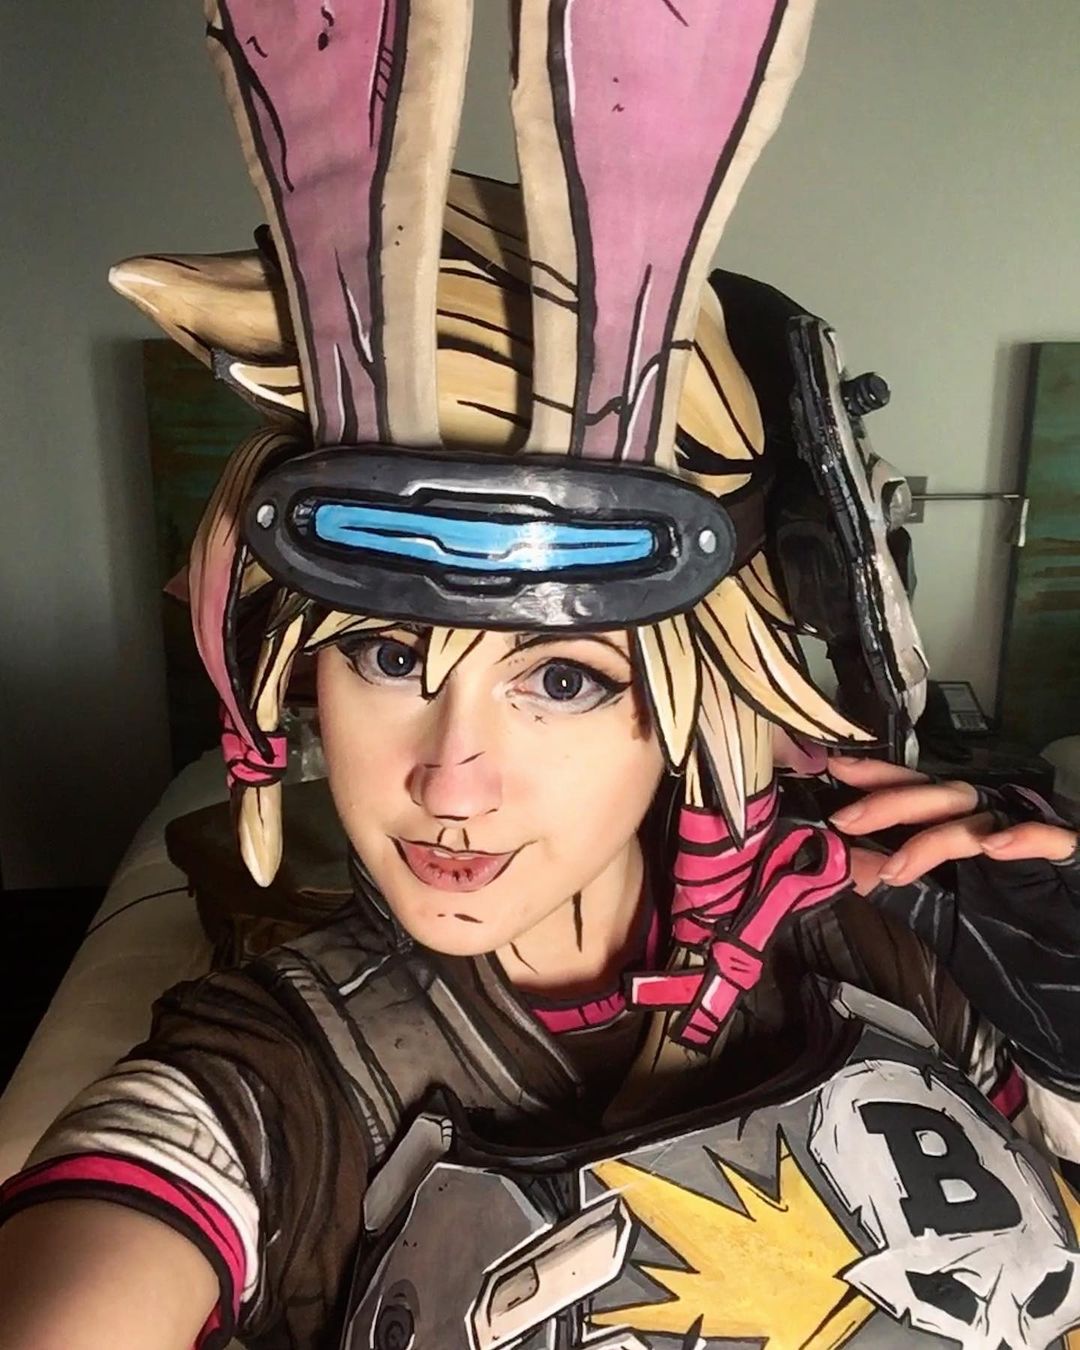
Finally, it’s time to pull out the black liquid eyeliner. Draw lines where the dark and light regions of your makeup meet. Remember that reference image? Now is a good time to go back to it and replicate where the black line are drawn.
When you’re happy with the results, use a makeup setting spray to lock your makeup in place so you don’t smudge your hard work.
Borderlands characters tend to show skin, so use the same techniques for the rest of your body, whether it’s to draw in six-pack abs or add some shading.
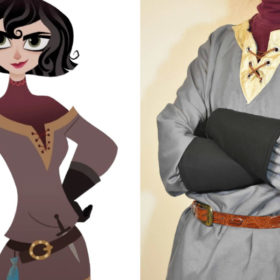
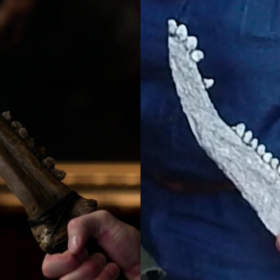
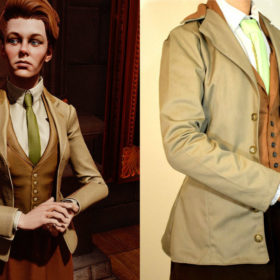
The Costume
For your costume, you’ll want to follow a similar principle as the wig and makeup whether you’re upgrading an off-the-rack costume or crafting your own.
This time, use a black fabric marker, ideally oil-based, to draw outlines on your clothing. You’ll need plenty of markers for this step.
Go back to your reference photo for the exact placement of the lines. For the most part, these lines will emphasize the seams, folds, rips, and other details in the costume.
Huge thanks to Labinnak & Mangoloo Cosplays for sharing her expertise on the Borderlands effect. If you love what you’ve seen, check out more of her work on Instagram and Twitter.
About the Author
Tom
On television, film, music, and all the rest.

There are no comments yet, add one below.
Stay connected. Don't miss out!
Get new costume guides in your inbox once a month.


Leave a Comment