Make Your Own: American McGee’s Alice
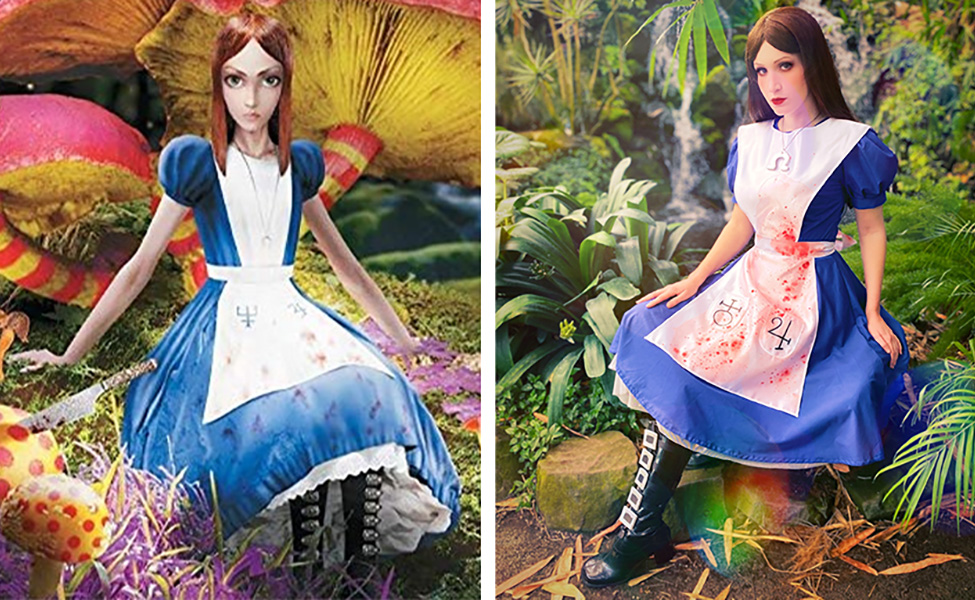
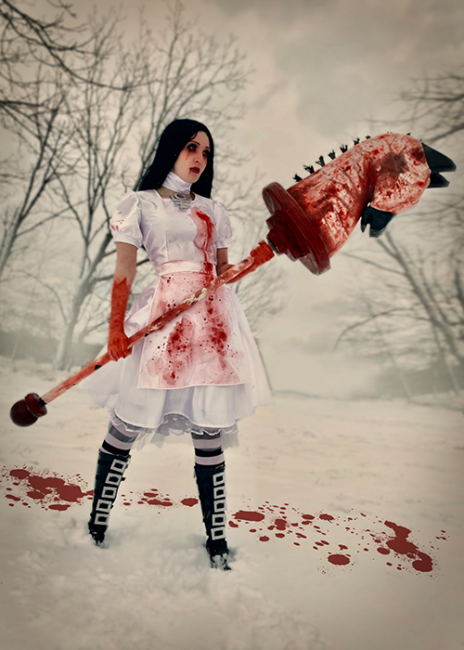
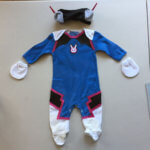
American McGee’s Alice first debuted in 2000 and quickly gained a cult following. In 2011, the second installment Madness Returns was released, in which we see Alice enter “Hysteria” mode. While in Hysteria, Alice is impermeable to attacks from opponents, however, she is only able to tap into this power when one rose of sanity hangs on the vine.
In this tutorial, we will explore both the classic blue dress featured in both games, as well as the Hysteria dress seen in Madness Returns. And, if you’re particularly eager to deal some damage, we will also learn how to make the Hysteria version of Alice’s Hobby Horse weapon.
Note: this tutorial is easily accessible to novice cosplayers, but may also pose an exciting challenge to intermediate crafters as well.
You will need:
Dresses:
- Simplicity pattern R10294
- 3 yards of blue broadcloth (classic dress)*
- 3 yards of bridal satin (Hysteria version)*
- 22″ – 24″ invisible zipper (blue for classic, white for Hysteria)
- Thread (blue for classic, white for Hysteria and the apron for each)
- Simplicity pattern 8533
- 2 yards bridal satin (for classic apron)*
- 1 yard bridal satin (for Hysteria apron)*
- 1 yard lightweight interfacing
- 2 packs of white double-fold bias tape
- Disappearing ink marker
- Silver, black and red acrylic paint
- Fabric medium
- 1 pack Model Magic clay (white for classic, red for Hysteria)
- 2 large pin backs
- E6000 glue
- Duct tape
- Glossy finish sealer
- Butcher paper
- 4 slider buckles (Hysteria version only)
- 4 small sew-in snaps
- Sharpie marker
- 1 sheet of thick craft foam
- 1 necklace chain
- Small pack of large jump rings
- ¼” thick white ribbon
*For exact yardage, refer to the sizing chart on the back of the pattern packets, and add between 1/2 yard and 1 yard for the extra costume embellishments and pattern alterations we will use in this tutorial.
Hysteria Hobby Horse:
- Butcher paper
- Spray adhesive
- Hot glue and glue gun
- Box cutter
- Wooden craft sticks/skewers
- Large pack of black pipe cleaners
- E6000 glue
- 1 wooden dowel rod, approx. 48” long and 1.25” thick
- Large container of Mod Podge
- Lightweight spackling
- Putty knife for spackling application
- 2 yards unbleached muslin
- Red and black acrylic paint
- Red and black spray paint
- 2 packs of polystyrene sheets*
- 1 Foam ball
- Fine grit sandpaper
- Masking tape
- Awl
- Sharpie marker
*(Note: the size of my horse head is 22” tall by 15” wide. I was not able to find the large pack of 15 x 30 polystyrene that I purchased from Lowe’s online, but they have them in-store by the insulation, and you only need 1 pack. Using the 2 packs of 17 x 11 polystyrene from Amazon is fine, it will simply yield a smaller prop and leave you with a bit more leftover foam for future projects.)
Dresses
Step 1:
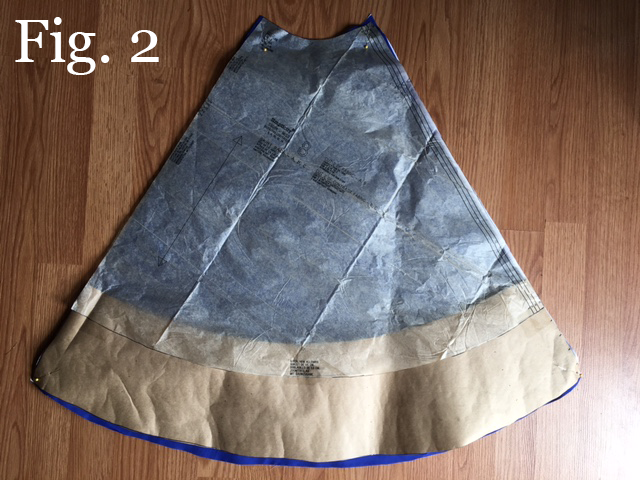
Cut out all of your pattern pieces for Simplicity pattern R10294. For each of the skirt pieces, I dropped the hem line down a few inches so that the dress is a bit longer than the original pattern. To do this, take your butcher paper and attach your skirt pattern piece on top of it with tape. Measure a few inches down from either side of the edges of your piece (roughly 5 inches in my case.)
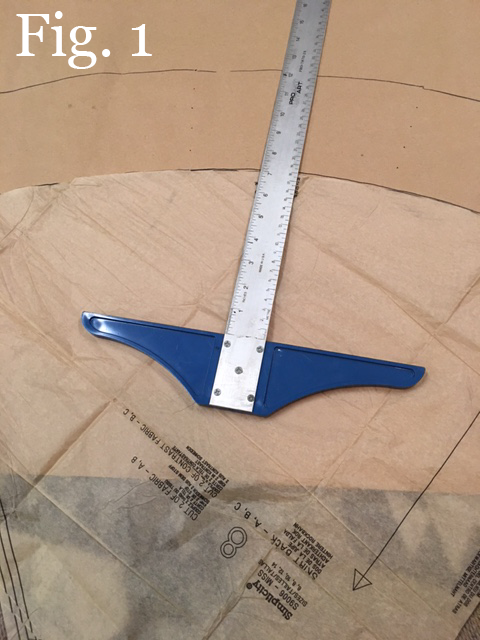
Then, measure that same length over and over along the curve of the bottom piece and make a dot with your marker. (I chose to make a dot every 5 or so inches around). After that, simply connect your dots to draw your curve, which will be your new hemline.
Step 2:
For the classic blue dress, none of the other pattern pieces require any adjustment. When cutting your pieces, cut only the ones from Pattern A, and ignore any of the pieces related to the collar, as we will not be adding the collar, but heming off the neckline instead.
Step 3:
For the Hysteria version of the dress, we will be making adjustments to the collar. Instead of the curved neckline that the original pattern offers, use your disappearing ink marker and draw a square neckline instead on the folded piece of pattern piece 1.
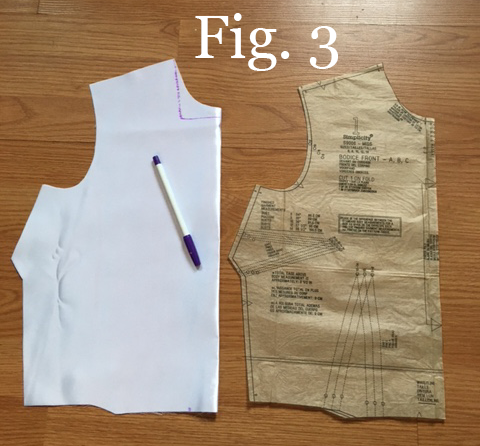
Cut out your new neck line.
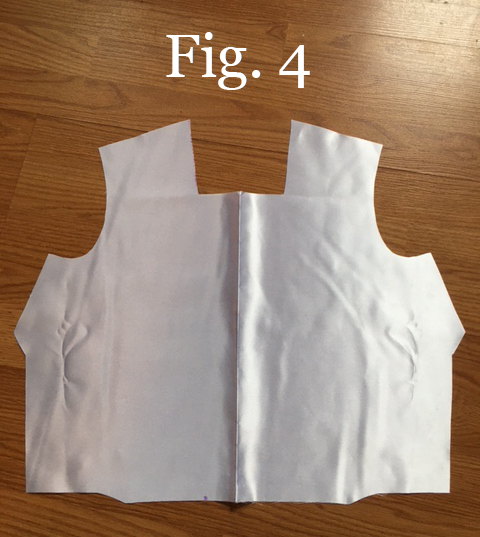
Place the new pattern piece 1 up to your body relative to where the neckline will lay, and make adjustments accordingly. For instance, I realized my new neckline was a bit too small, so I ended up widening just a bit. Remember to start off small and be cautious about how much you cut away, as you can always cut more off.
Step 4:
When it comes to installing the zipper, you can install the zipper in the back of the dress normally for the classic blue version. However, for the Hysteria version, you will want to install the zipper into one side of the dress, as the Hysteria dress has details on the back that will make it impossible to zip from the back.
Step 5:
For the back details of the Hysteria dress, cut out 4 strips of fabric that are about 8 inches long and 2 inches thick. Fold each strip in half (like a hot dog) and iron. Fold the selvages of the long sides in and iron again. Unfold, fold the selvages of the short ends in, fold everything up and iron once more. Each piece should now be about 7 inches long by 1 inch thick.
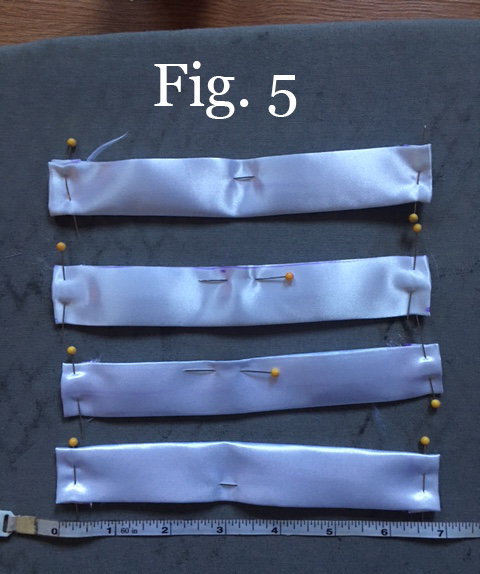
Sew each strip closed.
Step 6:
Weave each strip through a slider buckle, then sew the strips down so that they lay horizontally down the back of the dress at even intervals.

Step 7:
Now onto the apron. For the classic version, you will need to cut out the bib pattern piece from View C of the Simplicity 8533 pattern. For the bib, the view from the back is the same as the view from the front, so we will be adjusting this piece.
To do this, draw a line straight through the shoulder.
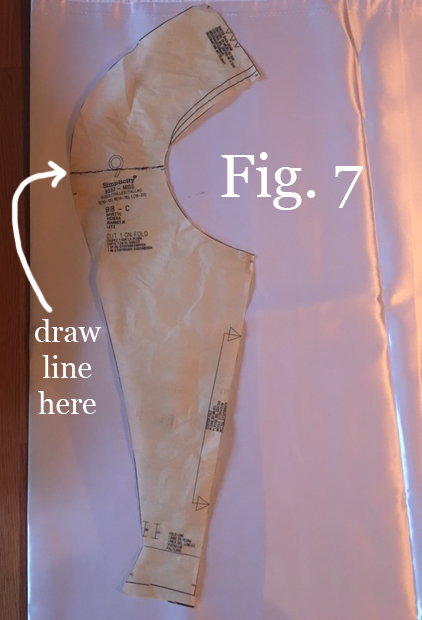
Cut the top piece off and cut 2 pieces of the rest of piece 9 (along the fold, as instructed). Now you have 2 identical pieces that you will attach together at the line you drew on your pattern piece. Wrap your white bias tape around all the raw edges and sew it down to finish it off.
Step 8:
If you are working with the classic Alice dress, put it on and put the apron bib on over top of it. Notice where the bottom of the bib sits, and mark off 2 evenly spaced dots on the front and back of the bib, and 2 evenly spaced dots that correspond to the bib dots on the waistline of the dress. This is where you will be placing your snaps, so that the bottom of the bib attaches to the waist of the dress. (If the bib is too long, don’t be afraid to fold the bottom edges up and sew it down, so long as it is low enough on the bib that it won’t be seen from underneath the apron.)
Step 9:
For the apron itself, cut out all of the pattern pieces that correspond to the tails and waistband of the apron. For the tails, feel free to add a few inches to give your apron a nice big bow in the back. Do not cut out any pieces related to the apron itself. Instead, draw your own pattern on a piece of butcher paper. The shape should be slightly triangular, tapering a bit on the top, but not so much that the bottom corners become floppy. Draw your design on a folded-over piece of butcher paper and cut it out such that it is perfectly symmetrical. This may take a few tries until you come up with something you are happy with, so feel free to experiment with a few pattern pieces before cutting it out of the fabric.
Finish off the raw edges of your apron by wrapping them in bias tape and sewing it down. Install your interfacing and sew in your apron piece as the pattern booklet instructs you to do.
Step 10:
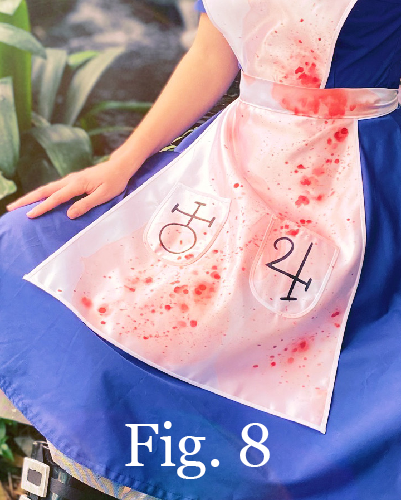
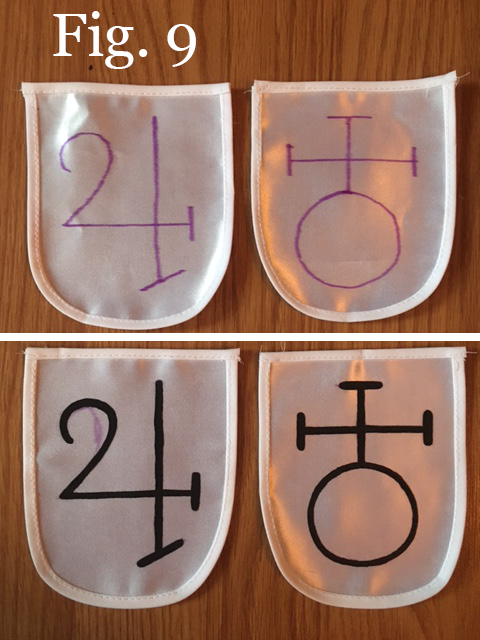
For the pockets, create a pattern piece from your butcher paper once more and cut out 2 identical pockets. Finish off the edges with bias tape as you did for the apron. Use your disappearing ink marker to create the symbols on each pocket, and paint over them with a mix of black acrylic paint and fabric medium. (Refer to the instructions on the fabric medium bottle to make a good mixture.)
Sew each pocket to the front of the apron. NOTE: If you are doing the Hysteria version of the dress, you do not need pockets.
Step 11:
For the Hysteria choker, simply cut a piece of your bridal satin that is a bit smaller than the circumference of your neck, and double the height of your neck. Fold it over, tucking in all the selvages as we did with the back strips. Sew it down, adding one 5” strip of ribbon to each end, which you will use to tie together around your neck. Cut out the shape of the choker medallion from your thick craft foam (do this as well for the classic version, except in the “omega” medallion shape). Paint the medallion silver, and punch your jump ring through the top. For the Hysteria choker, punch the same jump ring through the bottom of your satin choker (it will take a bit of finagling, but it is possible to do this without cutting your satin.) For the classic omega medallion, simply run your necklace chain through the jump ring.
Step 12:
The last piece of the costume you will need is the skull that is on the back of the apron, on top of the bow. To make this, start by sketching out a life-sized version of your skull. Use this sketch as a sizing guide while you mold the skull itself. As you work, make sure that the back of the skull is flat, so that it sits properly on the bow.
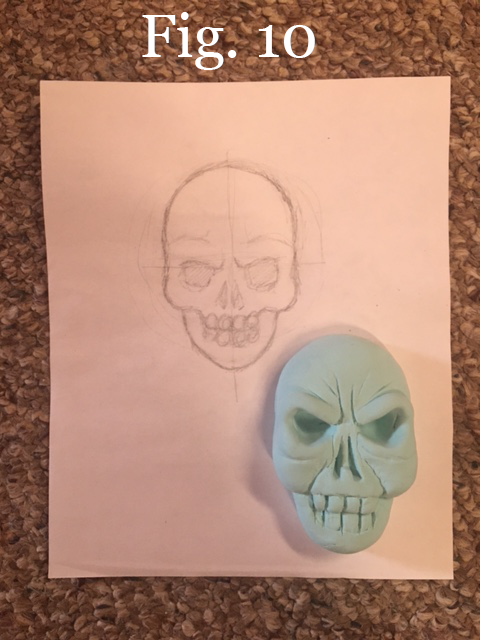
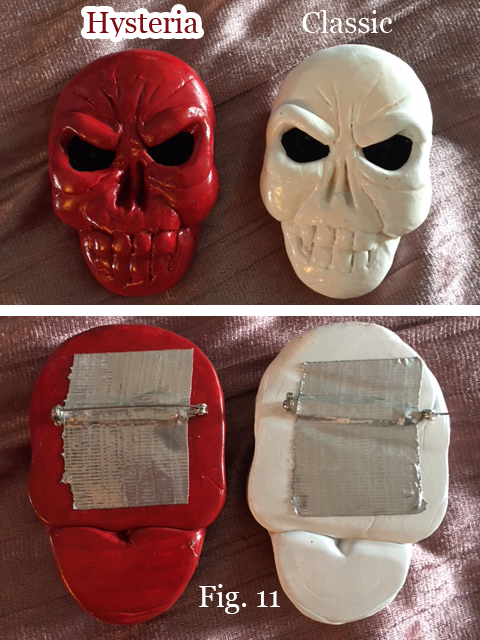
Allow the skull to air dry. Once it is completely dry, fill in the eyes with black acrylic paint, and seal the skull off with glossy sealer. Lastly, glue a large pin back to the back of your skull, and reinforce with duct tape.
Lastly, add some blood to your apron and your Hysteria dress by mixing a bowl of red acrylic paint, fabric medium, and water. Using a paint brush, splatter the red paint by flicking the hairs of the brush with your thumb. Layer your blood splatters by gradually reducing the amount of water you use in your mixture.
HYSTERIA HOBBY HORSE
Step 1:
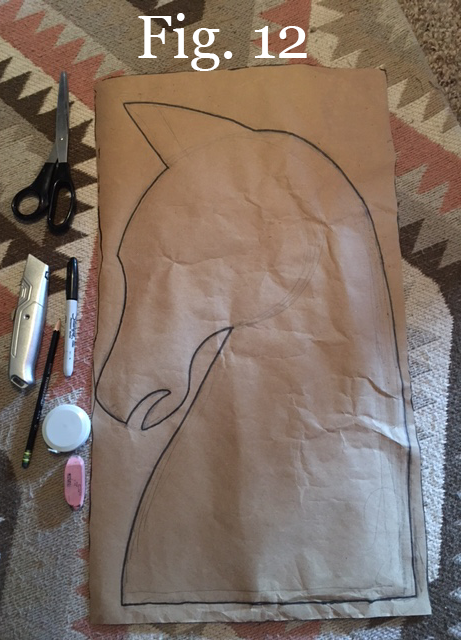
Start by sketching out a design for the silhouette of your horse head on butcher paper. Trace over your sketch with permanent marker – make sure the bottom of the neck is completely straight.
Step 2:
Cut your design out and place it on a sheet of polystyrene.
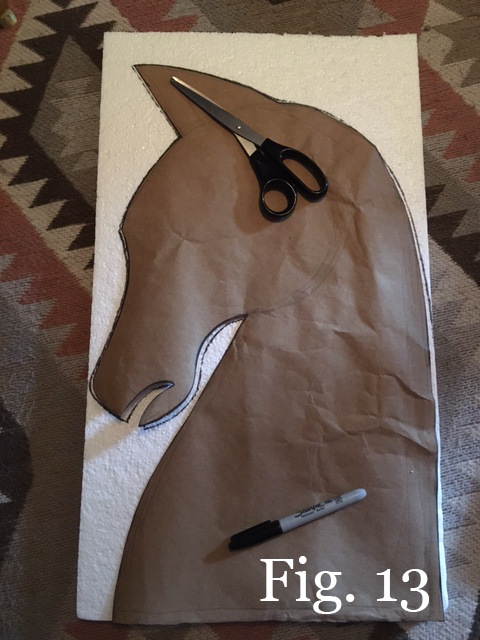
This initial drawing will be your “master piece”, as it will have the entire shape of the horse head, including the ears. For my horse head, I cut 2 pieces of the “master piece” out from the polystyrene sheets with a box cutter.
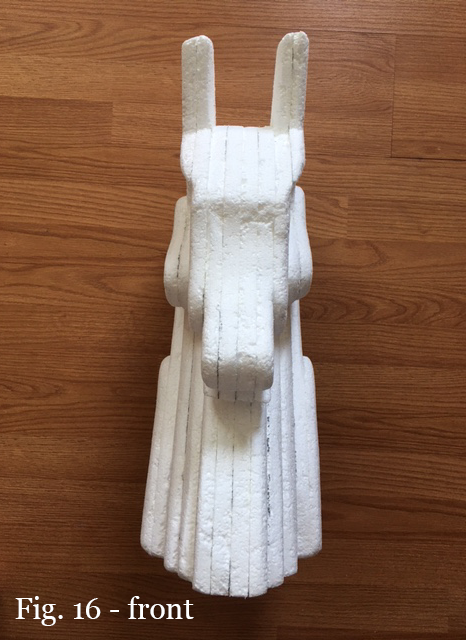
Step 3:
Next, fold the ears of your “master piece” down. Cut 4 pieces of this shape from polystyrene. These pieces will go in between your 2 pieces that have ears.
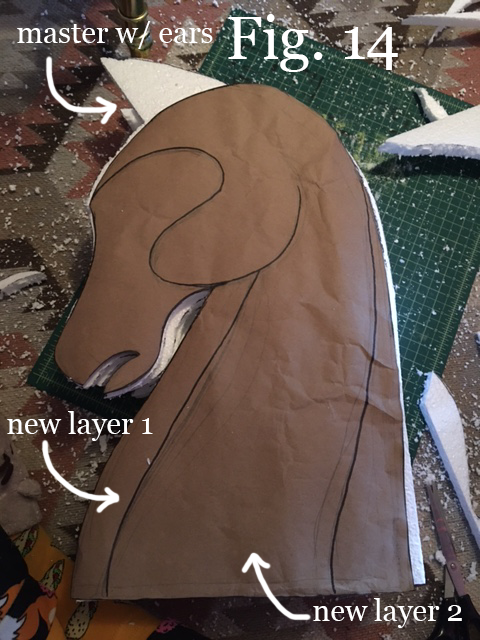
Step 4:
From here, cut a little bit more away from your horse head pattern, so that the neck and cheeks become thicker, the nose becomes thinner, and the eye sockets begin to recede. (See Fig. 14) Make sure to include 1 piece on either side of your foam master pieces that include the ears, so that your ears are 2 sheets thick. As you build outward from there, you can cut the ears off as a part of your subtractive process.
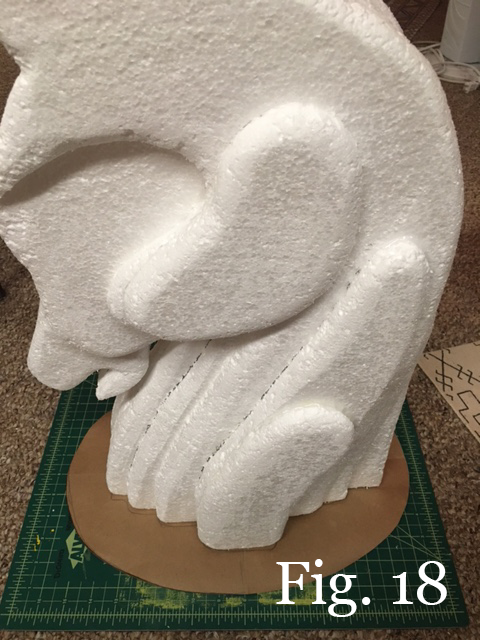
Step 5:
Using your spray adhesive, glue all of your pieces together in the correct order. Be aware that most adhesives cause polystyrene to deteriorate – this spray adhesive will simply be used temporarily as you begin to build your pieces on top of one another. After your horse head is completely assembled, go back in and fill the cracks with a generous amount of hot glue. Sand down all the edges so that each piece transitions a bit smoother into the next.
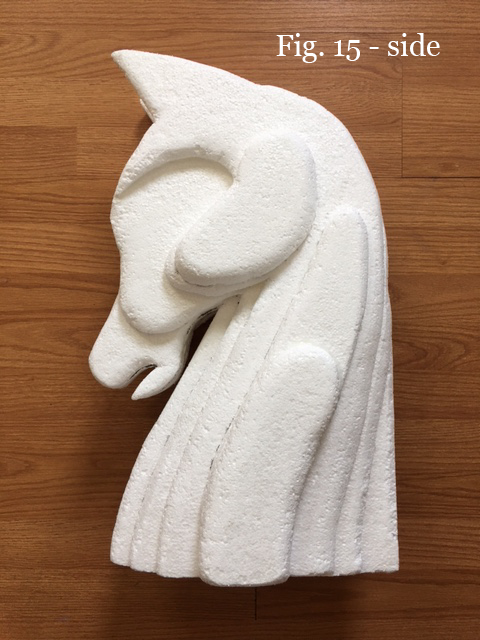
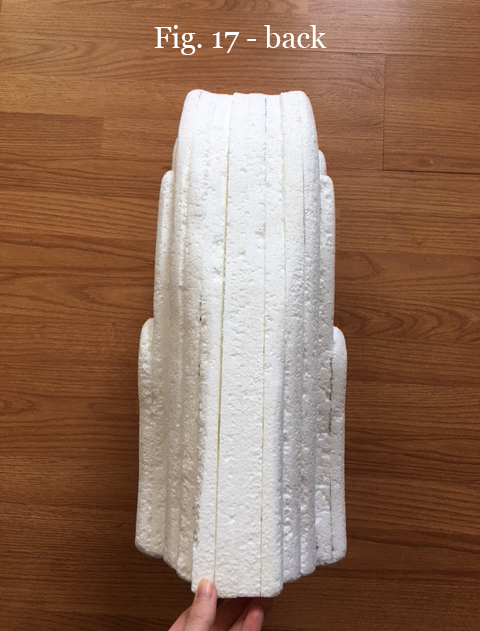
To help each piece of your horse head transition even smoother into the next, lay in some lightweight spackling to fill out the body of the neck and face as much as possible.
Step 6:
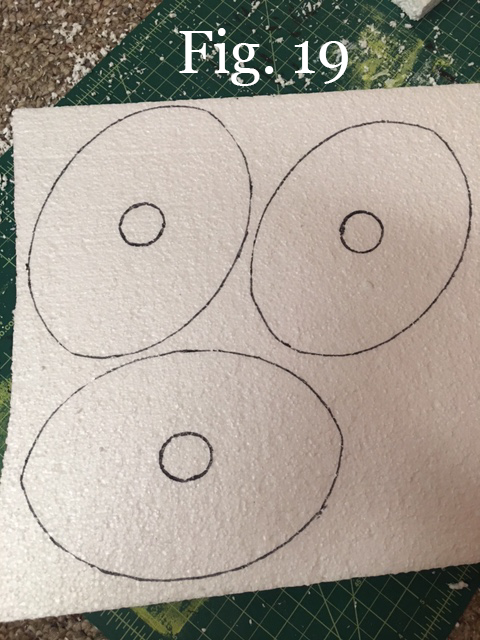
Now you will want to cut ovals for your base. Place your horse head on top of your butcher paper. Draw a rough oval around the horse head so that you have a good idea of how big your oval will need to be. Fold your butcher paper into quarters and mark the curve of your oval with permanent marker. Cut out your shape, open it up, and place your horse head back on top to confirm that it is a decent size.
You will want to draw a hole that is the width of your dowel rod right in the middle of your oval, and cut that hole out. For the base itself, I used 3 of these ovals with the center hole cut out.
Glue your oval pieces together and sand them. To add extra detail to your base, cut a few smaller circles (with holes in the middle) from your leftover polystyrene and glue them to the bottom of your base. For the bottom of the dowel rod, cut 2 small circles using this method and glue them together. Cut your foam ball in half, and scoop out a small ditch in the center of the foam ball so that the dowel rod can wedge into it.
Step 7:
To attach the horse head to the base, you will want to cut your wooden sticks into medium-small sized pieces, cover the bottom halves in hot glue, and stick them straight into the bottom of your horse head.
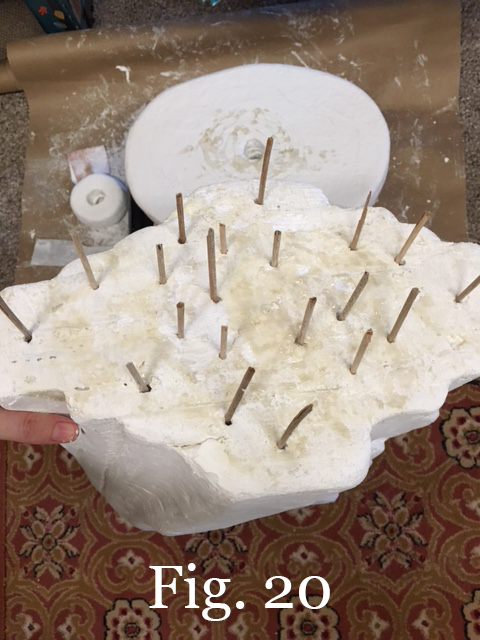
Cover the rest of the surface area with E6000 glue – as much as you can. Gently set the horse head on top of the base to make sure it is evenly placed within the shape of the base. Slowly and gently begin to press the horse head into the base, driving the wooden sticks into the base as you go. Once the bottom of the horse head has reached the surface of the base and is lying as flush as possible, fill every opening between the base and the head with hot glue.
Step 8:
Once everything has completely dried, cover all of your polystyrene pieces in a generous layer of Mod Podge. Allow it to dry, then add a second layer just to be safe. This step will protect the polystyrene from instantly dissolving under the spray paint, so it is crucial that every area is sealed. Once everything has dried, spray the base and all the base pieces (including the foam ball) with red spray paint. Then tape off the base with masking tape, and paint the horse head black.
Step 9:
Once that is dry, take some white paint and mark off a series of evenly-spaced dots down the back center of the horse’s head and neck. Use these dots as a guide for placing your pipe cleaners (or the “mane” of the horse).
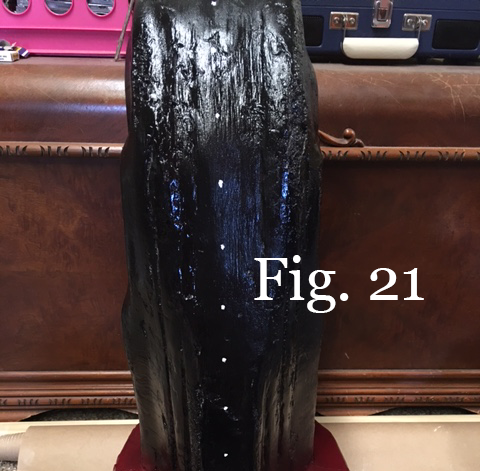
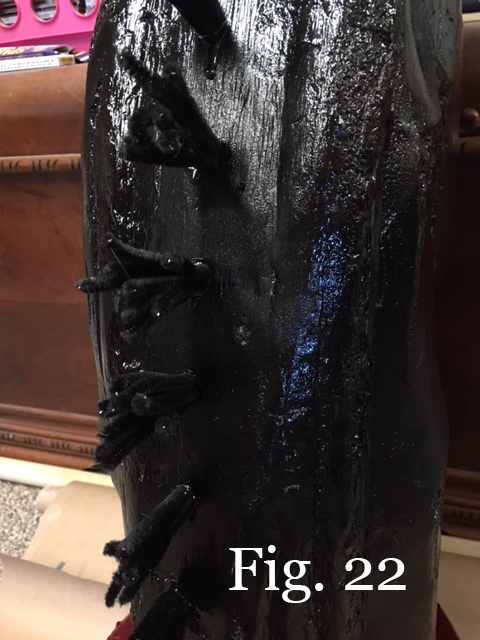
For each dot, use an awl to create a small, somewhat shallow hole and fill the holes with E6000 glue. In each hole, place about 8 pipe cleaner pieces, roughly 5 inches long. Reinforce the pipe cleaners with a circle of hot glue around the base of each cluster.
Step 10:
Cut your muslin into long, 2” thick strips. Starting at the base, wrap your muslin strips all around your horse head, securing them with Mod Podge as you go, until your horse is completely covered. Leave the ears and nose exposed. Do the same with your dowel rod. Add blood to your horse head and dowel rod using the same splattering method we used for the dress. To create the effect of blood that has dried, add a little bit of black or brown to your red paint mixture.
Step 11:
Fill the deep hole that runs through the bottom of your horse head’s base with as much E6000 as you can. Drive the dowel rod into the hole as deep as it will go. If the dowel rod is a bit loose, Fill the hole with the dowel rod in it with hot glue, until the dowel rod is unable to move at all. Do this with the dowel rod aimed straight and flush with the horse head. Do the same with the bottom circle piece, and finally, the foam ball.
And now you’re ready to face the Red Queen herself!
About the Author
Diomira Keane
Cosplayer, artist, cat-lover, party princess extraordinaire.


There are no comments yet, add one below.
Stay connected. Don't miss out!
Get new costume guides in your inbox once a month.


Leave a Comment