Make Your Own: Shy Guy Hoodie
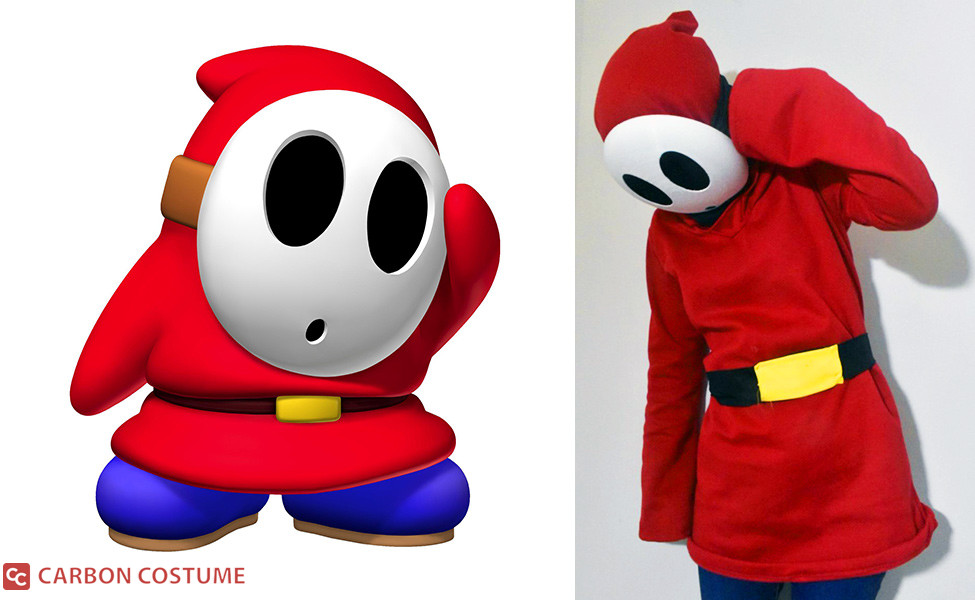
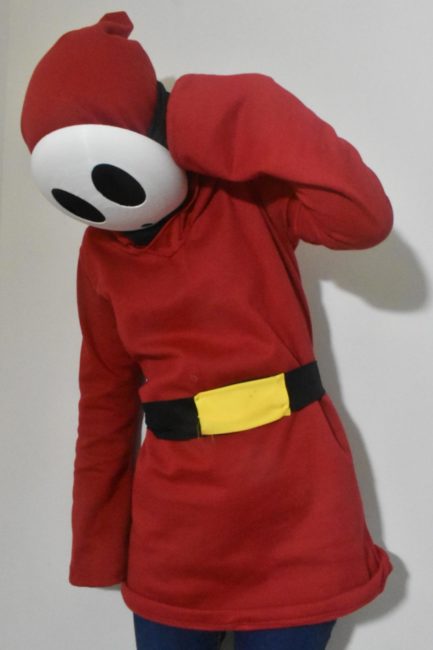
Shy Guys are short beings who hide behind masks. Not much information is offered for them besides the fact that they are, in fact, shy. Shy Guys have been featured in many games in the Mario series, but are mostly known for their work as racers in Mario Kart. Hiding behind a mask is a feat many of us at one time wish we could try.
So, today this tutorial will teach you how to make your own Shy Guy hoodie! (I will only go through the steps for the hoodie. The pants, mask, and shoes can be bought separately following this Shy Guy closet cosplay guide.)
Things You’ll Need:
- Simplicity 1251 sewing pattern (in your size)
- Red hoodie material (2 yards or more. Check the pattern requirements)
- Black material (Preferably one that has some stretch to it. Or not. Your choice.)
- Scissors
- Fabric glue
- Yellow material
- Red thread
- Black thread
- Yellow thread
- Sewing machine
Optional:
This tutorial is pretty simple. You’ll be using your sewing pattern. The steps I’m going to go over will be ones I altered to make the hoodie look more Shy Guy-ish.
Step 1: Cut your pattern
Before you roll your eyes at this step, there is a part I altered. The hoodie part given in this pattern has a tiny little point.
Line the hoodie pattern against the fold of your material then move it forward 5 inches. This gives the hoodie a larger point to flop backward.
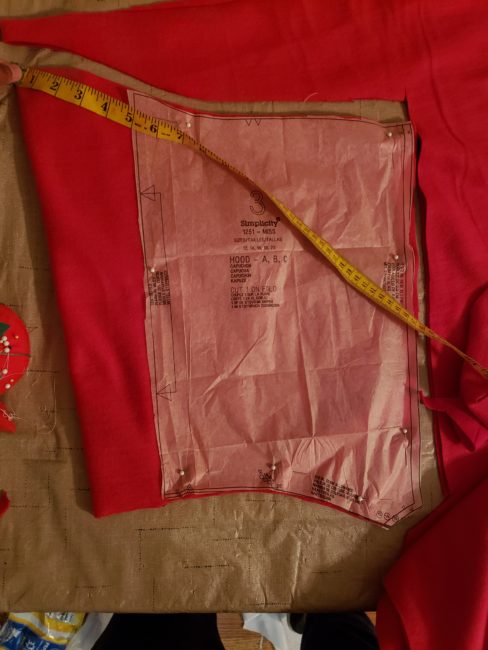
Be warned: This pattern has a v-neck. If you don’t want a v-neck, do not cut it into your material. I accidentally cut the v neck, so I had to sew a piece in front of it as requested.
Step 2: Sew
a. Pretty self explanatory for the hoodie portion. As for the belt, measure around your waist with about 2 or so inches extra space for the hoodie.
b. Measure how wide you want your belt to be and double it. The measurements I used were 34 inches long and 6 inches wide (3 inch thick belt).
c. Fold your belt in half width wise. If your material has a clear difference between the wrong and right sides, sew it with the wrong side OUT. Sew the open edges down, flip it inside out, and potion the seam in the middle. You might want to pin it down to keep it from rolling back as a side seam.
d. OPTIONAL: If you’d like your belt to look a little more….flat, you can hem the top and bottom of the belt length wise.
d. The yellow “belt buckle” is going to be the same width as your belt that’s been folded in half and sewn. It should be about 6 inches wide and sewn in half the same way as the belt was. So to clarify, cut a piece that’s 5 inches long and 6 INCHES WIDE.
e. Fold the yellow material in half width wise, sew it closed, and flip it right side out.
f. Find the middle of your belt. Apply a small dot of fabric glue to each corner of the belt buckle, then press the corners to the belt. Weigh the corners down with something heavy and leave it for a few hours or however long your fabric glue takes to harden.
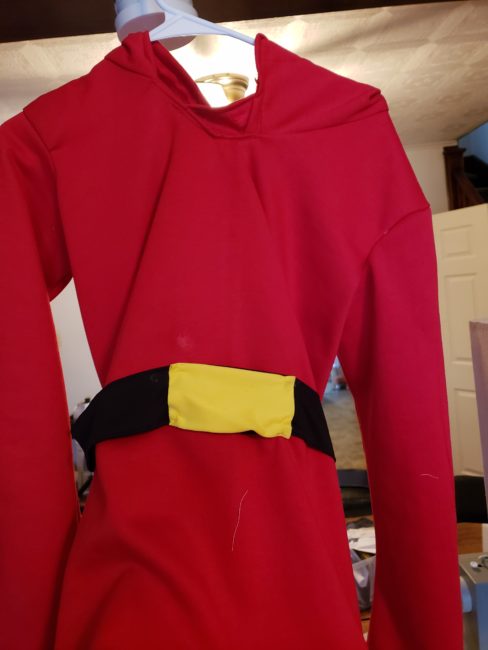
g. Once your glue has dried, put on your hoodie to accurately mark where your belt should be sewn. I sewed the belt completely down width wise in the back, then tacked the belt buckle and the sides up by hand. This method will save time and allow a little give when you take off or put on the hoodie. It’s also less likely to somehow become crooked if you’re like me and you don’t have a sewing mannequin to use.
Hems
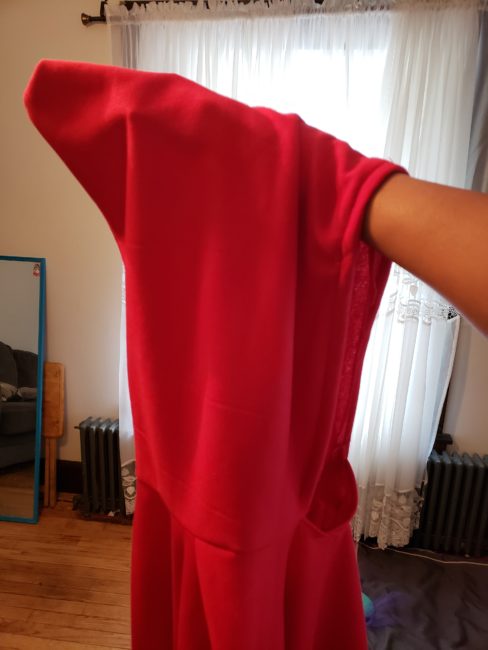
This pattern calls for lattice edges. If you’d like a lattice finish, go ahead. Otherwise, just hem it as you would any other article of clothing.
Once you’re done doing one last check on your hoodie, you’re free to break the laws of street racing as a Shy Guy!
There are no comments yet, add one below.
Stay connected. Don't miss out!
Get new costume guides in your inbox once a month.
 Carbon Costume















Leave a Comment