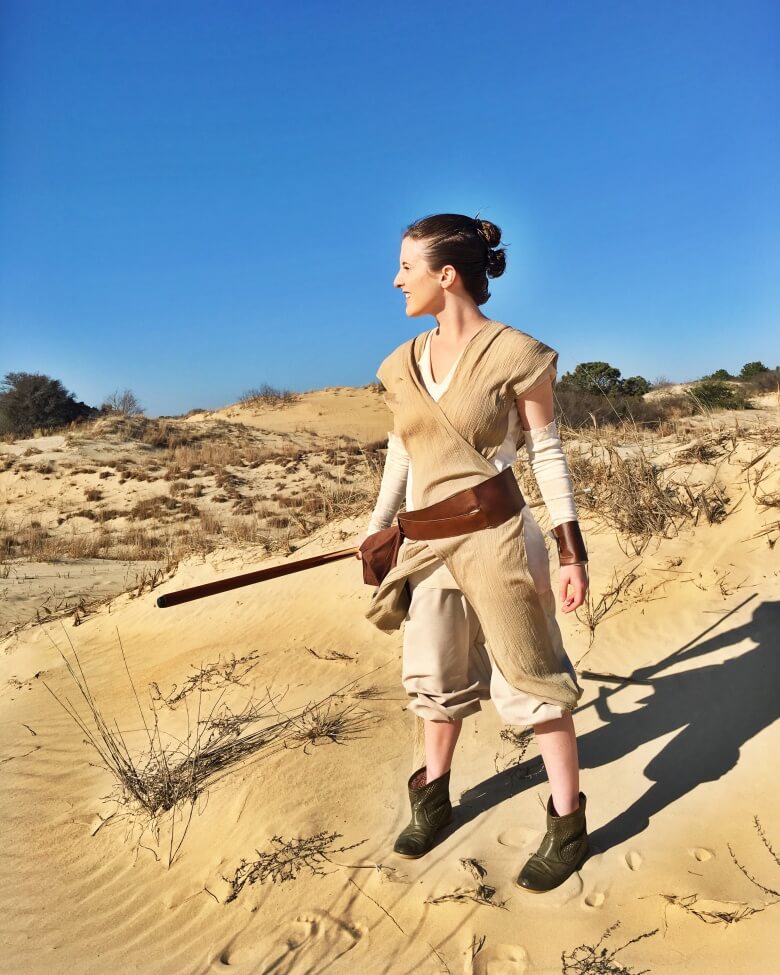
Make Your Own: Rey from Star Wars: The Force Awakens
Skill Level: Beginner
This is a detailed, step-by-step guide to help you create your own Rey costume from Star Wars: The Force Awakens with sewing and fabrication. For the no-sew version, visit this guide.
There are certain finishes, specifically with the belt that you can make “more accurate” to the movie. Due to the popularity of this costume, I tried to make this tutorial as accessible to all parties as possible.
All materials listed are for a women’s US size medium. Please adjust according to your measurements.
Supplies
- Pants pattern: Simplicity 1663
- 1 yard cream 4 way stretch cotton jersey
- 1 ½ yards taupe or tan broadcloth, linen, raw silk, etc
- 1 ½ yards taupe or tan crinkle chiffon (I could not find the color I liked, so I opted to dye white)
- 1 yard brown pleather
- ½ yard brown canvas
- 1 package 1” no roll elastic
- 2 small silver D rings
- 4 silver slide buckles or D rings for belt
- Thread
- An old t-shirt in your size to create your pattern
- Aging and Distressing Supplies: Tea bags, brown spray paint, tan spray paint
Tools
- A sewing machine with zigzag stitch capabilities, with both knit and regular needles
- A quilting ruler
- Straight pins
- Fabric chalk
- Iron for pressing seams
- Optional: An Overlock serger for finishing
Costume Tutorial
Clothes
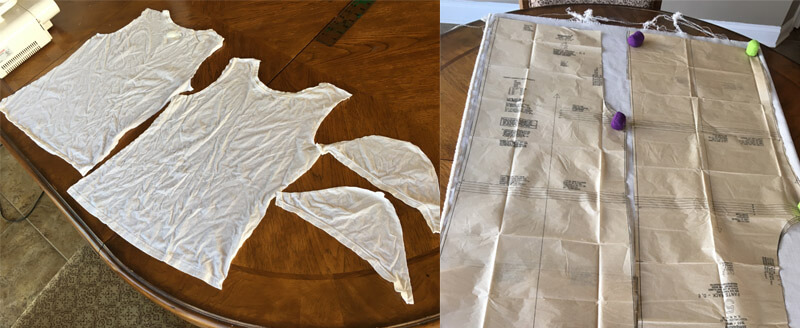
Cut apart your t-shirt at the side, shoulder, and sleeve seams.
Follow directions to cut pants pattern to your size. Shorten 2” longer than desired length at bottom (I subtracted about 7”).
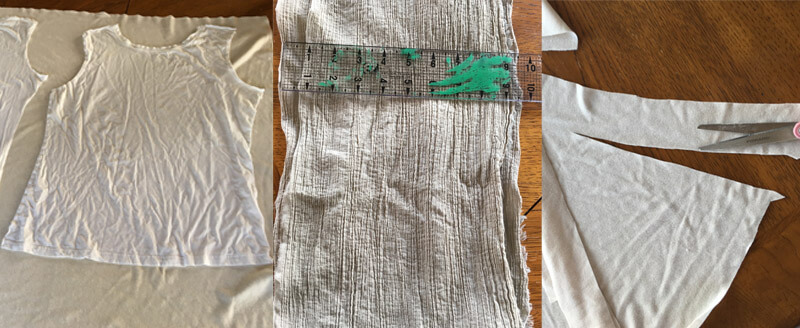
Lay out your t-shirt pieces on a single layer of your fabric. Add 1/4” all the way around to these pieces for seam allowance, and lengthen shirt to desired length.
Cut 2” bands of remaining jersey to create your arm bands. I ended using about 8 in total.
Follow cutting directions for your pants pattern, and cut. Cut elastic to elastic guide provided by pattern. Save additional elastic.
Cut two long 9” wide strips of your viscose fabric. Length will vary depending on height.
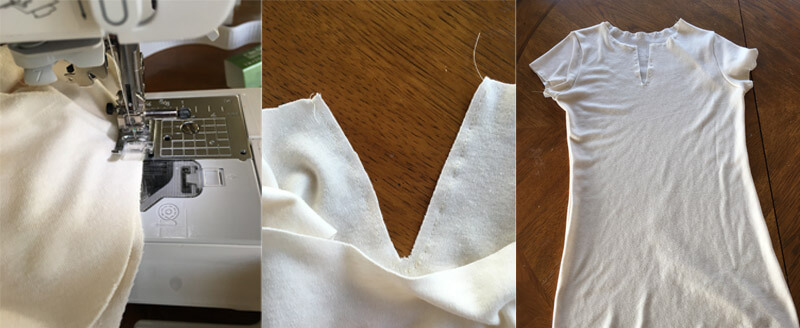
Sew side seams and shoulders of t-shirt together. Attach sleeves. Cut small slit in center front of shirt, and top stitch around.
NOTE: I left my edges raw to keep with the de-constructed theme. I just simply stitched a basting stitch on all my edges to make sure they do not unravel. You may cleanly hem all of your edges if you desire.
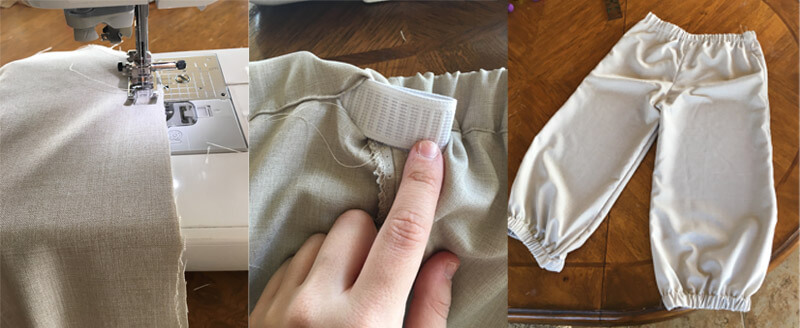
Follow sewing instructions for pants, leaving the hem undone.
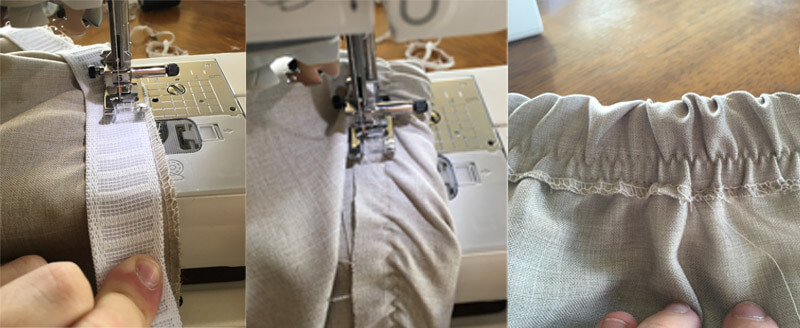
Take your 1” elastic, leaving 1/4” in between edge of fabric and elastic. Stretch as tight as possible while sewing, and zigzag stitch into place. Press 1/4” under, and straight stitch into place, stretching fabric flat as you sew.
Press your seams open as you sew! This allows for everything to lay nice and flat. If you are using your serger to finish seams, remember to serge your seams as you sew each piece.
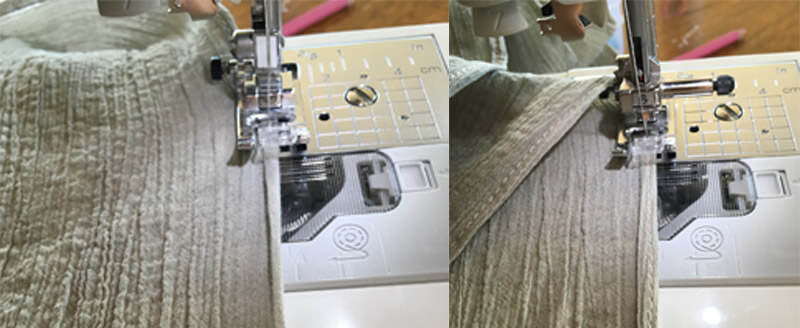
Turn under 1/4” edges on either long side of your viscose, and press. Baste edges down. Turn in and press again. Stitch down to create clean edges.
Once again, I left these hems raw to allow for a more deconstructed look.
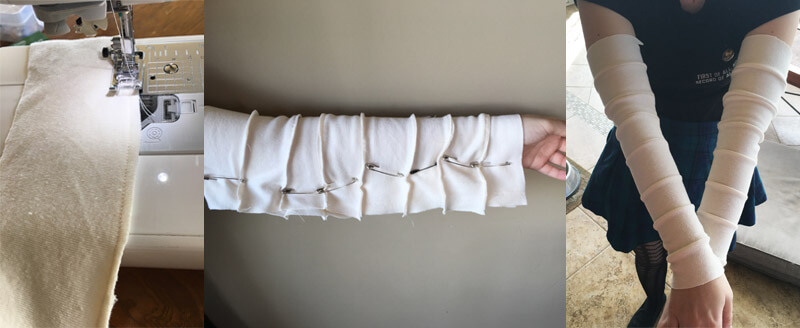
Sew together your 2” wide strips with 1/4” seam allowance to create fabric for arm bands. Fold your sheet in half horizontally, and cut along your fold. Take each of your new pieces, and pin around arm to adjust fit. Sew along the line you pinned, and trim off excess, leaving 1/4” to 1/2” for seam allowance.
Bag and Belts
Cut two 8” by 9” squares of your brown canvas. These will be your bag front and back. Cut a 4” by 9” square. This will be your bag flap. Cut two 8” by 2” strips, these will be your bag sides. Cut a 2” by 9” strip, this will be your bag bottom.
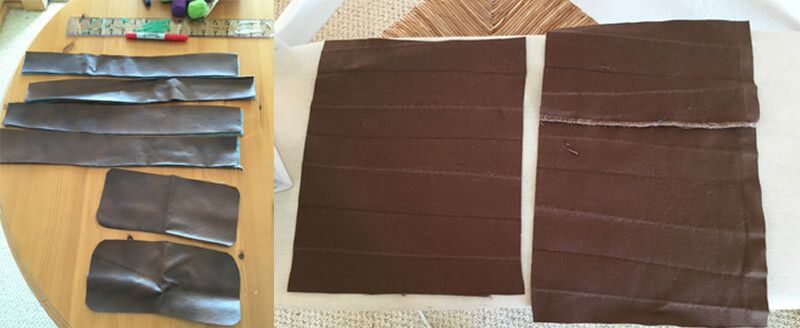
Decide where you would like your belt to sit on your hips. Measure this width, and add 4-6″. Cut 2 4″ by 6″ (or wider depending on your size) squares out of your pleather. These will be the center of your belt. Subtract this from your hip + 4-6″ measurement. Divide in half. This is the length you need for each of your belts. Cut 4 1 1/2″ by your new number strips. These will be your bag straps.
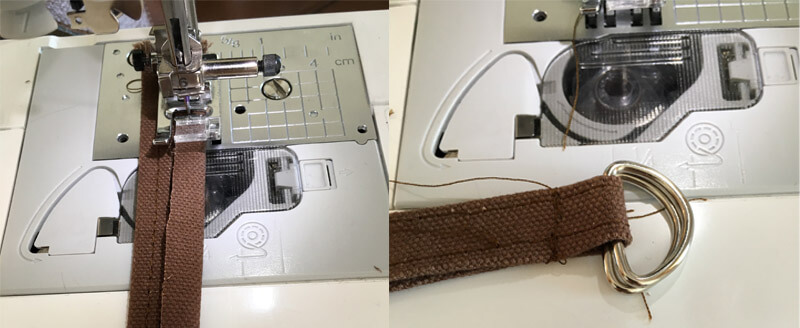
Create bag straps by cutting one 8” by 1 1/2” strip of canvas. Turn edges in to clean finish, cut in half. Press. Attach D rings at raw edge on one side. Sew other side shut.
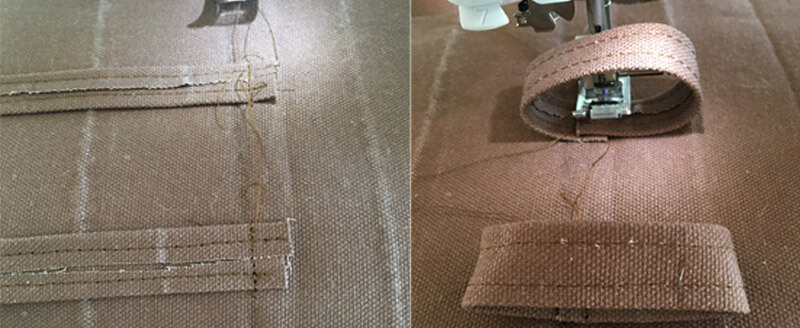
Create belt loops with the same method you created your straps, and cut in half. Sew both ends down to center of your back bag piece.
Hem bottom edge of bag top flap. Sew your bag straps to your bag front, and top flap. Sew top flap to back. Attach your side pieces to bag front. Attach bag bottom to bag front. Sew back to front.
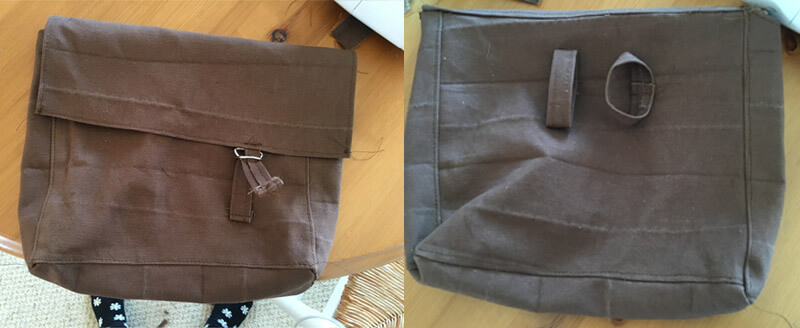
Optional: I top stitched 1/8” from each edge. This is a nice decorative touch, but not necessary.
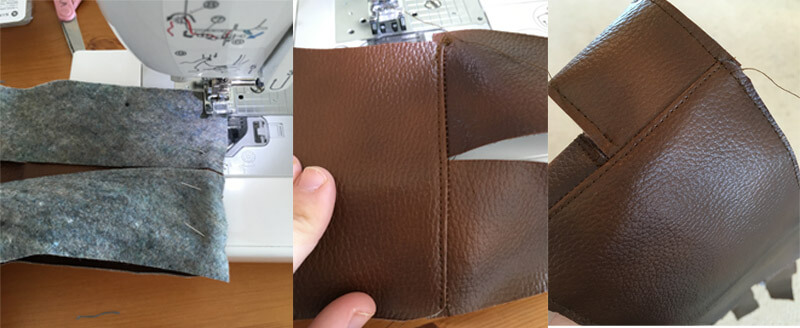
Sew one set of straps to either side of one of your belt side. Repeat on other belt, and sandwich together. Top stitch together 1/8″ from the edge, leaving ends of one side of your straps. Top stitch other side closed. Attach 2 D rings to each one of your open belts.
Aging and Distressing Tutorial
There’s a million ways to do all of these distressing and aging looks. They make specialty products like wax sticks, powders, dyes, etc. I didn’t want you to have to buy a bunch of fancy products just to use on one project. If you feel like you’d rather choose a different method, go for it!
Think of places where dirt would hit more. The bottoms, sleeves, arm bands, etc. These places would be dirtier than the rest of the costume.
Tea Bath
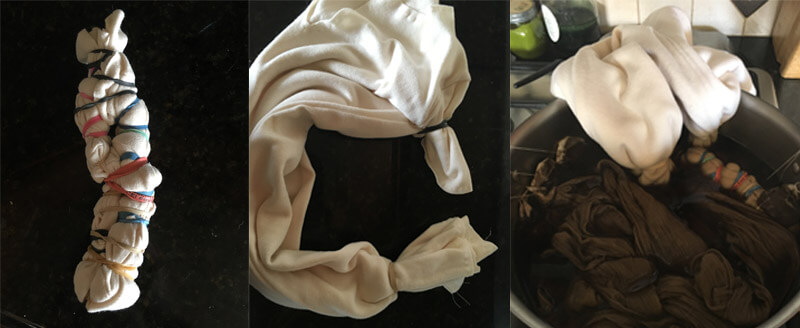
Boil a large pot of water, and add tea bags. I used about 8. Let steep for 4-5 minutes, then turn heat off.
Wrap your arm bands together with rubber bands. Tie the ends of your t-shirt sleeves, and hem off with rubber bands as well. If you choose to age your viscose, you can tie it off with rubber bands. I stuck mine directly in the tea bath without any banding. Allow all of these to sit in the tea bath until desired color is reached, it took me about 20 minutes. Run through the washer with detergent, and dry.
Spray Paint
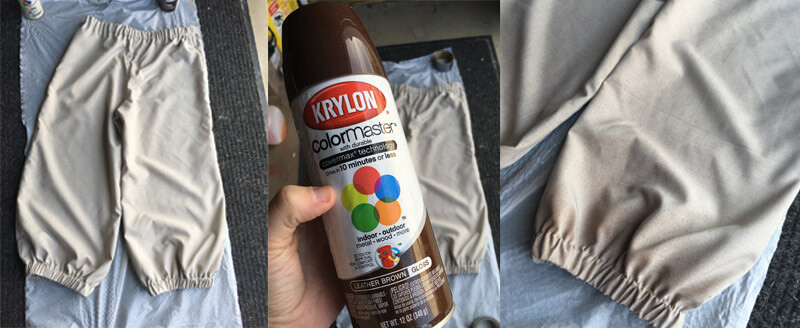
I chose to spray paint my pants. You may use fabric spray if you desire, but spray paint does not typically come off of fabric, so I used household paint.
Lay your pants out flat on a drop cloth in a well ventilated area. Stand over your product, and lightly spray a haze of paint over the whole garment from about 18” away, focusing on ends of pants. Make sure to constantly be moving your spray area, otherwise you will create concentrated spots of paint. Flip and repeat. This gives garments that dirty, dusty look without using theatrical dirt.
About the Author
Alexa O'Neill
Costume Designer and fabricator by day, Magical Girl crime fighter by night. Cosplay enthusiast extraordinaire .
Related Posts

There are no comments yet, add one below.
Stay connected. Don't miss out!
Get new costume guides in your inbox once a month.


Leave a Comment