Make Your Own: Twilight Princess Zelda
All fabric used for this costume came from FabricWholesaleDirect.com!
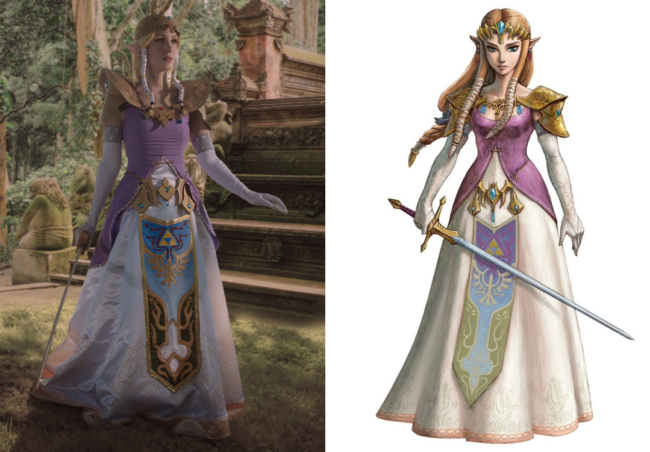
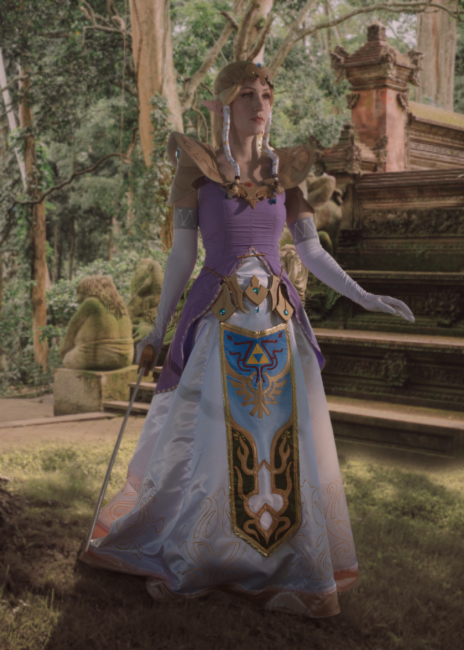
Released in November of 2006, The Legend of Zelda: Twilight Princess is the 13th chapter of The Legend of Zelda series. Somewhat dark in tone as compared to the other Zelda games, the plot follows Link as a young man as he battles Bokoblins, Bulblins, and Fire Bubbles. For this tutorial, we will be exploring Zelda’s iconic white dress with its elegant purple overlay, intricate apron, and ornately bejeweled pauldrons.
This tutorial is intended for intermediate to advanced cosplayers who have some experience with garment-making under their belts, particularly with using fusible webbing. However, the armor aspects of this cosplay provide a wonderful learning opportunity for somewhat-seasoned but “still-new” cosplayers as well!
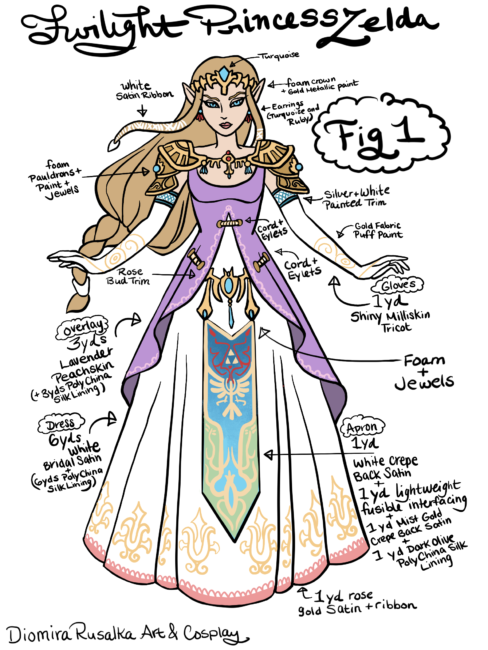
If at any point you find yourself stuck on a step during this tutorial, feel free to reference Fig. 1, in which I have provided a map of each piece and how it relates to the full costume.
You will need:
White dress:
- 6 yards white Bridal Satin and matching thread
- 6 yards white Poly China Silk lining
- 1 yard rose gold Bridal Satin (trim) and matching thread
Purple overlay:
Apron:
- 1 yard white Crepe Back Satin
- 1 yard mist gold Crepe Back Satin and gold thread
- 1 yard dark olive Poly China Silk lining and olive thread
Gloves
Other:
- 1 yard Wonder Under fusible web
- Simplicity pattern 8113
- McCall’s pattern M7397
- Gold bias tape and lilac grey bias tape (double fold)
- 4 yards Simplicity rose bud trim
- Pink ribbon (optional trim)
- Gold fabric paint
- White fabric paint
- Red fabric paint
- Yellow fabric paint
- Silver acrylic paint
- Blue acrylic paint
- Fabric medium
- Sponge brush
- Hot glue and glue gun
- E6000 glue
- Spray adhesive
- Eyelets and eyelet kit
- Elastic
- Paper fastener
- Plasti-Dip
- Metallic gold spray paint
- White satin ribbon (for wrapping the front locks of your hair/wig)
- 1mm-2mm foam sheet and 5mm-6mm foam sheet
- Red triangular beads
- Red circular bead
- Blue teardrop prism beads and blue rhinestones
- White 22” invisible zipper and purple 22” invisible zipper
- 2 yards twisted gold cord trim
- Large jump rings
- Foam core board
- Gold embroidery floss and Embroidery needle
- Disappearing ink fabric pen
- Earring hooks
- X-acto knife and posterboard
- Large pin back base
- Elf ears
Step 1:
Begin by cutting out all your pattern pieces for both Simplicity pattern 8113 and McCall’s pattern M7397 according to your size. To save time, overlap your main fabric with your lining fabric. Pin each pattern piece into place with straight pins and cut.
Step 2:
Assemble all of your pieces as per the instructions provided. Starting with the lining of your white base dress, sew all of the pieces together accordingly. Leave all other edges raw for now. Follow the same steps for the dress itself, leaving about 6” loose at the bottom. (That is where you will be sewing in the rose gold trim).
Step 3:
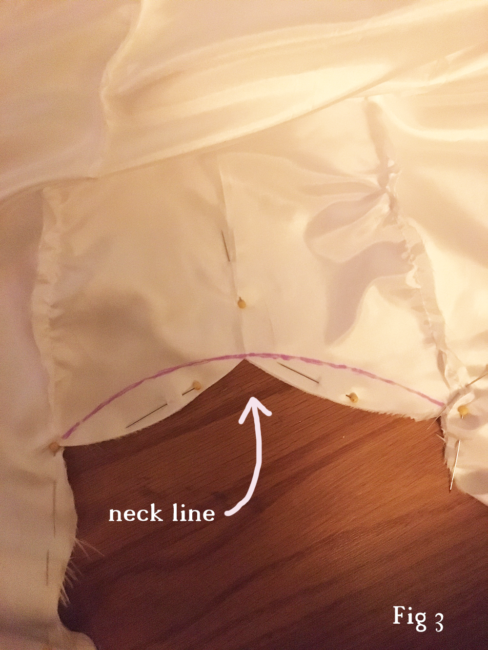
On the front of both the lining piece and the dress piece, use your disappearing ink pen to map out a semicircle at the neckline. Cut along the line to create a curved neckline instead of the sweetheart neckline provided by the pattern. This will give the dress a more accurate look. (You will do this to the purple overlay and the overlay lining as well to match the dress.)
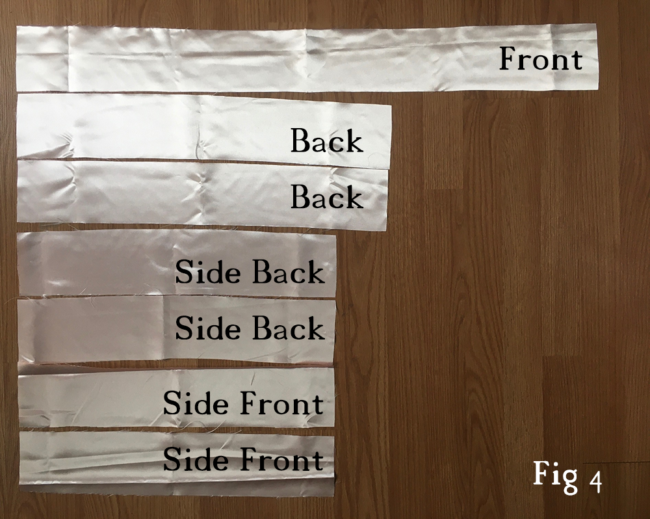
Complete the white dress by sewing the lining to the dress and installing your white 22” inch invisible zipper. (Again, stop the seam between the 2 back pieces several inches from the bottom, leaving room to install the trim.) For the rose gold trim, cut 4-5” wide strips to match the length of the Front piece, Side Front pieces, Side Back pieces, and Back pieces.
Step 4:
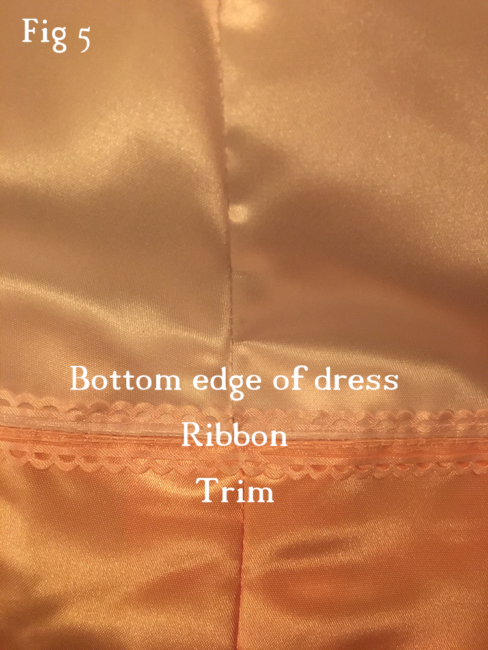
Sew your trim on top of the bottom edges of each dress piece, stitching along the top of your trim pieces. Complete your seams down each piece of your dress and hem the bottom edge. To cover up the seam you used to attach your trim to the bottom of your dress, sew a pink ribbon across the entirety of that seam.
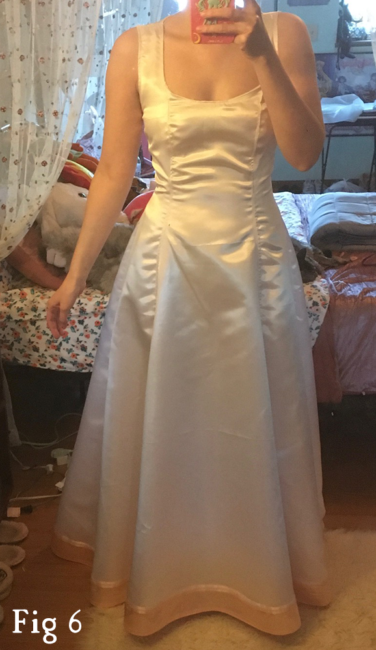
You’ve now successfully finished your base dress, complete with lining!
Step 5:
Follow the same steps for your purple overlay. (Don’t forget to edit your neckline as we did for the white dress.) Sew your lining into your base piece, and finish off the arm holes and neck hole by sandwiching the edges between your purple bias tape. Install your purple 22” zipper.
Step 6:
As an optional step, you may choose to cut your overlay a bit shorter. I chose to do this to more closely resemble Zelda’s overlay. To do this, map out your new length with your disappearing ink pen. Pin your edges down so that they don’t slide around while you’re cutting.
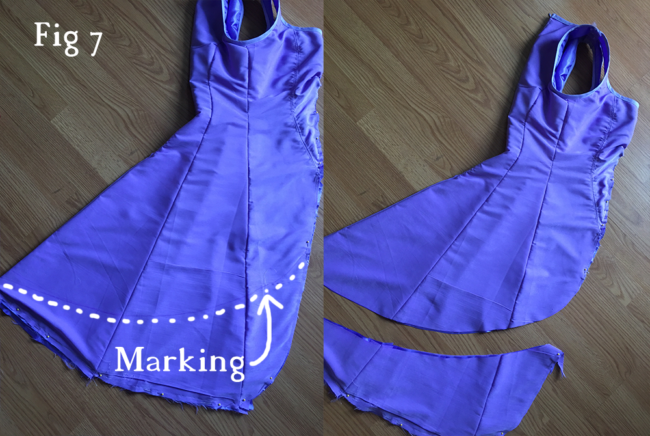
Once you’ve cut your overlay, hem it and finish the bottom edge off with another strip of your purple bias tape.

Step 7:
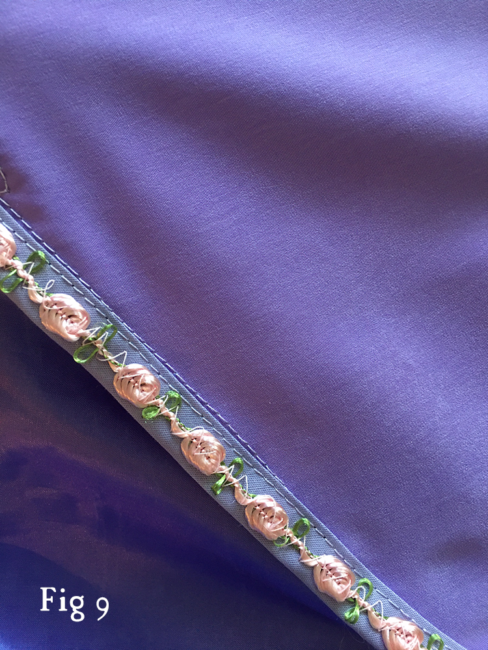
Sew your rose bud trim along the bottom edge.
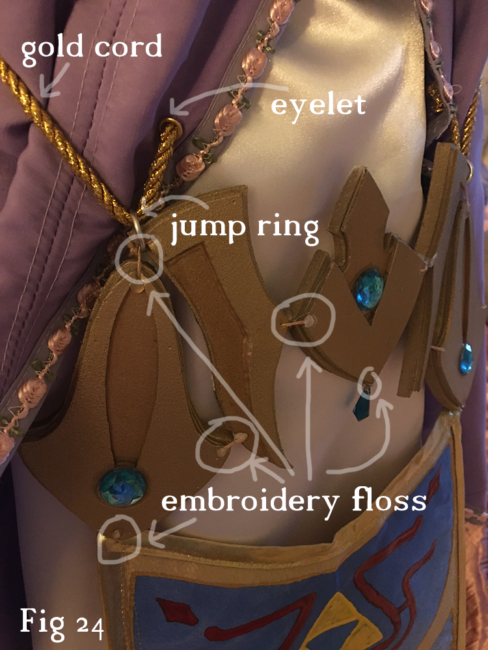
Install 2 eyelets to each side of the middle front portion of your overlay, about 6 inches apart, following the slope of where your hips will be. Thread a strip of your twisted gold cord through these 2 eyelets on both sides, so that you have 1 strip of cording on both sides facing outwards. On the inside, knot your cord off at the ends and glue the knots closed with hot glue. Install 1 eyelet to either side of the upper inner section of your overlay, about an inch or two from wear the overlay parts in the middle. Run one strip of twisted gold cord through them, knotting them off at the ends inside the overlay and gluing them in the same way. (See Fig 1 and Fig 24 for reference.)
Step 8:
On a piece of lightweight posterboard, sketch out a large flower pattern. Fold your design in half and cut it out so that it is perfectly symmetrical. Place your flower pattern at the bottom edge of your white dress and trace around it with your disappearing ink pen.
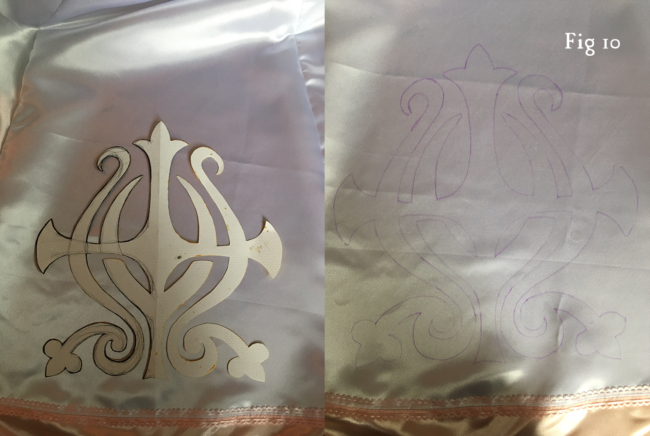
Note: For my flower pattern, I made it large enough so that it filled almost the entirety of the bottom space between each seam, and 2 for the front piece. This size will vary based on the size of your dress.
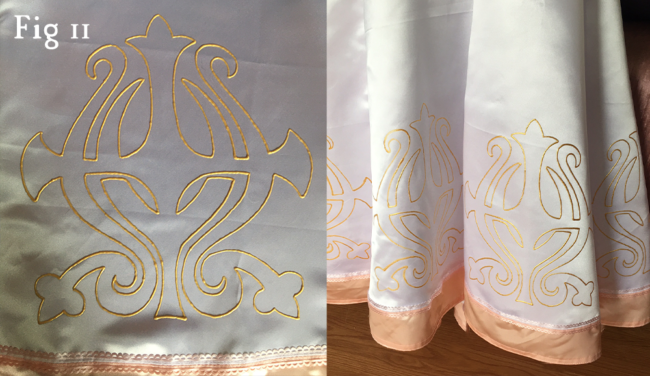
Step 9:
Trace over your flower design with your gold fabric paint.
Step 10:
Cut out your glove pattern pieces from your McCall’s M7397 pattern. Before sewing your pieces, pin each piece down to a slab of foam core and use your gold fabric paint to paint a matching design on each piece. Mix your silver acrylic paint with your fabric medium as per the fabric medium instructions. Using your foam brush, paint a silver border on the top edge of each glove piece, about 4-5” thick.
Note: To keep your metallic silver paint from bleeding, mark off your stopping point with white fabric paint. This will create a border for your silver paint and make it easier to get an exact measurement while painting.
After your paint has dried, use your white fabric paint to create a zig-zag design on the silver border.
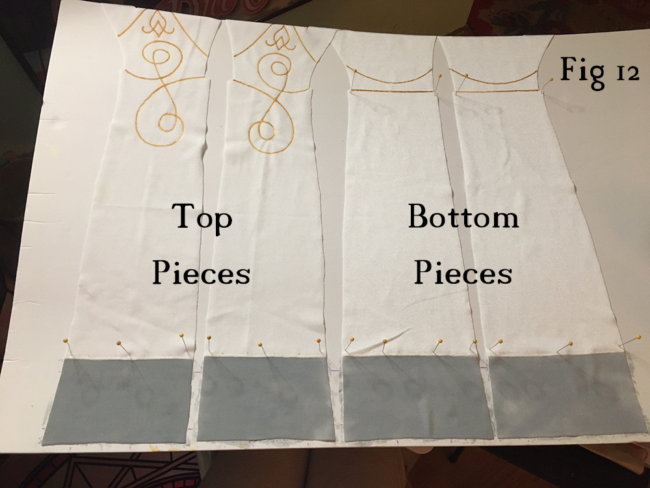
Step 11:
Sew each top piece to each bottom piece, right sides together using your white Eloflex thread and your stretch sewing machine needle.
Step 12:
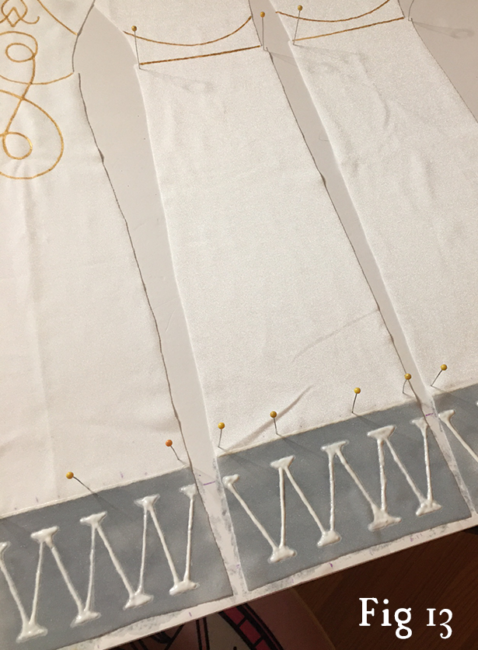
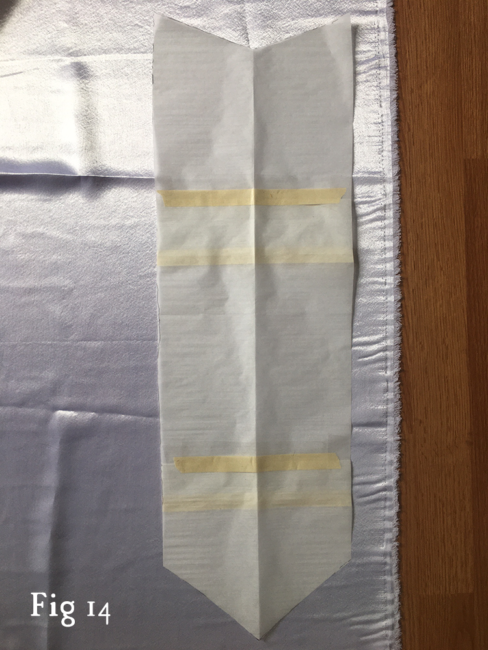
For the apron, I chose to make a pattern myself instead of using the one provided in the Simplicity pattern. To do this, I measured a strip of fabric that was roughly the size and length of the Simplicity apron pattern, with an inward triangle shape at the top and an outward triangle shape at the bottom.
Cut 1 apron piece from your white crepe back satin fabric.
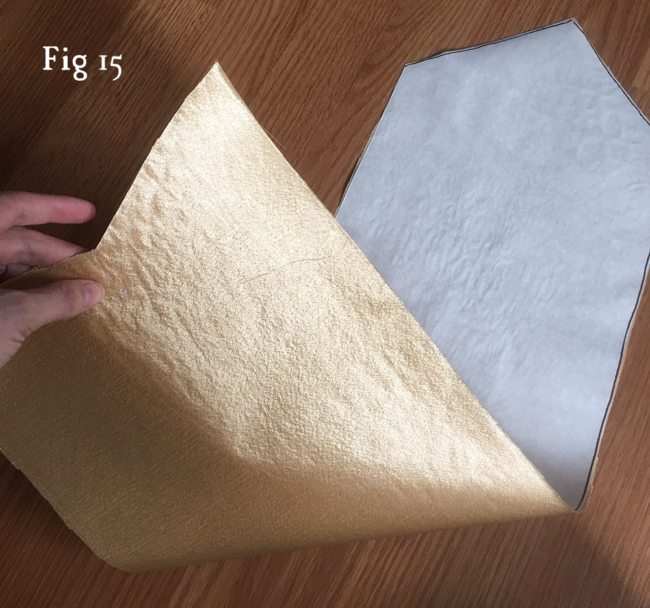
Cut 3 apron pieces from your Wonder Under infusible webbing. Iron 2 webbing pieces to your mist gold crepe back satin and 1 piece to your dark olive poly china silk lining, on LOW heat. Be very careful not to burn your fabric throughout this very delicate process. Cut around the fabric where you ironed on your fusible web pieces.
Step 13:
In a bowl, mix your blue acrylic paint, fabric medium, and water. Use a large sponge to create an ombre effect down your white crepe back satin apron piece, beginning from the top.
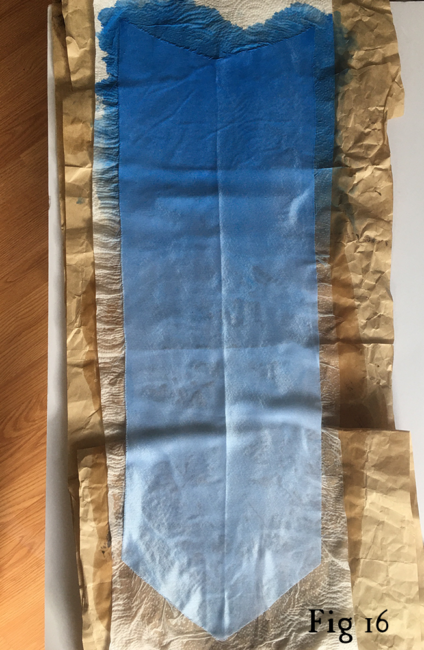
After your fabric has dried, remove the paper backing from one of your gold apron pieces and iron it to the back of your blue ombre piece.
Step 14:
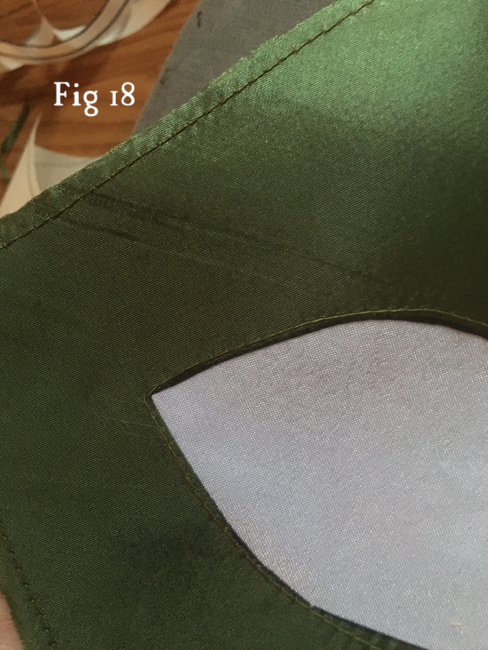
Next, sketch a design for your dark olive green piece on another piece of poster board that is cut to the shape of your apron. Fold it in half, and cut it out. Trace it onto the paper side of your dark olive green piece, and cut your piece out.
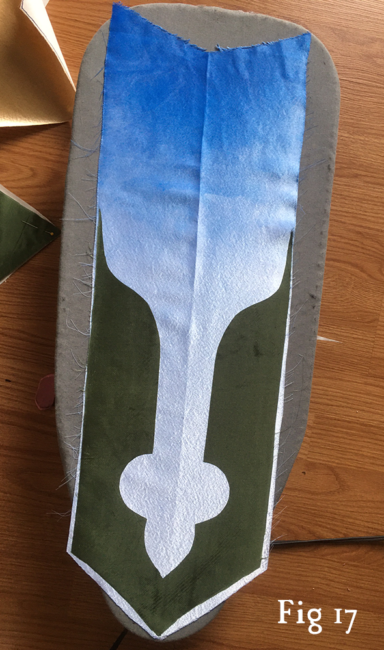
Remove the paper backing from your dark olive piece, and iron it down to the top of your blue ombre piece. Don’t worry if it doesn’t line up perfectly to the outer edges of your blue ombre piece; the edges will be covered with gold bias tape. That being said, do try to line everything up as accurately as you can.
Note: To ensure that your dark olive piece will stay put on your blue ombre piece, you can reinforce it by sewing it all around the edges
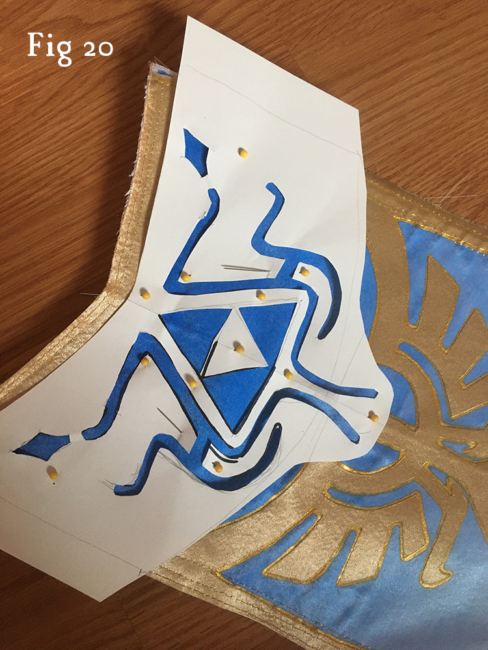
Step 15:
Repeat this step with your second gold piece.
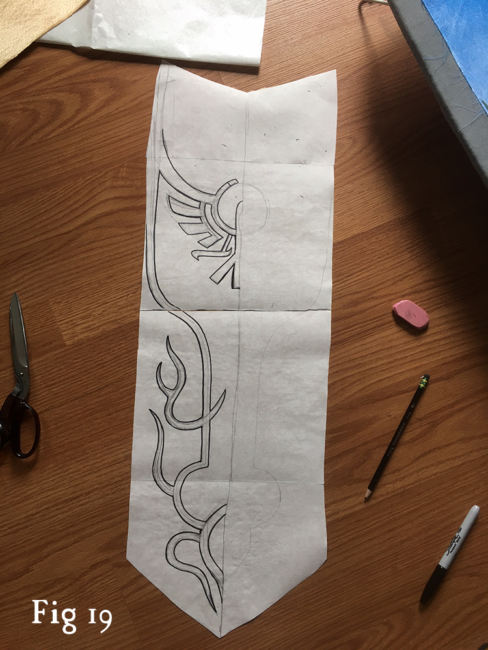
Once again, trace your design, cut it out, and iron it on top of your blue ombre piece with the dark olive piece attached. For extra insurance, sew your piece down using your gold thread. For an added touch, trace all around your design using your gold fabric paint.
Step 16:
For the final design on your apron, cut another piece from your posterboard to trace onto the top section. Use your yellow fabric paint for the Triforce, and your red fabric paint for the design around it.
Step 17:
Finish up the edges of your apron with your gold bias tape.
Step 18:
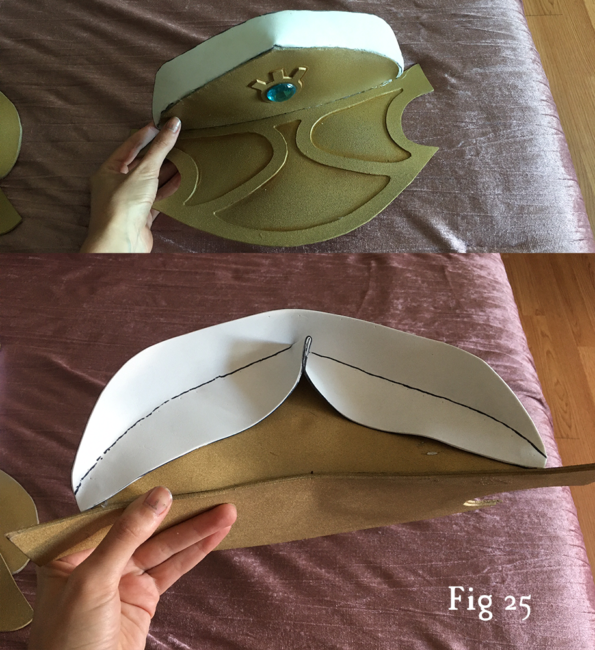
Cut all of your armor pieces out using your thin (1mm-2mm) foam. I included the following minor adjustments to my pattern pieces to make them more accurate:
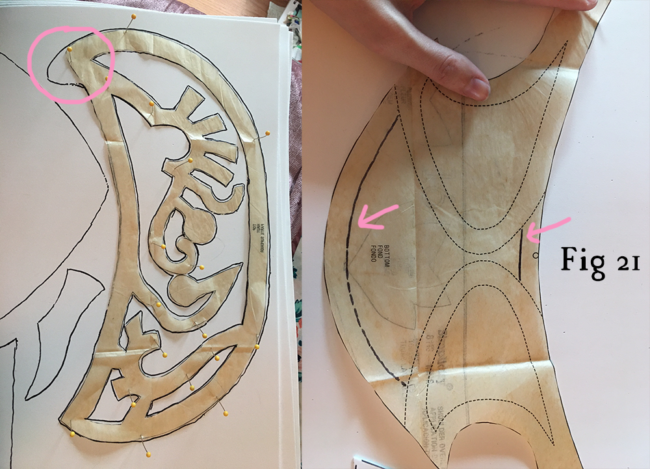
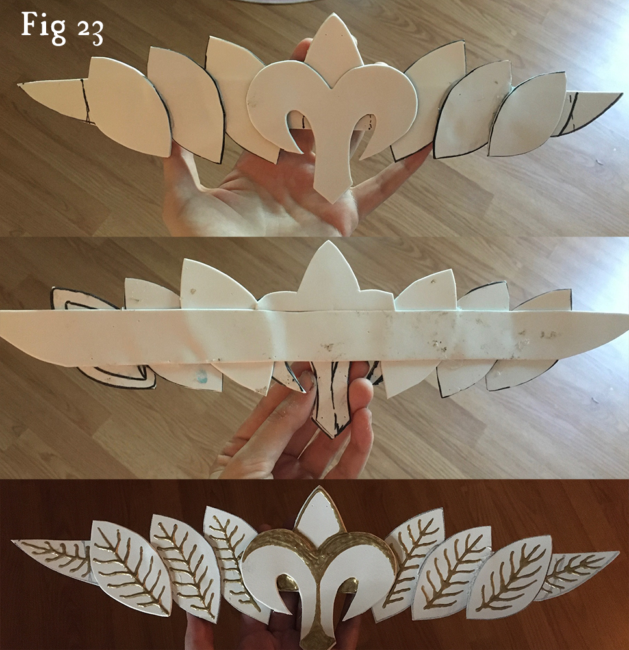
I also chose to create my own pieces for the crown, and attached them to a long, thin strip of thin foam using hot glue. (See Fig 22 for reference.)
Step 19:
Use your spray adhesive to attach the filigree pieces to their base pieces.
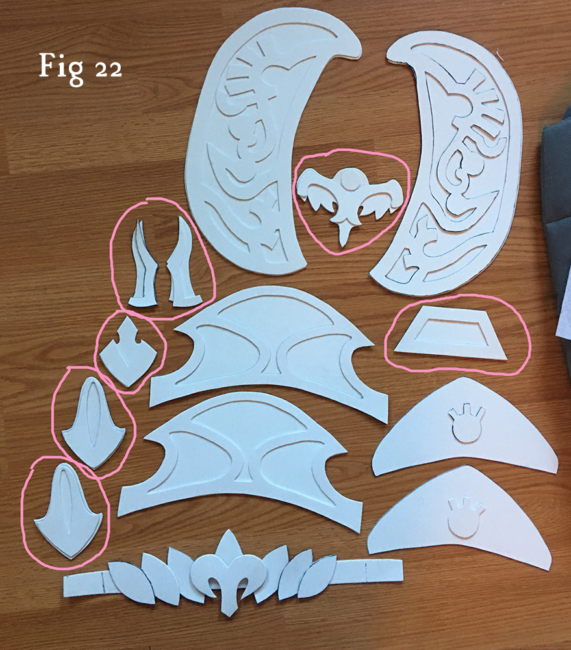
Note: To enhance the look and durability of your pieces, attach a thick (5mm-6mm) piece of foam to the back of each piece seen above in Fig 22 circled in pink. Do NOT attach thick foam to the other pieces.
Next, spray all of your pieces with 1-2 coats of Plasti-Dip. For an extra dimension of detail, you can also use your fabric paint to add ornamental designs to each piece, as I did with my crown piece.
Once all of your pieces are dry, spray the top and bottom side of each piece with your gold metallic spray paint. To give your pieces depth, you can also choose to paint the base part of each piece with a slightly darker gold paint (brown or black acrylic paint mixed with gold metallic acrylic paint, for instance.)
Step 20:
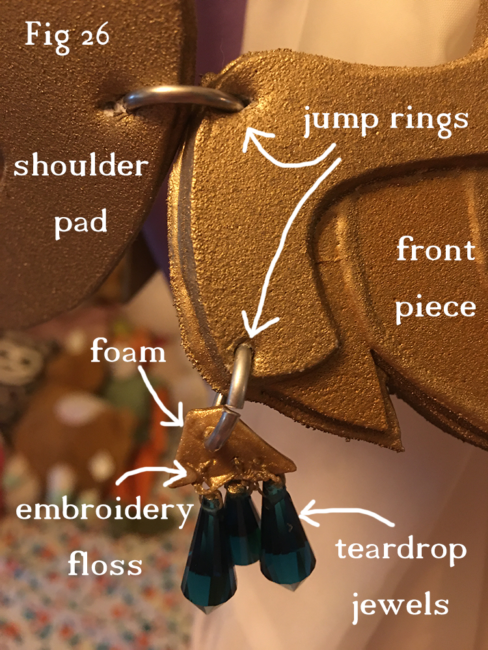
Assemble your belt pieces. I attached them together using gold embroidery thread and an embroidery needle by simply puncturing the foam with the needle. I used jump rings to attach the ends of the foam belt pieces to the twisted gold cord installed in the purple overlay. This allows me to remove the apron from the overlay if I need to by opening and closing the jump ring.
Construct your pauldrons/shoulder pads as per the instructions in the Simplicity pattern booklet using hot glue. Secure with E6000 glue after each pauldron is completely assembled and dried.
Attach your pauldrons/shoulder pad pieces together the same way you attached your belt. For the dangling pieces on either side of the front piece, I used a jump ring, embroidery floss, and a small piece of painted gold foam to secure everything together.
Step 21:
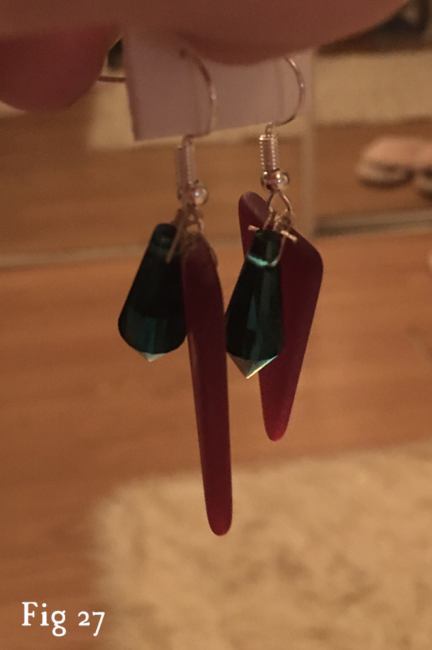
Attach a small strip of elastic (according to the measurement of your head with your crown in place) to the ends of your crown by pushing a paper fastener through the foam, through the elastic, and then opening the arms to secure it. To ensure that the paper fastener stays put, put a dab of hot glue or E6000 over the open arms. Hot glue all of your remaining gems and rhinestones in place accordingly. Secure with E6000 glue around the edges. To make your earrings, simply secure a red triangle bead and a blue teardrop prism bead to each of your 2 earring hooks using embroidery thread.
Now that you’ve completed the final component to your cosplay, you’re all finished! Enjoy your new royal garb and get ready for Hero Mode!
About the Author
Diomira Keane
Cosplayer, artist, cat-lover, party princess extraordinaire.


One Comment
Leave a Comment
Stay connected. Don't miss out!
Get new costume guides in your inbox once a month.


This was so helpful, thank you!