Make Your Own: Eve

“Out there / Full of shine and full of sparkle / Close your eyes and see it glisten Barnaby / Listen Barnaby…”
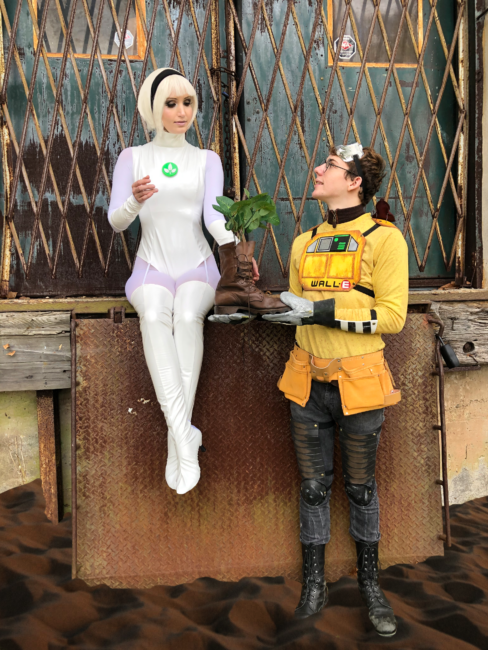
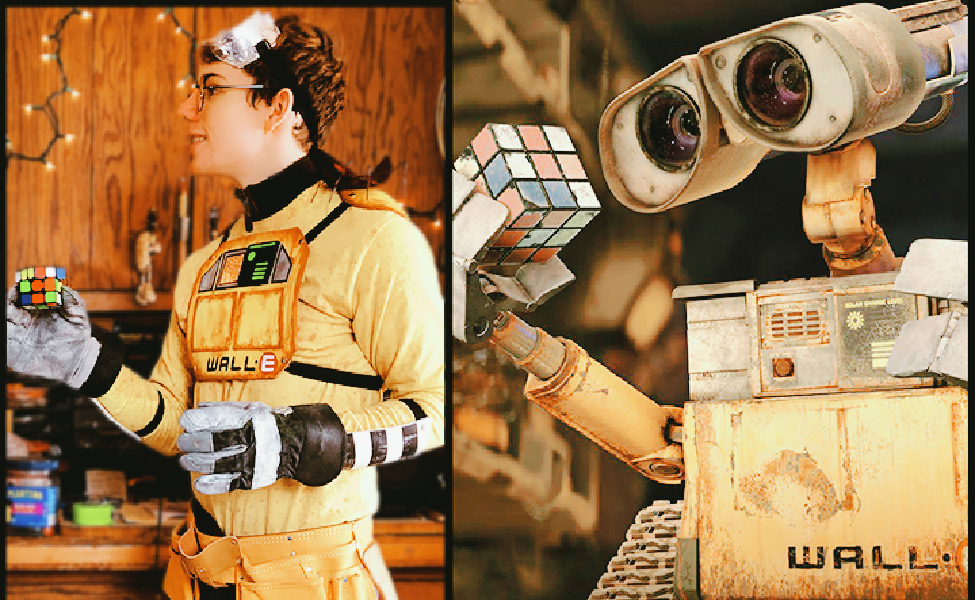
Over a decade later, getting lost in Disney and Pixar’s film Wall-E is still one of my favorite things to do. Is it the cultural commentary? The gorgeous animation? The adorable robots? Yes! So of course, I had to try my hand at personifying everyone’s favorite Plant Mom, EVE (or, if you prefer her full name, Extra-terrestrial Vegetation Evaluator).
In this tutorial, we’ll be making a simple body suit with a few alterations and accessories. This is a perfect intro for any cosplayer who’s always wanted to make a bodysuit but doesn’t quite know where to begin, as well as seasoned cosplayers who have experience working with four-way stretch fabric. We will also be making boot covers, which is an extremely useful skill that can be applied to a myriad of other cosplays, especially from the superhero genre. This also pairs perfectly with our Wall-E costume tutorial.
So let’s begin!
You Will Need:
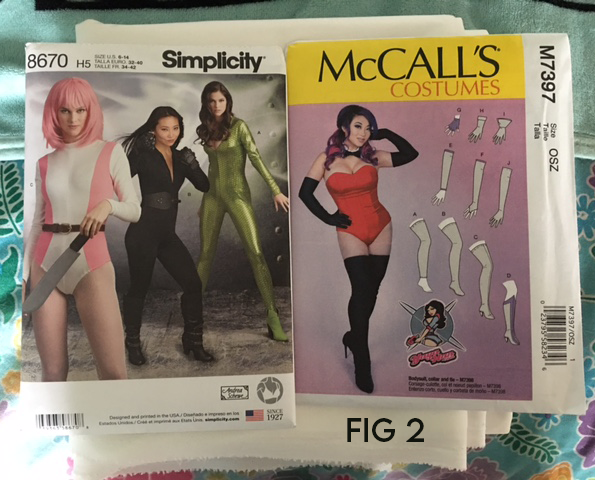
- McCall’s Pattern M7397
- Simplicity Pattern 8670
- 3 yards white four-way stretch pleather fabric
- ¼ yards white four-way stretch spandex (optional but recommended for extra stretchy boots)
- 2 pairs of opaque white tights
- 1 piece of thick EVA foam
- 1 piece of thin EVA foam
- Neon green acrylic paint (glow-in-the-dark optional)
- White Elo-flex thread (2 spools recommended)
- Fabric scissors
- Disappearing ink pen
- 22” white invisible zipper
- 3 yards of ¼” elastic
- 1 yard Velcro
- E6000 glue
- Glossy finish sealer
- Hand needle
- Stay pins
- White acrylic paint
Step One:
Cut out all of your pattern pieces for Simplicity Pattern 8670 (View C) except for the sleeve pieces. Then cut out all of your pattern pieces for McCall’s Pattern M7397 (View E and View C).

Next, arrange all of your pattern pieces out on your 3 yards of white pleather. It’s important to map out all of the pattern pieces at once to ensure that you have enough material for everything. Make sure to read through the entire tutorial before making any cuts, as there are some special instructions further on.
Pro Tip: Play close attention to which size you are cutting out. Simplicity Pattern 8670 has a different piece for each size, as opposed to one piece with several different edges corresponding to different sizes. Take your measurements to find your correct size on the sizing chart on the back of the pattern packaging.
Step Two:
The boots are the most difficult part of this costume, as working with pleather can be a little intimidating for boot covers. Stitch your boots down the front seam first, then place one of your 2 boot pieces over your leg and evaluate how much material you have left over for the back seam. If you have very stretchy pleather (which is highly recommended), you may be able to get away with just sewing up the back seam. If you’re worried your boot covers won’t be stretchy enough to get on and off with ease, measure the amount of slack you need and cut that measurement out of your white spandex fabric. Sew that strip to each remaining side of each of your boot pieces to close them off. (I used about a 1.5” wide strip of spandex the length of the back of the boot, which worked well for me. This allowed my boots to sit tightly around my legs without being so tight that I struggled to get them on.)
Step Three:
Install your elastic around the top hem of each boot, as per the instructions, then close off the bottom.
Pro Tip: For a detailed video on how to make boot covers, check out my video on YouTube, which offers a walk-through process of how I made my She-Ra boot covers without a pattern. This will help you visualize the process instead of simply reading the instructions and trying to interpret them. Like I said, boot covers can be difficult, but once you get the hang of it, it gets much easier very quickly.)
Step Four:
Sew your pattern pieces for View E of the McCall’s 7397 Pattern (the bracers) by following the instructions. Hem each opening of both bracers, and put them aside with your boot covers.
Step Five:
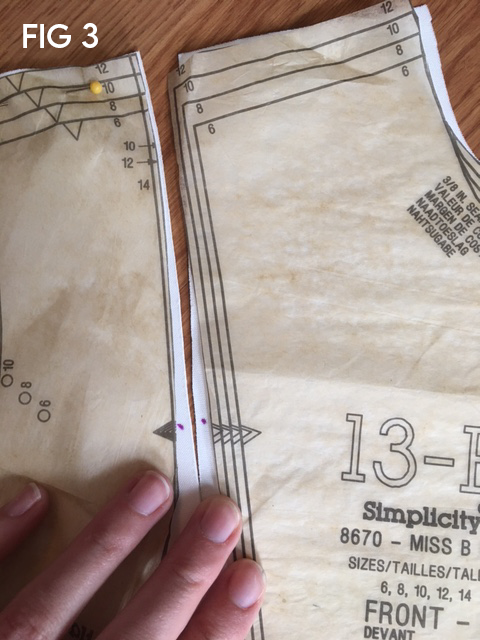
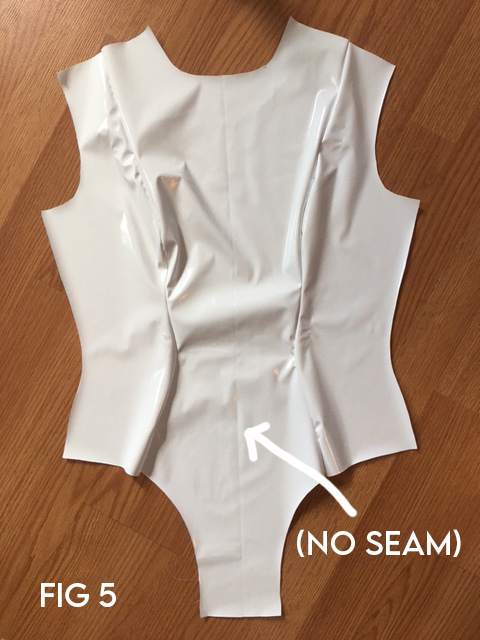
Begin sewing together the main pieces of the suit (Simplicity Pattern 8670 View C). Play close attention to the markers on your pattern pieces which indicate how to line up your pieces while sewing them down. Use your disappearing ink pen to mark off these indications as shown:
Instead of attaching sleeves, hem the armholes and leave them open. Install your 22” invisible zipper down the back, and stitch a strip of Velcro to the ends of the collar.
This pattern calls for you to install ¼” elastic into the leg holes of the bodysuit, but that’s up to you. I preferred the look of my bodysuit without them, but you may feel differently. Try the bodysuit on and carefully pin (or hold) the bottom pieces shut to see if you like the way the edge of the leg openings fit. If you choose to add elastic, do so before closing off the ends, that way it’s easier to feed the elastic through and stitch the loop closed.
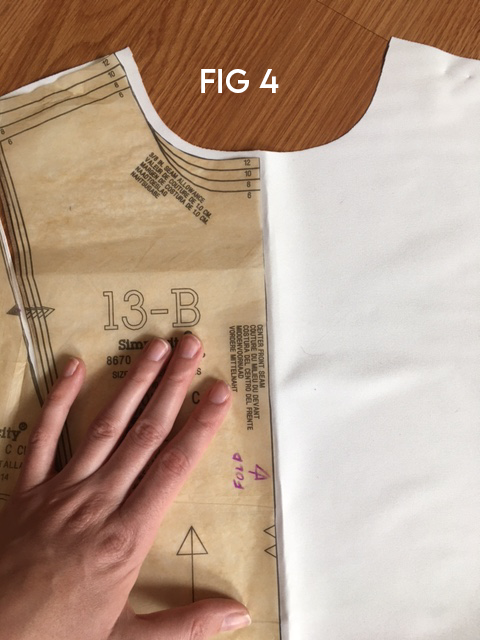
Pro Tip: This pattern calls for you to cut 2 pieces of the FRONT view piece and sew them together. This creates a seam straight down the middle of your bodysuit, which I didn’t like for this cosplay. To avoid having to make a seam which is a bit more aesthetic than it is functional or necessary, place the FRONT piece of your body suit along the fold line. This will give you 1 whole front piece, no seam required.
Step Six:
Now that the bodysuit is complete, cut a medium-sized circle from your thick EVA foam. (You can find something round that is roughly the size you want and trace it onto the foam with a pencil. I used a large coffee mug for mine!) This will be your “button”. Add a few layers of neon green paint and allow your button to dry completely.
While waiting, trace the same circle to a piece of paper and sketch out your leaves (One larger leaf and two smaller leaves on each side) and a small stem. Once you’ve got your design figured out, cut out each piece and trace them onto your thin EVA foam. Cut your leaves out and keep them together so they don’t get lost. If you’re using white foam and you’re satisfied that there are no trace marks on your pieces, you can leave them raw, or you can choose to paint them white with white acrylic paint or spray paint.
Step Seven:
When everything has dried, glue your leaves down onto your green button with a thin brushing of E6000 glue. Allow that time to dry as well, then seal it with your glossy finish sealer.
Step Eight:
Glue one side of your Velcro to the back of your green button. I did this buy layering Velcro strips vertically on top of one another until the back of the button was completely covered, then cutting off all the excess. While the glue dries, place stay pins about half way into the foam so that the Velcro sits securely.
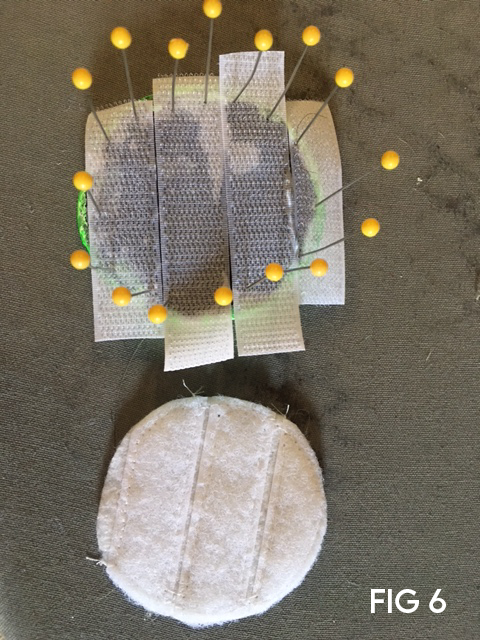
Find the location where you want your button to fit. (Ideally in the center of where the middle of your sternum would go.) Cut another matching circle from your left over pleather (or any material will do in a pinch) and sew down your other strips of Velcro in the same fashion as you did for the back of the button. Pin that circle down to your bodysuit and sew it on securely. You now have a removable button!
Step Nine:
To make “garters” that help keep your boots from sliding down and your bodysuit from riding up, put your finished costume pieces on and measure the distance from the top edge of your boots to the bottom edge of your leg hole’s hem (ideally right under the seams on the front of the bodysuit). Subtract about an inch or so from this measurement, and cut 2 pieces of your ¼” elastic. These will be your front garters.
Repeat this process for the back garters.
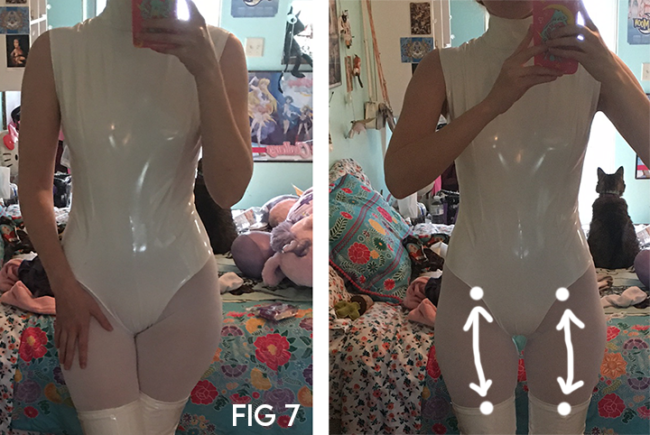
Install your garters by hand sewing them in. For added security, run a few stitches over them on the machine.
Step Ten:
Last but not least, take one of your 2 pairs of white opaque tights and cut a very small hole between the legs. This will be the hole your head goes through. Be careful, a very small hole will go a very long way, as the nylon is very stretchy, so don’t overdo it.
Cut the toes off as well. This will be where your fingers go through. Cut another small hole on either side for your thumbs. Once you’ve done that, you’re ready to begin your journey to earth and fulfill your directive!
About the Author
Diomira Keane
Cosplayer, artist, cat-lover, party princess extraordinaire.


There are no comments yet, add one below.
Stay connected. Don't miss out!
Get new costume guides in your inbox once a month.


Leave a Comment