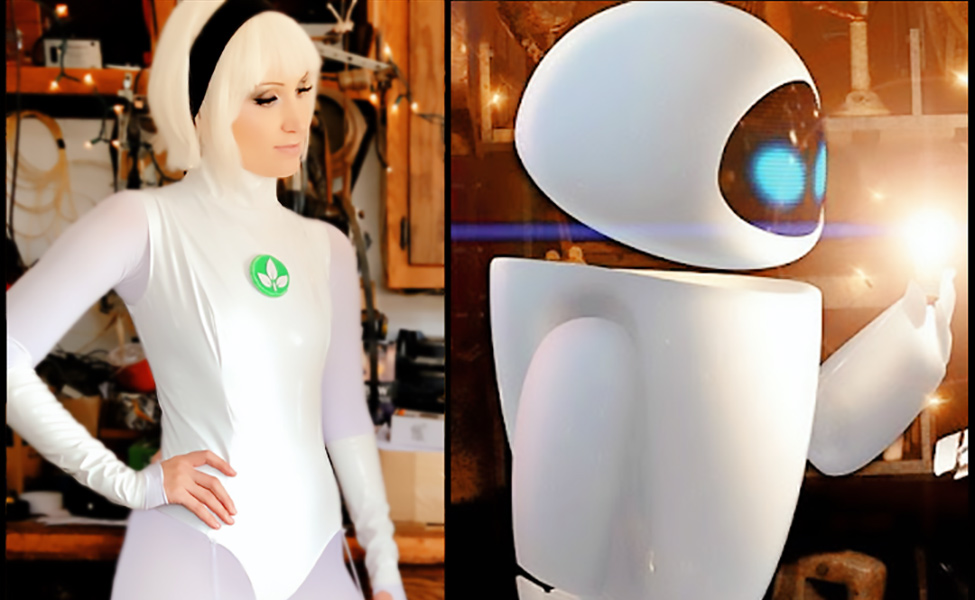
Make Your Own: Wall-E
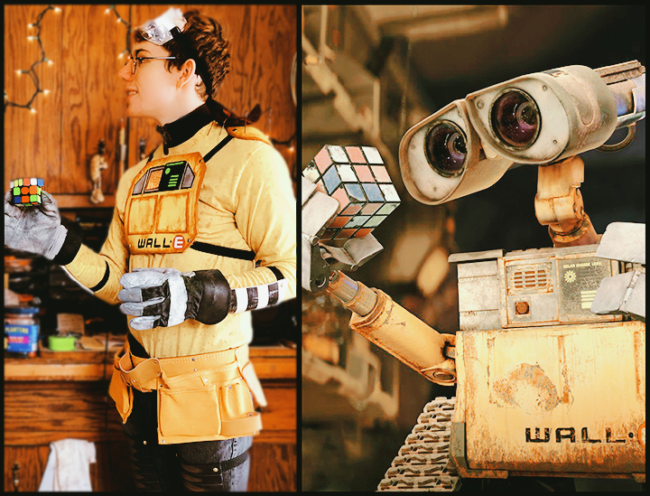
Disney and Pixar’s 2008 animated film Wall-E is a robot-meets-also robot adventure that is as classic as it is charming. What could be better than space, robot romance, and a thinly veiled prompt for us to re-evaluate our throw-away culture? (Be honest, you’re mostly here for the robots. It’s cool, I get it, me too.)
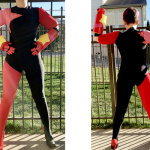
Now you can dress up as everyone’s favorite space janitor, the main protagonist, Wall-E! In this tutorial, we will explore using the Chandler Heat Gun which is perfect for those who are new to working with and shaping foam. This costume has a few design elements that are slightly shaped to fit your body in a convincing way, but requires no previous technical knowledge of shaping foam. (This was actually my first time shaping foam too, and I can’t wait to use what I’ve learned on bigger pieces!) So let’s get started!
You Will Need:
- Chandler Dual Temperature Embossing Heat Gun
- Yellow long-sleeved t-shirt
- Heavy duty work gloves
- Utility belt
- Safety Goggles
- 10 sheets of thick EVA foam (5mm or thicker)
- 2 sheets of thin EVA foam (1mm)
- Yellow spray paint
- Silver spray paint
- Dark brown spray paint
- Acrylic paint: brown, white, black, red, neon green (glow-in-the-dark optional)
- Various sized paint brushes
- Polyurethane sealer spray
- Paper fasteners
- 5 yards 1” thick black elastic (non-roll preferred)
- E6000 glue
- Magnetic snap
- Dull pencil
- Scissors
- Thick jewelry wire
- Thin jewelry wire (0.3mm)
- Dark brown felt
- Embroidery needle
- Dark brown embroidery floss
- Dark brown turtleneck shirt
- Black jeans
- Black combat boots
- Heat resistant rubber bands
- Plasti-Dip spray
- Fine sandpaper
- Silver duct tape
- Ruler
- Stay pins
Step One:
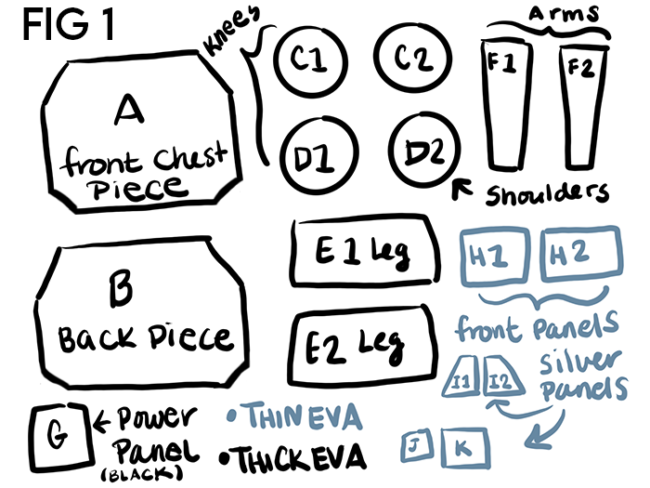
From your EVA foam sheets, cut out all the pieces as shown in the Fig. 1 diagram below:
Next, begin shaping your 2 upper leg pads. To do this, grab something large and cylindrical, roughly the size of your thigh but a little smaller, such as an empty Gatorade bottle. (This object will vary based on the shape of your body, and thus, how large or small your leg pad is. The pad should reach from a few inches above your knee to a few inches below your hip, and be wide enough to cover just the front of your leg. Using an object slightly thinner than your leg will give your pad a nice curve that can adjust to the size of your leg while maintaining a bit of its own shape.)
Step Two:
Secure your pad pieces to the object using heat resistant fastening, such as heat resistant rubber bands. (You can also choose to hold the pad around the bottle yourself, using heat resistant work gloves.)
Turn your heat gun on and gently work it over the rubber, maintaining a safe but effective distance. You will notice the foam on the outer layer of your piece start to warp and change shape as you go, becoming a big glossy and stretched, which will allow you to see which parts you haven’t covered yet.
Continue until your leg pad is sufficiently and evenly warped, such that it maintains its slight arc when you remove it from the object you are using to shape it. Repeat this step for the other leg pad.
Step Three:
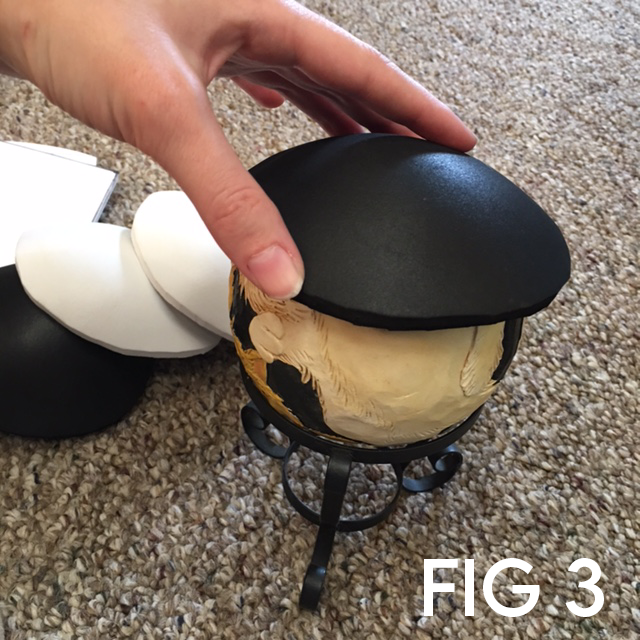
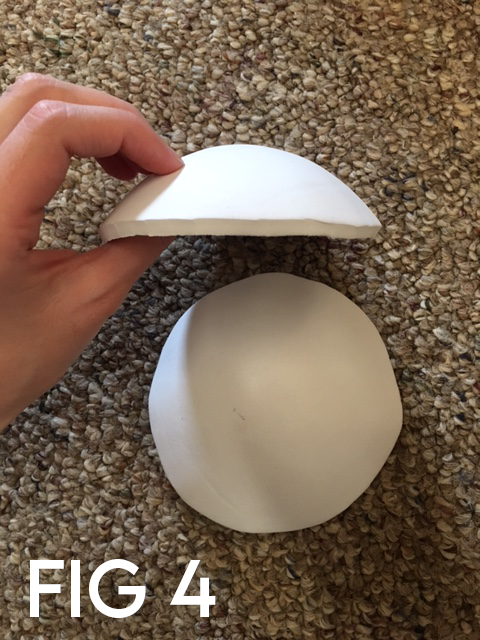
Follow a similar process for your shoulder and knee pads, this time with something evenly round, such as a softball. Place your pad on top of the object and once again fasten it down. I had better luck holding mine down with my hands and slowly working the heat gun across the surface, but you may find that another method works better for you.
The Chandler heat gun is ideal for this kind of process, as it is strong enough to offer the desired outcome without overdoing it. This allows you to be precise in the effect you are trying to accomplish.
If you’re feeling confident, you can also try working both sides of the pad as I did, by heating one side up and then wrapping it around the ball, then holding it tightly around the edges and hitting it with the heat gun all around the top. This makes the foam more malleable and helps to warp it more quickly.
Step Four:
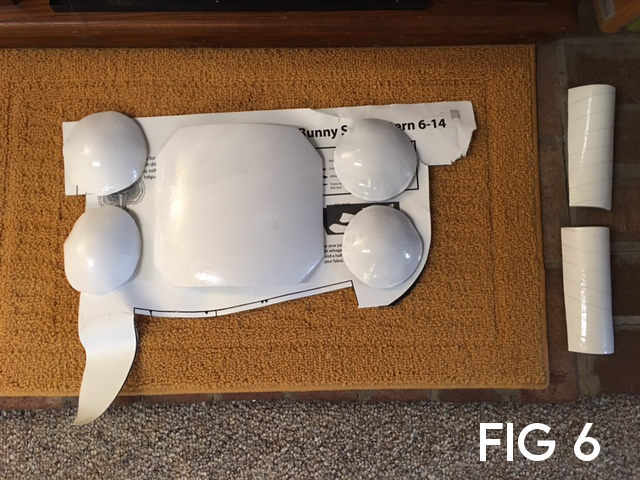
With your E6000 adhesive, glue Front Panels H1 and H2 to Front Chest Piece A. While you’re waiting for the glue to settle, take this time to cover the edges of your goggles with your silver duct tape to give them a metallic look.
Step Five:
Now that all your pieces are cut and shaped, coat them with a layer of Plasti-Dip.
Allow them to dry completely before spray painting them:
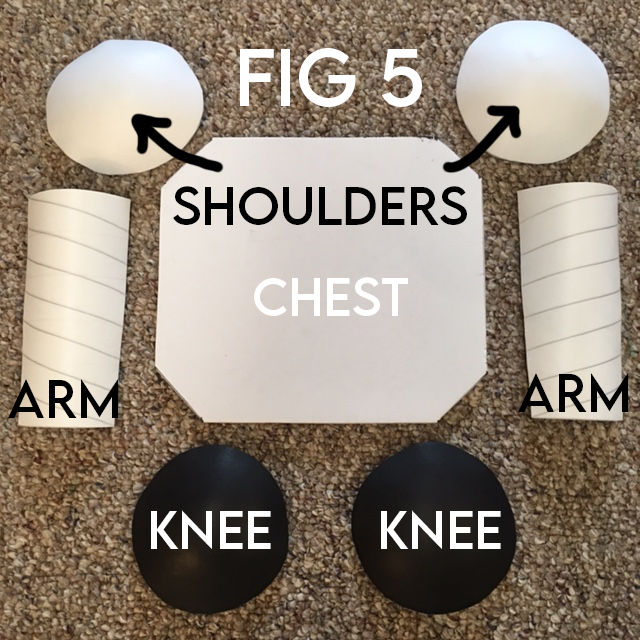
Yellow for Front Chest Piece A, Back Piece B, and shoulder pads.
Black for Power Panel G, knee and leg pads.
White for the arm pads.
Silver for Silver Panels I1, I2, J and K.
Step Six:
Next, glue Power Panel G and Silver Panels I1, I2, J and K to Chest Piece A, then paint in the details of each piece. To create a “rusted” effect, slowly add on layers of watery brown paint from the edges inward, allowing for a little “bleed” every once and a while to make it look authentic.
Paint your black Power Panel G with neon green power bars, and lastly, add the “Wall-E” decal on the bottom right portion of the chest piece.
For the arm pads, use your ruler to create slanted stripes, and paint them in an alternating black and white pattern.
Step Seven:
To give your “armor” pieces a more distressed look, scrape them with sandpaper until the desired look is achieved. This is especially helpful for the arm pads and knee pads, but not so much the chest pieces.
To create indents in the “treads” of the leg pads, use a ruler and mark off each inch, then run a dull pencil across the pad between your markers, digging into the foam generously without breaking the surface too much. You can add some extra distress by painting the treads with brown paint to look like dirt.
Pro Tip: You can also distress your yellow T-shirt by filling up a spray bottle that is 1 part water and 1 part brown acrylic paint. Shake well and spray your shirt generously and randomly to look like dirt. (Make sure to prewash your shirt before you do this.) Do this a few times to create a layering effect.
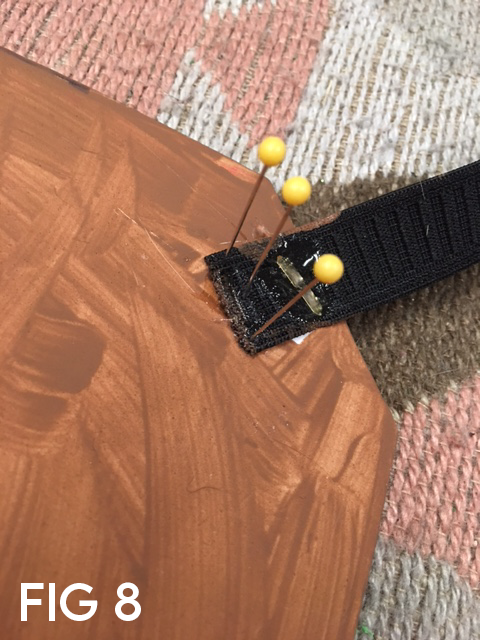
Step Eight:
Next, it’s time to install the elastic. The leg pads should have a strap across the back on the top and bottom, as should the arm pads. The knee pads only need one strap around the back, which fit neatly into the crook of the back of your knee.
For the chest armor, however, it’s a bit more complicated, but not by much.
Attach elastic from the top left corner of the front chest piece to your shoulder pad. Do the same for the right side. Then, attach the top left center of the back piece to the opposite side of the shoulder pad, and repeat this process for the right side.
Next, attach elastic from the bottom left of the front chest piece to the bottom left of the back chest piece. Do the same for the right side, but this time, leave the end of the elastic that is supposed to attach to the back piece open, and instead, attach a magnetic snap. Attach the snap fastener to the corresponding corner of the back chest piece. Secure with E6000.
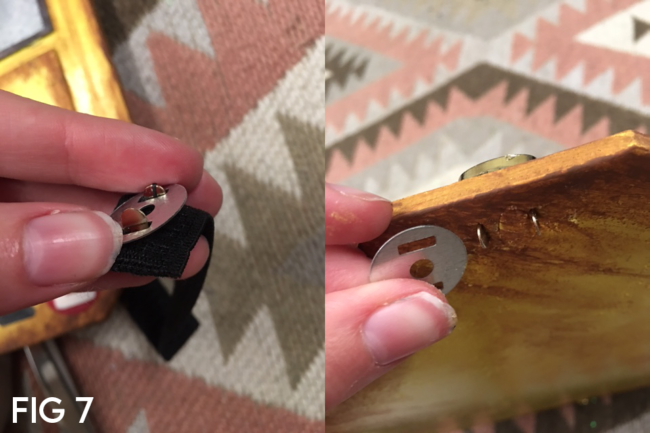
To attach all of these elastic straps, cut strips of elastic according to your measurements. To join them firmly to the foam, push a paper fastener through the elastic and through the foam at your desired location. Then, secure with E6000 glue before fanning the 2 edges of your paper fastener open, and add an extra dollop of glue over the spread wings of the fastener itself. Then place a few stay pins partially through the foam to help the glue dry flat.
Step Nine:
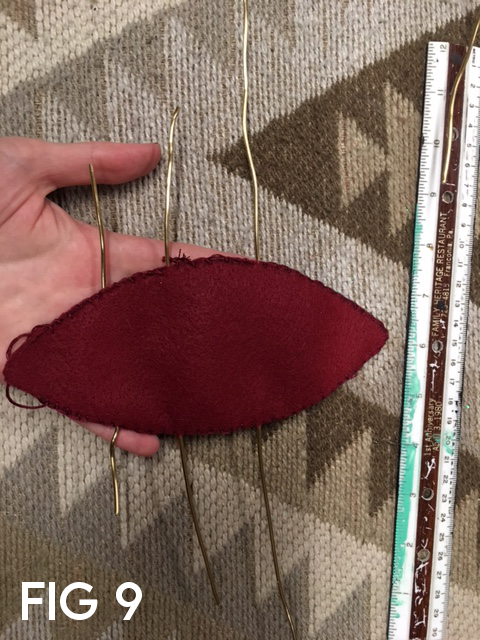
For Wall-E’s little cockroach friend (reported to be nicknamed “Hal” by Pixar creators), cut a length of thick jewelry wire as long as you want him to be. Cut 6 more lengths of this wire; each one of these lengths will account for 2 of his legs.
Wrap these three pieces of wire around the “body” piece once, right in the middle, so that your are left with a completely symmetrical roach with even legs.
From your felt, cut out 2 pointed, symmetrical oblong shapes the length of his body and use your embroidery floss to sew them together along the edges with the “skeleton” in between like a sandwich.
Cut a smaller piece out, this time about the shape of a very rounded-off triangle, and glue that to the top edge of the body. That will serve as his head.
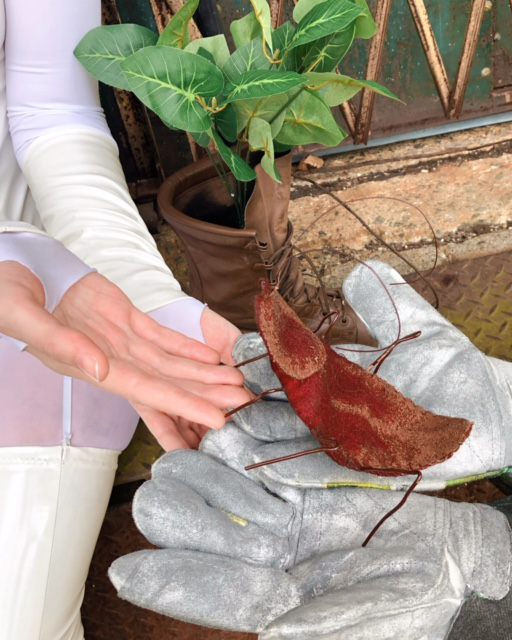
Poke a thin piece of jewelry wire through the top edge of his head towards the nose, and wrap it around the center skeleton piece. Wrap it around once or twice, then wrap it around itself tightly. Trim the excess wire and shape it to your preference. This will be the antennae.
Shape the legs as you want them to be as well, then spray paint the entire piece dark brown. You can add some lighter brown as well if you like for contrast and detail. Now that you have a little friend, you’re ready to pack some trash!
About the Author
Diomira Keane
Cosplayer, artist, cat-lover, party princess extraordinaire.
There are no comments yet, add one below.
Stay connected. Don't miss out!
Get new costume guides in your inbox once a month.


Leave a Comment