Search Results for На каком расстоянии от Земли Солнце детальнее bit.ly/psy3000
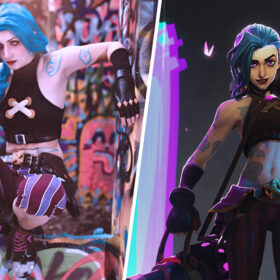
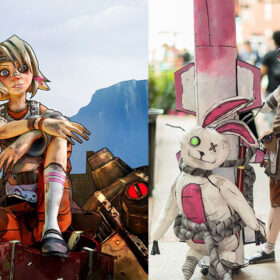
Make Your Own: Jinx
…either adjust the height of your leggings during the sewing process or simply fold the top down while you wear them. Similarly, if you prefer the high-waisted look, feel free to wear the leggings as-is. If you prefer a pattern with a slightly lower waist to match Jinx’s low-rise pants more accurately without having to adjust your pattern, consider using this pattern instead. Either way, make sure you use the pattern for the ankle-length pants, NOT…

Make Your Own: Cassandra from Rapunzel’s Tangled Adventure
…er. (Because we’re designing the pattern to be cut out on a fold, you’ll only be drawn half the V.) You’ll want the length of the V to be long enough to fit 4 eyelets, spaced evenly. To make facings for the pattern, trace the collars of both the front and back pieces and add about 4-5″ to the inside edges. They should look something like this: For the sleeves, start by drawing a regular, long sleeve. Similar to how we did the bodice, you’ll want t…
Make Your Own: Wall-E
…ch parts you haven’t covered yet. Continue until your leg pad is sufficiently and evenly warped, such that it maintains its slight arc when you remove it from the object you are using to shape it. Repeat this step for the other leg pad. Step Three: Follow a similar process for your shoulder and knee pads, this time with something evenly round, such as a softball. Place your pad on top of the object and once again fasten it down. I had better luck…
Make Your Own: Vanellope Von Schweetz from Wreck-It Ralph
…work just as well. If you’re using a wig for your costume, you could probably glue these foam candies directly into the hair, but if you’re using your real hair or don’t want to glue the foam onto the wig, you can glue them onto bobby pins. You will want to use a generous amount of hot glue to keep the foam from falling off the bobby pins. Finally, seal in the foam using some gloss finish Mod Podge. And that is all! I hope you found this tutorial…
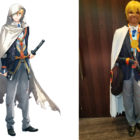
Make Your Own: Yamanbagiri Kunihiro
…for this step, but in the long run using dye means you don’t have to reapply it after washing. Apply the dye to the pants cuffs too. He’s generally pretty dirty. Blazer Recreate Yamanbagiri’s pin stripe blazer by grabbing a yardstick ruler and tediously making every single line. He sports thin double striped lines with a space about an inch or two away from each couple. I used a white sewing pencil, but the fabric marker I also added to the suppl…
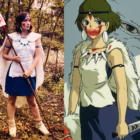
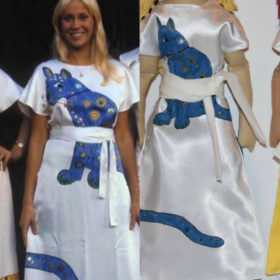
Make Your Own: Princess Mononoke
…ress too much about the shape. The bottom hem of the dress should end roughly 2 inches above the knee. Since you’re only drawing out the pattern, remember to leave about a half inch to an inch of leeway space all around your pattern to give you some extra room while you’re sewing your seams. Once you have your pattern figured out, cut it out and lay it on your piece of folded blue fabric. Make sure to line the fold of the fabric with the fold of y…

Interview with Maggie from Costumer’s Guide
…the complexity that makes something recognizeable… My friend and I… actually, funnily enough it was Gail, who I mentioned earlier… were at Balticon. This was many years after our first foray into Jedi costumes. I was wearing my Leia Bespin costume that I’d spent 9 months embroidering and was about as screen accurate as you could get. Gail (for fun) was wearing a Princess Leia costume her mom had made her in high school. The white dress was not sc…

Make Your Own: Elsa’s White Forest Dress from Frozen II
…ake. It’s time to glue your cabochon gems down with your E6000 glue. The only thing I can really say about this part is that your tape measure is going to be your best friend in making sure that each gem is placed equidistant from each other and from the top. You can do as many or as few gems as you like, in as many rows as you like. I put a pillow under the bodice to give it a nice curve, which helped a lot on making sure my gems were in the righ…

Interview with the Cast and Crew of Monster Force Zero
…y most favorite characters I’ve ever had the opportunity to play. He actually really became my favorite after going to a handful of cons and interacting with the attendees. And my hope, after the masses see the little diamond in the rough, that maybe just maybe someone will wanna cosplay this big hairy lug. Also, it would be kinda cool to see Yetiboot plushies next Christmas right by the Baby Yoda toys. Aeon (Ammorama): It was challenging to move…
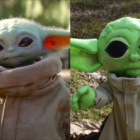
Make Your Own: Grogu (The Child / Baby Yoda) from The Mandalorian
…to Baby Yoda’s face and hands. You don’t want to apply the paint too heavily, only lightly coloring his face. I added some pink around his eyes, in his ears, around his cheeks, and a little around his mouth and the tip of his nose. With the dark green and brown, you want to paint in the places where shadows naturally are, like around his fingers and the grooves on his head, as well as around his nose and below his mouth. Step 7: The next step is…